Maximizing kitchen space is essential for creating an efficient and enjoyable cooking environment. Whether you have a small or spacious apartment kitchen, utilizing every inch effectively can make a significant difference. These 23 space-saving kitchen hacks will help you organize, streamline your cooking process, and make your kitchen more functional and clutter-free.
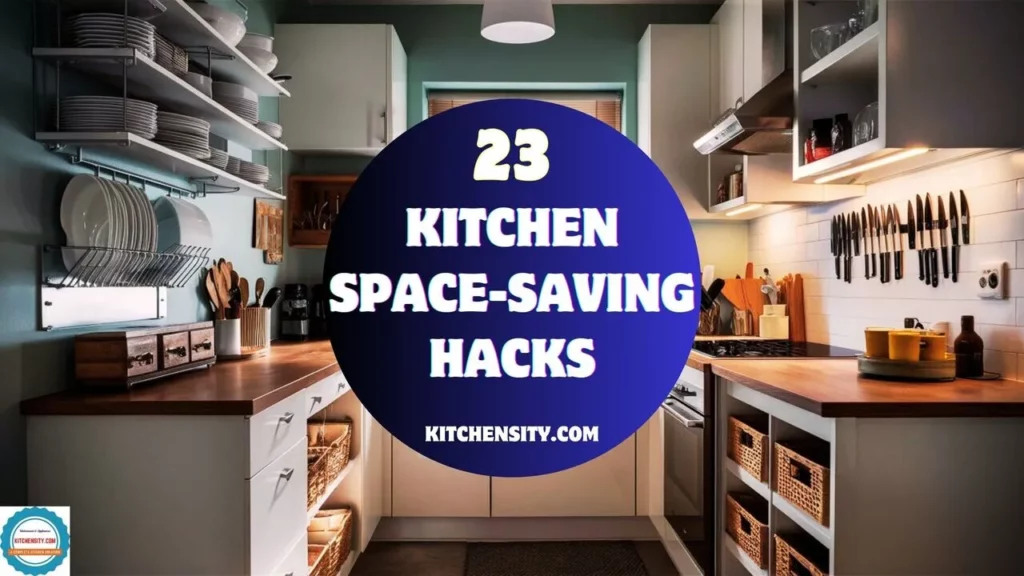
Table of Contents
- 1 Hack 1: Magnetic Knife Strips
- 2 Hack 2: Under-Shelf Baskets
- 3 Hack 3: Vertical Pot and Pan Storage
- 4 Hack 4: Pull-Out Pantry Shelves
- 5 Hack 5: Over-the-Sink Cutting Board
- 6 Hack 6: Corner Shelf Units
- 7 Hack 7: Hanging Fruit Baskets
- 8 Hack 8: Stackable Storage Containers
- 9 Hack 9: Door-Mounted Spice Racks
- 10 Hack 10: Multi-Tiered Drawer Organizers
- 11 Hack 11: Rolling Kitchen Carts
- 12 Hack 12: Pegboards for Kitchen Tools
- 13 Hack 13: Fold-Down Tables and Counters
- 14 Hack 14: Magnetic Fridge Organizers
- 15 Hack 15: Ceiling Pot Racks
- 16 Hack 16: Collapsible Measuring Cups and Bowls
- 17 Hack 17: Slide-Out Trash Bins
- 18 Hack 18: Under-Cabinet Lighting and Storage
- 19 Hack 19: Tiered Shelf Organizers
- 20 Hack 20: Hidden Cutting Boards
- 21 Hack 21: Wall-Mounted Dish Racks
- 22 Hack 22: Drawer Dividers
- 23 Hack 23: Lazy Susans
- 24 Final Thoughts
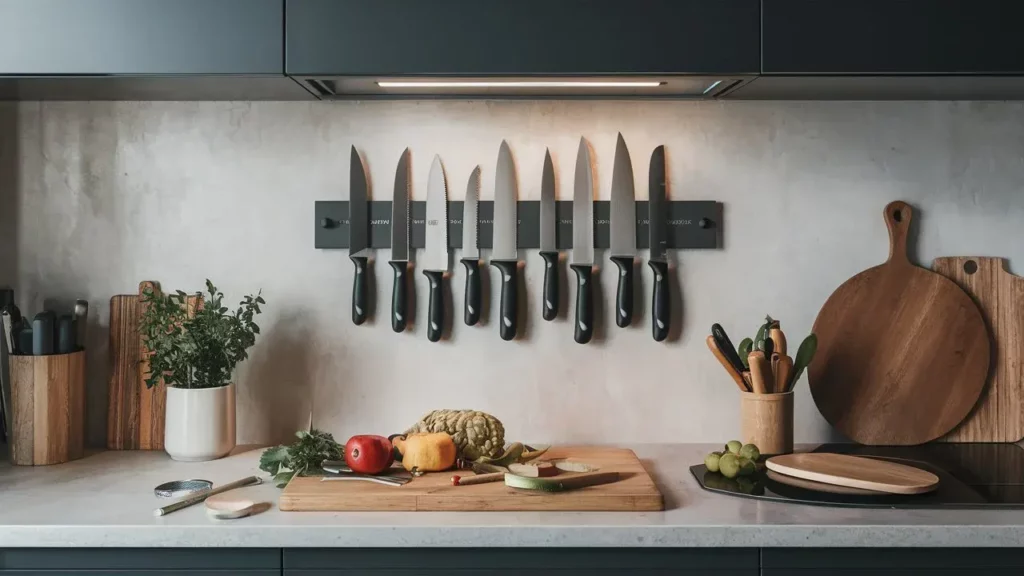
Hack 1: Magnetic Knife Strips
Magnetic knife strips are sleek and practical tools that help free up your kitchen’s valuable counter and drawer space. These strips are typically made of strong magnets encased in a durable material like stainless steel or wood. They can hold your knives securely in place, making them easily accessible while preventing the blades from dulling due to contact with other utensils.
Benefits
- Space-Saving: By mounting knives on the wall, you free up drawer and counter space, making your kitchen look less cluttered.
- Convenience: Knives are easily accessible, which can streamline your cooking process.
- Safety: Reduces the risk of cutting yourself when rummaging through drawers.
- Blade Protection: Prevents knife blades from becoming dull or damaged by avoiding contact with other utensils.
- Aesthetic Appeal: Adds a modern and organized look to your kitchen decor.
Installation Tips
- Choose the Right Location: Select a spot that is convenient for your cooking area, such as above your countertop or near your food prep area. Ensure it’s out of reach of children.
- Mark the Placement: Use a level to mark the exact placement of the strip on the wall. Make sure it’s straight to avoid any issues with knives slipping off.
- Use Appropriate Hardware: Depending on the wall material (drywall, tile, wood), choose the right type of screws and anchors. Most magnetic strips come with mounting hardware, but ensure it’s suitable for your wall type.
- Drill Holes: Drill pilot holes into the wall at the marked spots to prevent the wall from cracking.
- Secure the Strip: Align the magnetic strip with the drilled holes and use the provided screws to secure it in place. Ensure it’s firmly attached and level.
- Test the Strip: Place a few knives on the strip to ensure it holds securely. Adjust if necessary.
Hack 2: Under-Shelf Baskets
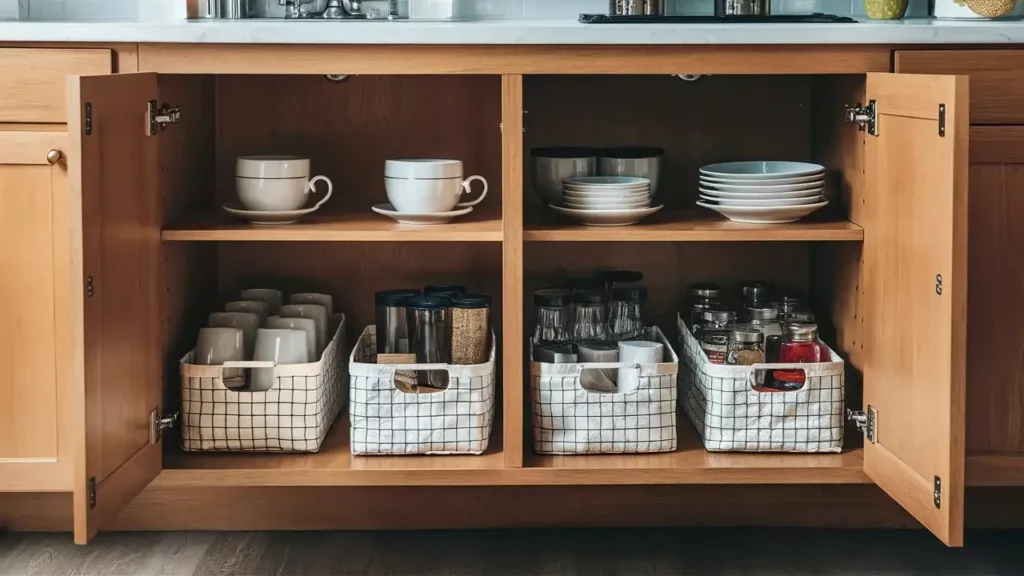
Under-shelf baskets are ingenious storage solutions designed to utilize the often-overlooked space beneath shelves. These baskets are easy to install, typically requiring no tools or hardware. They slide or clip onto existing shelves, creating an additional layer of storage underneath. This setup maximizes vertical space, making it possible to store more items without crowding your shelves or countertops.
Best Items to Store in Them
- Small Kitchen Gadgets: Perfect for items like graters, peelers, and garlic presses that can clutter drawers.
- Coffee and Tea Supplies: Store coffee pods, tea bags, sugar packets, and small jars of creamer for easy access near your coffee station.
- Spices and Seasonings: Use for spice jars and seasoning packets, keeping them within easy reach while cooking.
- Snacks: Great for organizing snack bags, nuts, and dried fruits, making them easy to grab and go.
- Cooking Utensils: Ideal for spatulas, wooden spoons, and other frequently used utensils that you want close at hand.
- Baking Supplies: Store cookie cutters, cupcake liners, and other small baking tools to keep them organized and accessible.
- Dish Towels and Napkins: Perfect for keeping dish towels, napkins, and placemats neatly folded and ready to use.
- Food Wraps and Bags: Keep cling film, aluminum foil, and sandwich bags organized and easy to reach.
- Cleaning Supplies: Use sponges, scrub brushes, and other small cleaning tools to keep them out of the way but easy to grab when needed.
Installation Tips
- Measure Your Shelves: Before purchasing, measure the depth and width of your shelves to ensure the baskets will fit properly.
- Choose the Right Size: Select baskets that match the dimensions of your shelves and the items you plan to store.
- Slide or Clip On: Most under-shelf baskets simply slide or clip onto the shelf. Ensure they are securely attached and leveled.
- Distribute Weight Evenly: Avoid overloading the baskets. Distribute weight evenly to prevent the shelf from sagging or the basket from detaching.
- Use Multiple Baskets: For larger shelves, consider using multiple baskets side by side to maximize storage space.
- Organize by Category: Group similar items together in each basket to make finding what you need quick and easy.
Hack 3: Vertical Pot and Pan Storage
Different Ways to Store Pots and Pans Vertically
- Vertical Pot Racks: Install wall-mounted vertical pot racks that allow you to hang pots and pans on individual hooks. These racks can be placed on unused wall space, inside cabinets, or even on the back of cabinet doors.
- Cabinet Organizers: Use vertical cabinet organizers specifically designed for pots and pans. These organizers have slots or dividers to hold cookware upright, making it easy to see and access each piece.
- Pan Dividers: Place adjustable pan dividers inside your cabinets to store pans vertically. These dividers keep pans separated and prevent them from scratching each other.
- Tension Rods: Install tension rods vertically in cabinets to create custom slots for storing baking sheets, cutting boards, and flat pans.
- DIY Solutions: Repurpose items like dish racks or magazine holders to create vertical storage solutions for your cookware.
Space Benefits
- Maximizes Cabinet Space: Vertical storage allows you to use the full height of your cabinets, freeing up valuable horizontal space for other items.
- Improved Accessibility: Storing pots and pans vertically makes them easier to see and access, reducing the time spent searching for the right piece of cookware.
- Prevents Damage: Vertical storage prevents pots and pans from being stacked on top of each other, reducing the risk of scratching or denting.
- Enhanced Organization: Keeps your kitchen more organized and efficient by giving each pot and pan its own designated space.
Installation Tips
- Measure Your Space: Before purchasing any vertical storage solution, measure the height, width, and depth of your cabinets or the wall space where you plan to install the storage.
- Choose the Right Storage Solution: Select a vertical storage system that fits your space and accommodates the size and number of pots and pans you have.
- Install Securely: Ensure that wall-mounted racks are securely anchored to studs or use appropriate wall anchors to support the weight of the cookware.
- Use Non-Slip Materials: Consider adding non-slip liners or pads to the base of cabinet organizers to prevent pots and pans from sliding or tipping over.
- Organize by Size: Arrange pots and pans by size, with larger items on the bottom and smaller items on top, for easy access and to maximize space.
- Label Hooks or Slots: For even greater organization, label hooks or slots with the type of pot or pan that belongs there, making it easy for everyone in the household to keep the kitchen organized.
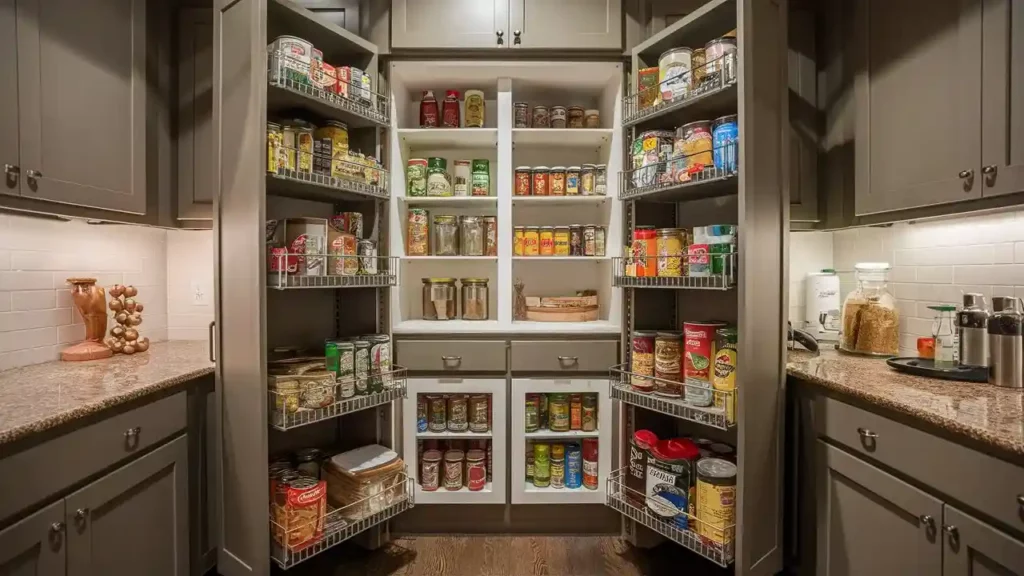
Hack 4: Pull-Out Pantry Shelves
Pull-out pantry shelves are sliding shelves that can be installed inside cabinets or pantry spaces. These shelves glide out smoothly, allowing you to access items stored at the back without having to rummage through or rearrange other items. They are ideal for maximizing storage space and improving the organization of your kitchen.
Advantages Over Traditional Pantries
- Improved Accessibility: Pull-out shelves make it easy to see and reach items stored at the back of the pantry, reducing the need to move other items to find what you need.
- Better Organization: These shelves help keep your pantry organized by providing clear, designated spaces for different items, reducing clutter, and making it easier to find what you need.
- Maximized Storage Space: By utilizing the full depth of your cabinets, pull-out shelves increase the usable storage space, allowing you to store more items in an organized manner.
- Reduced Waste: With everything visible and accessible, you’re less likely to forget about items, helping to reduce food waste.
- Increased Convenience: Pull-out shelves can be customized to fit various pantry items, such as canned goods, spices, and baking supplies, making your kitchen more functional and efficient.
Installation Ideas
- Measure Your Cabinet Space: Accurately measure the height, width, and depth of your cabinets to ensure that the pull-out shelves will fit properly.
- Choose the Right Shelves: Select pull-out shelves that match the dimensions of your cabinets. Look for sturdy, high-quality shelves with smooth-gliding mechanisms.
- Clear Out the Cabinets: Empty the cabinets where you plan to install the pull-out shelves. Clean the interior to ensure a smooth installation process.
- Install the Mounting Rails: Most pull-out shelves come with mounting rails that need to be attached to the cabinet floor or existing shelves. Use a level to ensure the rails are straight, and secure them with screws.
- Attach the Shelves: Slide the pull-out shelves onto the mounted rails. Make sure they glide smoothly and are securely attached.
- Adjust Shelf Height: If your pull-out shelves are adjustable, set them at different heights to accommodate various items, such as tall bottles or shorter jars.
- Organize Your Items: Place your pantry items on the pull-out shelves, organizing them by category for easy access. Heavier items should go on the lower shelves for stability.
- Add Labels: Consider labeling the edges of the pull-out shelves to identify where specific items are stored, making it even easier to find what you need.
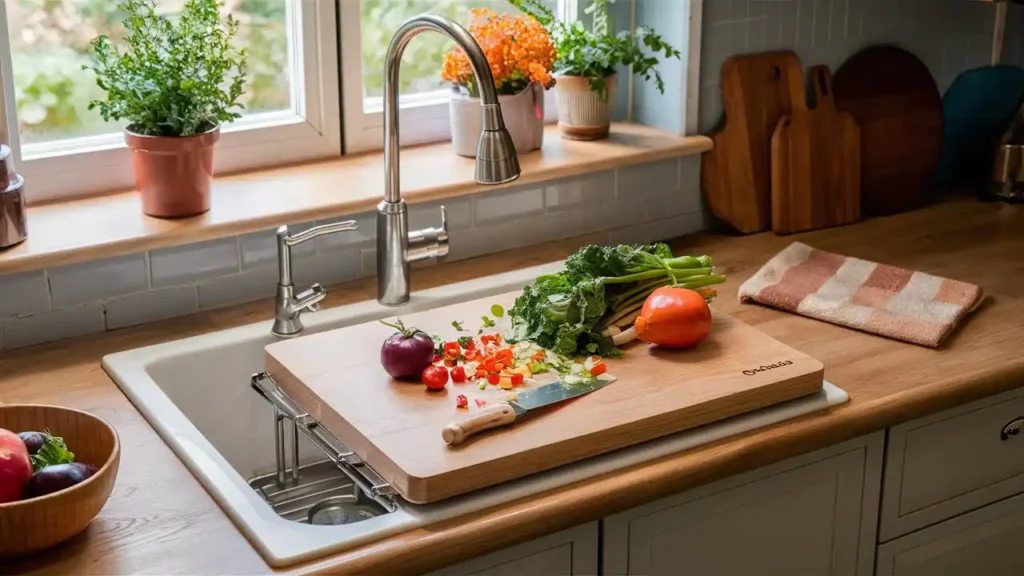
Hack 5: Over-the-Sink Cutting Board
An over-the-sink cutting board is a specially designed cutting board that spans across your kitchen sink. It typically has extendable arms or edges that rest on the edges of your sink, providing a stable surface for cutting, chopping, and food preparation directly over the sink.
Dual Functionality and Space-Saving Benefits
- Maximizes Counter Space: By utilizing the sink area for food preparation, an over-the-sink cutting board frees up valuable counter space in your kitchen.
- Efficient Cleanup: Directly chopping ingredients over the sink allows you to easily rinse and dispose of food scraps, making cleanup quicker and more convenient.
- Versatility: It can serve as both a cutting surface and a temporary storage area for washed produce or drained dishes, maximizing kitchen efficiency.
- Stability and Safety: The board’s design ensures stability during use, reducing the risk of slips or spills compared to traditional cutting boards placed on countertops.
- Adjustable Size: Many over-the-sink cutting boards come with extendable arms or adjustable edges, allowing them to fit different sink sizes and shapes.
- Multi-Functional: Some models include built-in features like colanders or compartments for collecting scraps or holding utensils, enhancing their usability.
Types Available
- Basic Extendable Boards: These boards have extendable arms that rest on the sink edges, providing a stable cutting surface.
- Boards with Built-in Colanders: Includes integrated colanders for rinsing fruits and vegetables directly over the sink.
- Multi-Compartment Boards: Feature additional compartments or trays for organizing chopped ingredients or collecting scraps.
- Foldable or Collapsible Boards: Foldable designs for easy storage when not in use, maximizing kitchen space.
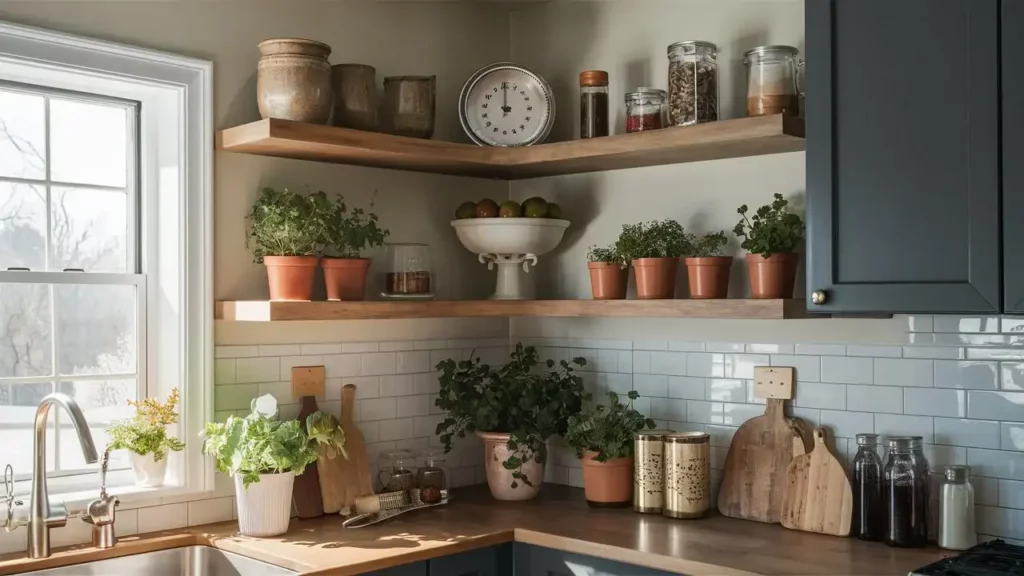
Hack 6: Corner Shelf Units
Corner shelf units are specifically designed storage solutions that maximize the often-underutilized corner spaces in kitchens. These units come in various designs and configurations to fit different kitchen layouts and storage needs.
Utilizing Corner Spaces
- Maximizing Storage: Corner shelf units effectively utilize otherwise wasted corner spaces, providing additional storage without taking up valuable wall or floor space.
- Organizational Efficiency: By placing items on corner shelves, you can keep the kitchen organized and easily accessible, reducing clutter in other areas.
- Enhanced Accessibility: Items stored on corner shelves remain within reach, making them convenient for daily use without having to reach deep into cabinets.
- Aesthetic Appeal: Well-designed corner shelf units can enhance the overall kitchen decor by filling empty corners and adding visual interest.
Types of Corner Shelves
- Floating Corner Shelves: Minimalist shelves that attach directly to the wall, ideal for displaying decorative items or lightweight kitchen essentials.
- L-Shaped Corner Shelves: Fit snugly into the corner and extend along two walls, offering ample storage space for dishes, spices, or small appliances.
- Carousel or Lazy Susan Shelves: Rotating shelves that allow easy access to items stored in deep corner cabinets, maximizing storage and visibility.
- Pull-Out Corner Shelves: Slide-out shelves that extend from inside corner cabinets, providing easy access to items stored in deep corners.
- Corner Pantry Shelves: Tall, narrow shelves designed for corner pantry cabinets, offering vertical storage for food items and kitchen supplies.
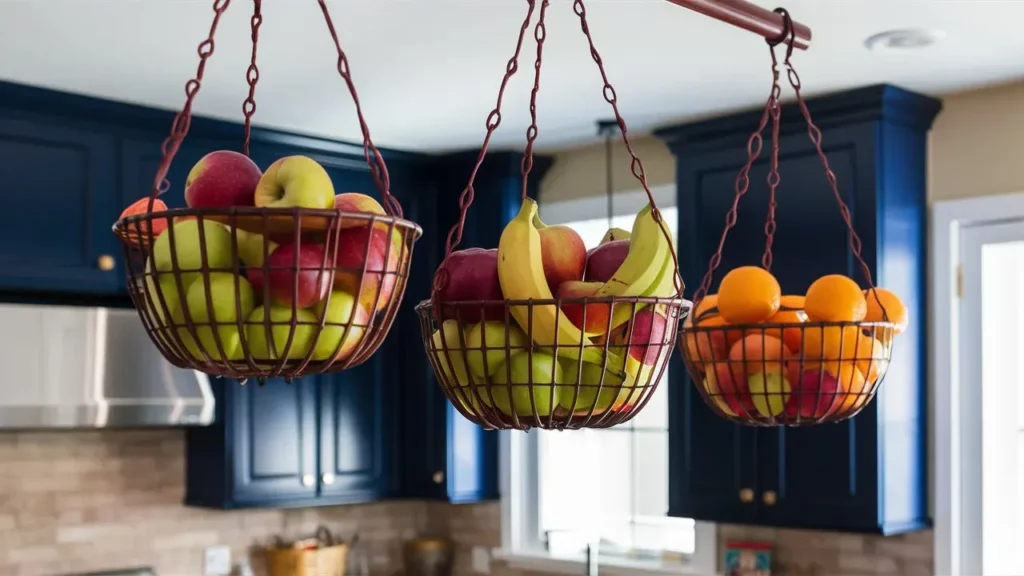
Hack 7: Hanging Fruit Baskets
Hanging fruit baskets are suspended storage solutions designed to hold fruits and vegetables, typically suspended from the ceiling or mounted on walls. They keep produce off countertops, maximizing space and improving kitchen organization.
Benefits of Freeing Up Counter Space
- Maximized Workspace: By keeping fruits and vegetables off the countertops, hanging fruit baskets frees up valuable workspace for food preparation and cooking activities.
- Reduced Clutter: Clearing countertops of produce reduces visual clutter, making the kitchen appear cleaner and more organized.
- Improved Hygiene: Elevated storage helps to keep fruits and vegetables dry and aerated, reducing the risk of spoilage and extending their freshness.
- Easy Cleaning: With fewer items on the countertop, cleaning becomes faster and more efficient, promoting a tidier kitchen environment.
Aesthetic and Functional Benefits
- Decorative Element: Hanging fruit baskets add a decorative touch to the kitchen, enhancing its visual appeal and creating a rustic or modern aesthetic depending on the design.
- Accessibility: Easily accessible storage encourages healthy snacking and meal preparation, promoting a more efficient kitchen workflow.
- Space Utilization: Utilizing vertical space optimally allows for better organization of kitchen essentials, making it easier to locate and access items as needed.
- Versatility: Some baskets come with multiple tiers or compartments, accommodating different types of produce and other kitchen items such as herbs, spices, or small utensils.
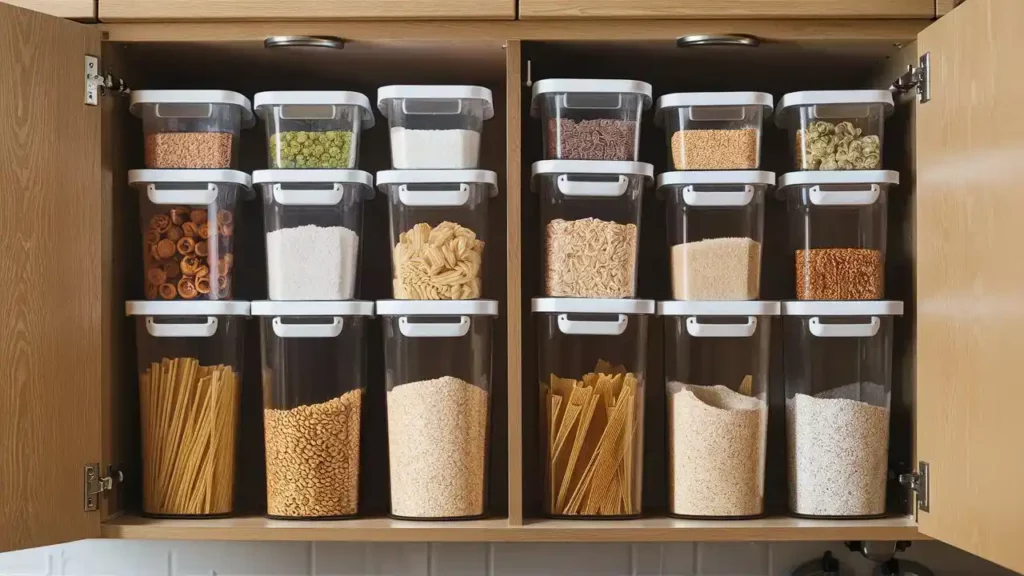
Hack 8: Stackable Storage Containers
Stackable storage containers are versatile kitchen organizers designed to maximize cabinet space by efficiently stacking on top of each other. These containers come in various shapes and sizes to accommodate different kitchen essentials, from dry goods to pantry items.
Maximizing Cabinet Space
- Vertical Storage: Stackable containers utilize vertical space within cabinets, allowing you to store more items without wasting shelf space.
- Organized Layout: By stacking containers, you create a neat and organized layout, making it easier to access and manage pantry items.
- Customizable Arrangement: Containers can be arranged based on size and frequency of use, optimizing cabinet space according to your needs.
- Visibility: Clear or labeled containers provide visibility into stored items, reducing the need to search through cabinets for specific ingredients or supplies.
Tips for Selecting Containers
- Size Compatibility: Choose containers that fit well within your cabinet dimensions, maximizing the available space without overcrowding.
- Material Quality: Opt for durable materials such as BPA-free plastic, glass, or stainless steel, ensuring longevity and safe storage of food items.
- Sealing Mechanism: Look for containers with secure lids or seals to maintain freshness and prevent spills or leaks.
- Stacking Capability: Select containers designed specifically for stacking to maximize vertical storage efficiently.
- Transparency: Transparent containers allow easy identification of contents without the need to open each container, enhancing kitchen organization.
- Versatility: Consider containers that can be used for multiple purposes, from storing dry goods like pasta and rice to organizing snacks or baking ingredients.
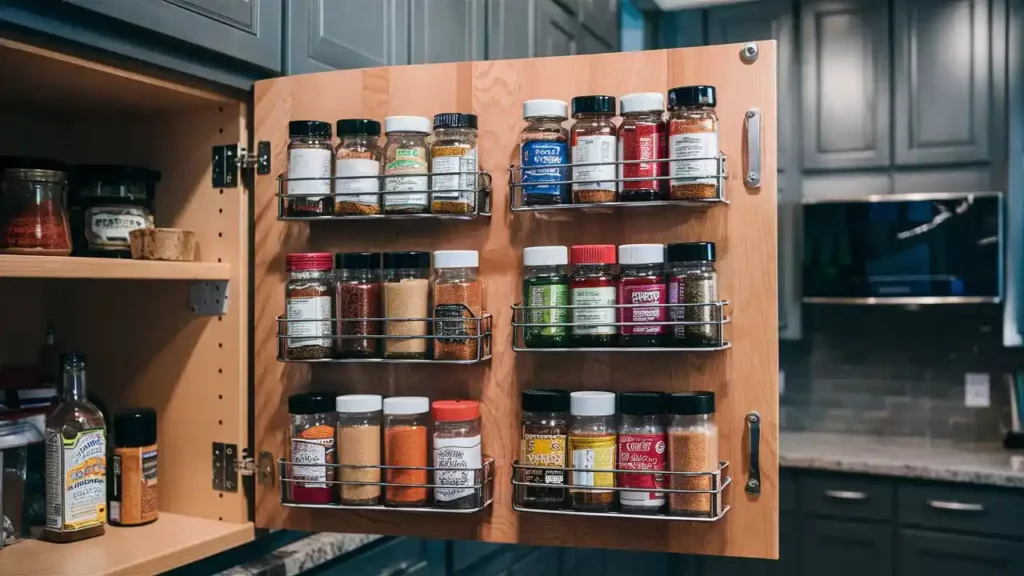
Hack 9: Door-Mounted Spice Racks
Door-mounted spice racks are storage solutions designed to hold spices and seasoning bottles on the inside of cabinet doors. These racks maximize vertical space and keep spices organized and easily accessible.
Keeping Spices Organized and Accessible
- Optimized Storage: Door-mounted spice racks utilize otherwise unused space on the inside of cabinet doors, keeping spices organized and within reach.
- Easy Accessibility: Organizing spices on cabinet doors makes them easily accessible while cooking, reducing the time spent searching for specific spices.
- Clear Visibility: Spice racks with tiered shelves or wire baskets provide clear visibility of spice labels, making it easy to identify and grab the right spice quickly.
- Space Efficiency: By storing spices on cabinet doors, you free up valuable shelf and countertop space for other kitchen essentials.
- Organizational Benefits: Keeping spices neatly arranged promotes a clutter-free kitchen environment and enhances overall kitchen organization.
Installation Tips
- Measure Your Cabinet Doors: Measure the dimensions of your cabinet doors to ensure that the spice rack will fit properly without obstructing the closing mechanism.
- Choose the Right Rack: Select a door-mounted spice rack that matches the size and layout of your cabinet doors. Consider adjustable racks to accommodate different bottle sizes.
- Mounting Method: Most spice racks come with mounting hardware, such as screws or adhesive strips. Follow the manufacturer’s instructions for installation.
- Positioning: Place the spice rack at a convenient height on the cabinet door, ensuring that it does not interfere with shelves or other items inside the cabinet.
- Secure Installation: Use a level to ensure that the spice rack is installed straight and securely attached to the cabinet door. This prevents it from swinging or becoming unstable when opening and closing the door.
- Test Stability: Before loading the spice rack with bottles, ensure that it can support the weight and remains stable when the cabinet door is opened or closed.
- Organize Spices: Arrange spices in alphabetical order or by frequency of use for easy access. Consider labeling or categorizing spices to further enhance organization.
Hack 10: Multi-Tiered Drawer Organizers
Multi-tiered drawer organizers are versatile storage solutions designed to maximize drawer space by providing multiple levels or compartments for organizing utensils, small kitchen items, and accessories. These organizers help keep drawers neat, efficient, and easy to navigate.
Organizing Utensils and Small Items
- Efficient Storage: Multi-tiered drawer organizers utilize vertical space within drawers, allowing you to store more items without cluttering the drawer.
- Separation of Items: Divided compartments or tiers help separate utensils and small items, making it easier to find what you need quickly.
- Customizable Layout: Adjustable dividers or modular compartments allow you to customize the organizer based on the size and type of items you need to store.
- Accessibility: Well-organized drawers enhance accessibility, ensuring that utensils and small items are easily reachable during meal preparation.
- Maximized Space: By utilizing the full height of drawers, multi-tiered organizers maximize storage space and optimize drawer capacity.
Different Types Available
- Expandable Drawer Organizers: These organizers can expand or contract to fit various drawer sizes and allow for customizable compartment arrangements.
- Stackable Drawer Inserts: Inserts with multiple layers or tiers that stack on top of each other within a single drawer, providing additional storage levels.
- Divided Tray Organizers: Tray-style organizers with fixed or adjustable dividers to separate utensils, cutlery, and other small kitchen tools.
- Utensil Drawer Inserts: Specifically designed with compartments for utensils of different sizes, ensuring each type has its designated space.
- Modular Drawer Systems: Versatile systems that combine different types of organizers, such as shallow trays for spices and deep bins for larger items, within the same drawer.
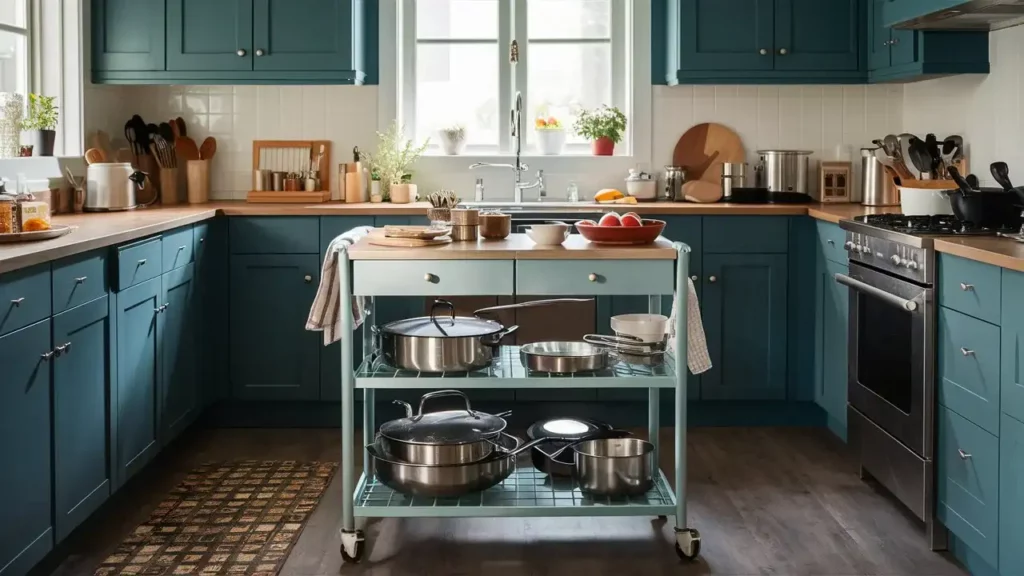
Hack 11: Rolling Kitchen Carts
Rolling kitchen carts are portable storage units on wheels designed to provide additional workspace, storage, and flexibility in the kitchen. These carts typically feature shelves, drawers, or cabinets, and can be moved easily around the kitchen or to other areas as needed.
Added Storage and Mobility
- Versatile Storage: Rolling kitchen carts offer extra storage space for kitchen essentials such as cookware, utensils, small appliances, and pantry items.
- Flexibility: Their mobility allows you to move the cart to different locations in the kitchen, making it easy to access supplies or create additional workspace near cooking areas.
- Expandable Countertop: Some carts have a fold-out or extendable countertop, providing additional workspace for meal preparation or serving.
- Utility Functions: They can serve as a portable bar cart, coffee station, or even a serving station during gatherings or meals.
- Organization: Carts with shelves and compartments help keep kitchen items organized and accessible, reducing clutter on countertops and in cabinets.
Best Uses for Rolling Carts
- Prep Area Extension: Use the cart as an additional prep area for chopping vegetables, assembling ingredients, or rolling out dough.
- Mobile Pantry: Store frequently used pantry items or snacks on the cart for easy access and organization.
- Kitchen Island Substitute: In smaller kitchens, use the cart as a temporary kitchen island for extra storage and workspace.
- Entertaining: Serve appetizers, drinks, or desserts from the cart during parties or gatherings, utilizing its mobility and storage capabilities.
- Outdoor Cooking: Roll the cart outside for barbecues or outdoor cooking, keeping essential tools and ingredients within reach.
Hack 12: Pegboards for Kitchen Tools
Pegboards for kitchen tools are versatile wall-mounted storage systems consisting of perforated boards with hooks or pegs. They allow you to hang and organize various kitchen utensils, cookware, and gadgets efficiently.
Customizable Storage
- Versatility: Pegboards offer customizable storage solutions by allowing you to arrange hooks and pegs according to the size and shape of your kitchen tools.
- Maximized Space: Utilize vertical wall space to free up countertops and cabinets, keeping essential kitchen tools easily accessible.
- Organized Display: Displaying kitchen tools on a pegboard provides visually organized and aesthetically pleasing kitchen decor.
- Quick Access: Easily access utensils and cookware without rummaging through drawers or cabinets, enhancing kitchen efficiency.
- Adaptability: Pegboards can be adapted to fit any kitchen size or layout, making them suitable for both small and large kitchens.
Tips for Setting Up a Pegboard
- Choose the Right Location: Select a wall space near your cooking area where the pegboard will be easily accessible and visually appealing.
- Measure and Plan: Measure the available space and plan the layout of hooks and pegs based on the size and number of kitchen tools you want to hang.
- Install Securely: Use appropriate wall anchors or screws to ensure the pegboard is securely mounted to the wall and can support the weight of your tools.
- Organize by Function: Arrange tools by function or frequency of use to optimize workflow and efficiency in the kitchen.
- Consider Accessories: Use additional accessories such as baskets, shelves, or magnetic holders on the pegboard to store smaller items or spices.
- Label or Outline: Consider labeling hooks or outlining tools with markers for easy identification and organization.
- Decorative Touch: Customize the pegboard with paint or decorative elements to match your kitchen decor and add a personal touch.
Hack 13: Fold-Down Tables and Counters
Brief Description: Fold-down tables and counters are space-saving solutions that provide additional workspace in kitchens. They can be mounted on walls or existing countertops and folded up when not in use to save space.
Creating Extra Workspace
- Versatile Functionality: Fold-down tables and counters offer versatile functionality by providing extra workspace for meal preparation, cooking, baking, or dining.
- Temporary Surfaces: Use them as temporary surfaces for chopping vegetables, rolling dough, or setting up a buffet during gatherings.
- Compact Storage: Fold-down tables fold flat against the wall or countertop, minimizing their footprint and freeing up floor space when not needed.
- Multi-Purpose Use: They can serve as kitchen islands, breakfast bars, or serving stations, depending on the installation location and design.
- Enhanced Efficiency: Adding extra workspace improves kitchen efficiency by providing dedicated areas for specific tasks, reducing clutter, and optimizing workflow.
Installation Ideas and Best Uses
- Wall-Mounted Tables: Install fold-down tables on kitchen walls near cooking areas or in compact kitchens where floor space is limited.
- Countertop Extensions: Use fold-down counters as extensions of existing countertops, creating additional prep space for cooking or baking.
- Dining Areas: Install larger fold-down tables to create dining spaces in kitchens or small dining rooms, ideal for small apartments or studio kitchens.
- Laundry Room Solutions: Utilize fold-down tables in laundry rooms for folding clothes or sorting laundry, maximizing utility in multi-functional spaces.
- Outdoor Kitchens: Incorporate fold-down counters in outdoor kitchens or grill areas for food preparation and serving during outdoor gatherings.
- Craft or Hobby Stations: Use fold-down tables in craft rooms or home offices for sewing, crafting, or as a compact workspace for hobbies.
Hack 14: Magnetic Fridge Organizers
Magnetic fridge organizers are storage solutions designed to utilize the sides or front of refrigerators for storing small items, notes, and kitchen tools. These organizers typically feature magnetic backing for easy attachment to metal surfaces.
Utilizing Fridge Sides for Storage
- Space Optimization: Magnetic fridge organizers utilize otherwise unused vertical space on fridge sides, freeing up countertop and cabinet space.
- Convenient Access: Keep frequently used items such as spices, cooking utensils, or grocery lists within easy reach while cooking or preparing meals.
- Enhanced Organization: Store small kitchen gadgets, keys, or magnets in designated compartments, reducing clutter in other areas of the kitchen.
- Multi-Purpose Use: Organizers can also serve as message boards or memo holders for displaying notes, recipes, or reminders in a central location.
Types of Magnetic Organizers
- Magnetic Spice Racks: Compact shelves or caddies with magnetic backs for storing spices, condiments, or small jars on fridge sides.
- Magnetic Hooks: Hooks or hangers that attach to fridge surfaces are ideal for hanging kitchen towels, aprons, or lightweight utensils.
- Magnetic Whiteboards: Whiteboard panels with magnetic backs for writing grocery lists, meal plans, or daily schedules directly on the fridge.
- Pocket Organizers: Fabric or mesh pockets with magnetic backing for storing mail, pens, notepads, or small kitchen tools like scissors or peelers.
- Magnetic Clips and Holders: Clips or holders for securing photos, recipes, or important documents on the fridge surface, preventing them from getting misplaced.
Hack 15: Ceiling Pot Racks
Ceiling pot racks are overhead storage solutions designed to hang pots, pans, and kitchen utensils from the ceiling. These racks typically feature hooks or bars suspended by chains or rods, providing convenient storage and adding a decorative element to the kitchen.
Benefits of Hanging Pots from the Ceiling
- Maximized Storage: Ceiling pot racks utilize vertical space, freeing up cabinet and countertop space for other kitchen essentials.
- Easy Accessibility: Hanging pots and pans from the ceiling makes them easily accessible, allowing for quick retrieval during cooking.
- Organized Display: Displaying cookware on a pot rack creates a decorative focal point in the kitchen, showcasing your collection of pots and pans.
- Reduced Clutter: By storing pots overhead, you can declutter cabinets and drawers, improving overall kitchen organization.
- Preserved Cookware: Hanging pots prevents scratches and damage that can occur when stacking them in cabinets, prolonging the lifespan of your cookware.
Installation Tips and Safety Considerations
- Choose a Sturdy Location: Install the pot rack in a ceiling joist or use anchors suitable for the weight of the rack and cookware to ensure stability.
- Height Consideration: Hang the pot rack at a height that allows easy access to pots and pans without interfering with normal kitchen activities or obstructing sightlines.
- Weight Distribution: Distribute the weight evenly across the rack and ensure that it can support the combined weight of your heaviest cookware.
- Secure Installation: Use strong ceiling hooks, chains, or rods that are designed for heavy loads and securely fasten them to the ceiling structure.
- Safety Precautions: Ensure that the rack is securely attached to prevent accidental falls or injuries. Avoid overloading the rack beyond its weight capacity.
- Accessibility: Arrange pots and pans by size and frequency of use for convenient access. Consider adding hooks for utensils or lids to maximize storage efficiency.
Hack 16: Collapsible Measuring Cups and Bowls
Collapsible measuring cups and bowls are space-saving kitchen tools that fold flat for easy storage. Made from flexible materials like silicone, they expand when used and collapse when not needed, making them ideal for kitchens with limited storage space.
Saving Drawer Space
- Compact Storage: Collapsible measuring cups and bowls can be flattened to a fraction of their full size, allowing them to fit neatly into drawers or cabinets without much space.
- Reduced Clutter: By collapsing these tools after use, you can keep your kitchen drawers organized and free from clutter, making it easier to find other items.
- Efficient Organization: The stackable nature of collapsible tools enables you to store multiple sizes together in a single drawer, maximizing storage efficiency.
- Versatile Use: These tools are not only space-saving but also versatile, serving multiple functions such as measuring, mixing, and serving, reducing the need for separate tools.
- Portable: Their compact size when collapsed makes them ideal for small kitchens, RVs, camping, or any situation where storage space is at a premium.
Best Collapsible Kitchen Tools
- Collapsible Measuring Cups: These come in various sizes and typically have measurement markings on the inside, making them easy to use and store.
- Collapsible Mixing Bowls: Available in different capacities, these bowls can be used for mixing ingredients, serving salads, or storing leftovers, and then collapsed for easy storage.
- Collapsible Colanders: Ideal for draining pasta or washing vegetables, collapsible colanders flatten for storage and expand when needed.
- Collapsible Food Storage Containers: These containers are perfect for storing leftovers or meal prep and can be collapsed to save space when not in use.
- Collapsible Funnels: Great for transferring liquids or dry ingredients without spilling, collapsible funnels can be stored flat in a drawer.
Hack 17: Slide-Out Trash Bins
Slide-out trash bins are built-in storage solutions that keep trash and recycling bins hidden within cabinets. These bins are mounted on sliding tracks, allowing you to pull them out when needed and push them back in to keep them out of sight.
Keeping Trash Out of Sight
- Aesthetic Appeal: Slide-out trash bins keep unsightly trash and recycling bins hidden, maintaining a clean and clutter-free kitchen appearance.
- Odor Control: Keeping trash bins enclosed within cabinets helps contain odors, making the kitchen environment more pleasant.
- Space Optimization: Integrating trash bins into cabinets frees up floor space, creating a more open and organized kitchen layout.
- Convenient Access: Slide-out bins are easily accessible when needed, providing a practical solution for waste management without compromising kitchen aesthetics.
- Hygienic Solution: Enclosed trash bins reduce the risk of pets or pests accessing the trash, promoting a more hygienic kitchen environment.
Installation Tips
- Measure Your Cabinet: Before purchasing a slide-out trash bin system, measure the dimensions of your cabinet to ensure a proper fit.
- Choose the Right System: Select a slide-out trash bin system that matches your cabinet dimensions and can accommodate the number of bins you need (e.g., one for trash and one for recycling).
- Prepare the Cabinet: Clear out the cabinet where you plan to install the bins and remove any existing shelves or obstacles.
- Install the Sliding Tracks: Follow the manufacturer’s instructions to install the sliding tracks inside the cabinet. Ensure they are level and securely attached to support the weight of the bins.
- Attach the Bins: Once the tracks are in place, attach the bins to the sliding mechanism. Ensure they slide in and out smoothly and are securely fastened.
- Test the System: Test the slide-out bins by pulling them out and pushing them back in several times to ensure they function properly and are easy to access.
- Consider Cabinet Doors: Depending on your cabinet design, you may need to adjust the doors or install a door-mount kit that attaches the cabinet door to the front of the sliding bin for seamless access.
- Secure the Bins: If needed, add securing mechanisms such as clips or locks to keep the bins stable and prevent them from sliding out unintentionally.
Hack 18: Under-Cabinet Lighting and Storage
Under-cabinet lighting and storage solutions combine the functionality of illuminating workspaces and providing additional storage. These systems are installed beneath kitchen cabinets, offering both practical lighting and efficient use of space.
Dual Function for Illumination and Storage
- Improved Visibility: Under-cabinet lighting enhances visibility on countertops, making it easier to perform tasks such as chopping, mixing, and cooking.
- Ambiance and Aesthetics: These lights create a warm and inviting ambiance in the kitchen, highlighting the backsplash and enhancing the overall kitchen design.
- Space-Saving Storage: Incorporating storage elements like hooks, shelves, or magnetic strips under cabinets maximizes space and keeps essential items within easy reach.
- Organized Workspace: Combining lighting with storage helps keep countertops clutter-free, promoting a more organized and efficient kitchen environment.
- Functional Design: Dual-function solutions enhance both the practicality and aesthetic appeal of the kitchen, making it a more enjoyable space to work in.
Types and Installation Tips
- Types of Under-Cabinet Lighting:
- LED Light Strips: Flexible and energy-efficient, LED light strips can be installed along the length of cabinets, providing consistent and bright illumination.
- Puck Lights: Small, circular lights that can be spaced evenly under cabinets, ideal for focused lighting on specific areas.
- Fluorescent Lights: Long-lasting and cost-effective, fluorescent light fixtures offer bright and even lighting, though they may be bulkier than LEDs.
- Battery-Powered Lights: Convenient and easy to install without wiring, these lights are ideal for renters or temporary solutions.
- Types of Under-Cabinet Storage:
- Magnetic Knife Strips: Mounted under cabinets to keep knives safely stored and easily accessible.
- Hanging Hooks: For utensils, cups, or small pots, freeing up drawer and counter space.
- Spice Racks: Compact racks that hold spice jars, making them easily reachable while cooking.
- Paper Towel Holders: Convenient holders for paper towels, keeping them off countertops and within reach.
Installation Tips
- Plan the Layout: Determine the best locations for both lighting and storage based on your kitchen’s workflow and where additional light and storage are most needed.
- Measure Accurately: Measure the space under your cabinets to ensure the lighting and storage solutions fit properly.
- Choose the Right Products: Select lighting and storage products that match your kitchen’s style and needs. Consider LED lights for their energy efficiency and magnetic strips for versatile storage.
- Prepare the Surface: Clean the underside of the cabinets to ensure strong adhesion for lights and storage hooks or strips.
- Install Lighting: For wired lighting, consider professional installation to handle electrical work safely. For adhesive or battery-powered lights, follow the manufacturer’s instructions for secure attachment.
- Add Storage Solutions: Use screws, adhesive strips, or magnetic mounts to install storage elements. Ensure they are securely fastened to hold the weight of the items they will store.
- Test Functionality: After installation, test the lights to ensure they illuminate the desired areas effectively and check that storage elements are sturdy and accessible.
Hack 19: Tiered Shelf Organizers
Tiered shelf organizers are multi-level storage solutions designed to maximize vertical space in pantries and cabinets. These organizers typically feature multiple tiers or steps, allowing you to store items at varying heights for better visibility and accessibility.
Maximizing Pantry and Cabinet Space
- Vertical Space Utilization: Tiered shelf organizers make efficient use of vertical space, allowing you to stack items on multiple levels instead of just one flat surface.
- Enhanced Visibility: By elevating items on different tiers, these organizers make it easier to see and access everything at a glance, reducing the need to rummage through shelves.
- Improved Organization: Categorize and arrange items by type or frequency of use, keeping your pantry and cabinets neat and orderly.
- Increased Storage Capacity: Maximizing vertical space allows you to store more items in the same area, increasing the overall storage capacity of your kitchen.
- Quick Access: Items placed on tiered shelves are more accessible, which speeds up meal preparation and makes it easier to find ingredients and tools.
Best Types for Different Uses
- Spice Racks: Tiered spice racks are perfect for organizing spice jars and small bottles. They come in various sizes to fit different cabinet spaces and keep spices easily accessible.
- Can Organizers: These are designed to hold canned goods, with angled tiers that allow you to see labels clearly and grab the cans you need without digging.
- Expandable Shelf Organizers: Adjustable and expandable tiered shelves can fit into various cabinet sizes, offering flexibility and maximizing space as needed.
- Corner Shelf Organizers: Specifically designed for corner cabinets, these tiered organizers utilize awkward corner spaces efficiently, making it easier to store and access items.
- Under-Sink Organizers: Tiered shelves for under-sink cabinets help manage cleaning supplies, toiletries, or other items, optimizing space in typically cluttered areas.
- Baking Sheet and Pan Racks: Tiered racks for baking sheets, pans, and lids keep these items organized and easily accessible, preventing stacking and clutter in cabinets.
- Lazy Susans: While not tiered in the traditional sense, tiered lazy Susans offer multiple rotating levels, making them ideal for organizing condiments, sauces, and small kitchen items.
Maximizing Pantry and Cabinet Space:
- Measure Your Space: Before purchasing, measure the dimensions of your pantry and cabinets to ensure the organizers fit properly.
- Categorize Items: Group similar items together and decide which categories will benefit most from the tiered organization (e.g., spices, canned goods, baking supplies).
- Label Tiers: For added convenience, consider labeling each tier to quickly identify the items stored on them, especially useful for large families or shared kitchens.
- Keep Frequently Used Items Accessible: Place the most frequently used items on the front tiers or at eye level for easy access.
- Regular Maintenance: Periodically review and reorganize your tiered shelves to keep them clutter-free and ensure optimal functionality.
Hack 20: Hidden Cutting Boards
Hidden cutting boards are space-saving kitchen solutions integrated into cabinets or countertops. These boards slide out or fold out from their concealed locations, providing a convenient and accessible surface for food preparation without taking up additional counter space.
Integrated Cutting Boards in Cabinets
- Design and Functionality: Hidden cutting boards are often built into a drawer or a pull-out mechanism within a cabinet. Some designs incorporate the cutting board into the top of a drawer, which can be pulled out when needed and pushed back in to conceal it.
- Material Choices: These cutting boards can be made from a variety of materials, including wood, bamboo, or composite, ensuring durability and suitability for various kitchen tasks.
- Customization: Many hidden cutting board systems can be customized to fit specific cabinet sizes and styles, making them versatile for different kitchen layouts.
Space-Saving Benefits and Installation
- Space-Saving Benefits:
- Maximized Counter Space: By integrating the cutting board into a cabinet, you free up valuable counter space for other tasks, making your kitchen more functional and less cluttered.
- Convenient Access: Hidden cutting boards are always within reach but out of the way, providing a dedicated space for food prep without occupying counter space permanently.
- Hygienic Storage: When not in use, the cutting board is stored away, protecting it from dust and contaminants and keeping your kitchen looking tidy.
- Multifunctional Use: These boards can double as serving trays or extra workspace when needed, adding to their versatility.
- Installation:
- Choose the Right Location: Determine the best cabinet or drawer to install the cutting board. It should be easily accessible and located near your primary food preparation area.
- Measure and Customize: Measure the available space inside the cabinet or drawer to ensure the cutting board will fit properly. Customization may be necessary to achieve a perfect fit.
- Install the Slide Mechanism: For pull-out cutting boards, install a sturdy slide mechanism that allows the board to glide smoothly in and out of the cabinet. Ensure the slides are securely attached to support the weight of the cutting board.
- Attach the Cutting Board: Secure the cutting board to the slide mechanism or drawer top, ensuring it is firmly attached and stable during use.
- Test the Functionality: After installation, test the cutting board by sliding it in and out multiple times to ensure it operates smoothly and is easy to use.
- Maintain Cleanliness: Regularly clean and sanitize the cutting board to maintain hygiene. Consider using a removable board for easy cleaning.
Hack 21: Wall-Mounted Dish Racks
Wall-mounted dish racks are practical kitchen solutions that allow you to dry dishes, utensils, and other kitchenware by mounting the rack on a wall. This frees up valuable counter space and helps maintain an organized and tidy kitchen.
Freeing Up Counter Space
- Maximized Workspace: By moving the dish-drying area to the wall, you free up counter space for food preparation, cooking, and other activities, making your kitchen more efficient.
- Decluttered Counters: Wall-mounted dish racks help keep countertops clear of drying dishes, reducing clutter and providing a cleaner, more organized appearance.
- Improved Workflow: With dishes drying on the wall, your kitchen workflow becomes more streamlined, as you have more room to work and move around.
- Better Organization: These racks often come with compartments and hooks for various kitchen items, helping you organize your dishes, utensils, and even cutting boards in one convenient location.
- Efficient Drying: Elevated drying racks allow water to drain directly into the sink or a drip tray, promoting quicker drying times and reducing the risk of water damage to countertops.
Best Wall-Mounted Dish Racks
- Simple Houseware Over Sink Drainer: This sturdy, stainless steel rack is designed to fit over the sink, making it ideal for small kitchens. It includes compartments for plates, bowls, and utensils, and hooks for mugs or other items.
- KitchenAid Full Size Dish Rack: A versatile and durable option, this dish rack features multiple tiers for drying dishes and a utensil holder, all mounted securely on the wall.
- KES Wall Mounted Dish Drying Rack: Made from rust-resistant stainless steel, this rack includes a drip tray to catch excess water and several slots for dishes, utensils, and cutting boards. It’s adjustable and fits various kitchen sizes.
- Boosiny Wall Mounted Dish Rack: This two-tier dish rack offers ample drying space with dedicated sections for plates, bowls, and cups. It also includes a removable drip tray and utensil holder, providing excellent functionality and organization.
- PremiumRacks Professional Dish Rack: Known for its versatility and sturdiness, this rack offers multiple configuration options, including a wall-mounted setup. It includes a microfiber mat, utensil holder, and hooks for additional kitchen items.
Installation Tips
- Choose the Right Location: Select a wall near the sink for easy access and drainage. Ensure the wall is sturdy enough to support the weight of the dish rack and dishes.
- Measure and Mark: Measure the dish rack and mark the installation points on the wall. Use a level to ensure the rack will be mounted straight.
- Use Appropriate Hardware: Depending on the wall type, choose appropriate anchors and screws to securely fasten the dish rack. For drywall, use toggle bolts or wall anchors; for tile or concrete, use masonry anchors.
- Install the Mounting Brackets: Attach the mounting brackets to the wall at the marked points. Ensure they are firmly in place and level.
- Attach the Dish Rack: Once the brackets are secure, attach the dish rack according to the manufacturer’s instructions. Ensure it is stable and can hold the weight of the dishes without wobbling.
- Test for Stability: Place a few lightweight items on the rack to test its stability. Gradually add more dishes to ensure the rack can handle the load without shifting or sagging.
- Maintain Regularly: Clean the dish rack regularly to prevent mold and mildew buildup. Check the mounting brackets periodically to ensure they remain secure.
Hack 22: Drawer Dividers
Drawer dividers are tools used to partition drawers into smaller, organized sections, making it easier to keep items sorted and accessible. They come in various materials, sizes, and styles to fit different types of drawers and organizational needs.
Keeping Drawers Organized
- Enhanced Organization: Drawer dividers help categorize and separate items, preventing them from becoming jumbled and making it easier to find what you need quickly.
- Maximized Space: By creating designated spaces for different items, dividers allow you to utilize the entire drawer efficiently, reducing wasted space.
- Improved Accessibility: Items are easier to see and reach when they are neatly organized in specific sections, enhancing overall drawer functionality.
- Reduced Clutter: Dividers prevent items from shifting around inside the drawer, keeping everything in its place and reducing clutter.
- Versatility: Drawer dividers can be used in various kitchen drawers, such as utensil drawers, junk drawers, spice drawers, and more, providing a versatile organization solution.
Types and Customization Tips
- Types of Drawer Dividers:
- Adjustable Dividers: These dividers can be resized to fit different drawer widths and lengths, offering flexibility and adaptability.
- Wooden Dividers: Made from wood, these dividers are sturdy and often customizable, allowing you to create compartments of various sizes.
- Plastic Dividers: Lightweight and durable, plastic dividers are easy to clean and available in various colors and styles.
- Expandable Dividers: These dividers can be expanded to fit different drawer sizes and are often spring-loaded for a snug fit.
- Modular Dividers: Modular systems include individual pieces that can be arranged in various configurations to suit your organizational needs.
- Customization Tips:
- Measure Your Drawers: Before purchasing dividers, measure the dimensions of your drawers to ensure a proper fit. Consider the height, width, and depth of the drawer.
- Assess Your Needs: Determine what items you need to organize in each drawer and how much space each category requires. This will help you choose the appropriate type and number of dividers.
- Plan the Layout: Sketch a layout of how you want to arrange the items in the drawer. Consider the frequency of use and prioritize accessibility for commonly used items.
- Choose the Right Materials: Select dividers made from materials that suit your kitchen’s aesthetic and durability requirements. For example, wooden dividers offer a classic look, while plastic dividers are easy to clean.
- Install and Adjust: Place the dividers in the drawer according to your layout plan. Adjust the positions as needed to ensure a snug fit and optimal organization.
- Label Compartments: For added organization, consider labeling the compartments to quickly identify where specific items belong.
- Maintain Regularly: Periodically review and reorganize the drawer contents to ensure they remain tidy. Clean the dividers and drawer as needed to maintain hygiene.
- Use Non-Slip Mats: Place non-slip mats under the dividers to prevent them from shifting and protect the drawer’s surface.
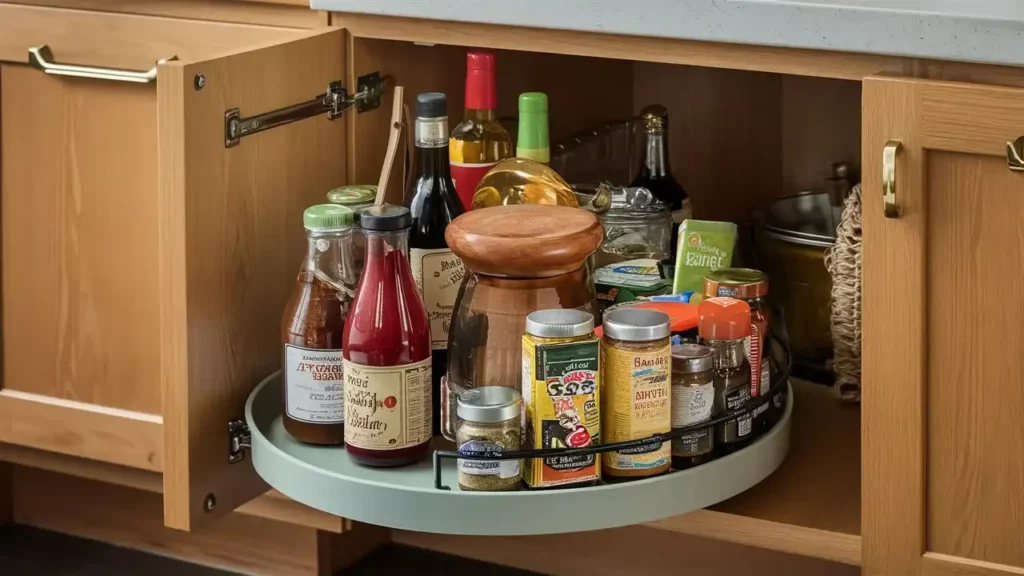
Hack 23: Lazy Susans
Lazy Susans are rotating trays or turntables that allow easy access to items stored in deep cabinets, shelves, or countertops. By rotating the tray, you can quickly find and reach items without having to move others out of the way.
Making the Most of Deep Cabinets
- Optimized Space Utilization: Lazy Susans make efficient use of deep cabinet spaces, which are often difficult to organize and access. By rotating the tray, you can utilize the entire depth of the cabinet without losing items in the back.
- Improved Accessibility: Items stored on a Lazy Susan are easily accessible, reducing the need to bend or stretch to reach the back of deep cabinets. This enhances convenience and reduces the risk of accidents or spills.
- Better Organization: Lazy Susans help keep items organized by grouping similar items on a rotating platform. This prevents clutter and makes it easier to maintain an orderly kitchen.
- Time-Saving: With a Lazy Susan, you can quickly find and retrieve items without having to sift through the entire cabinet. This speeds up meal preparation and other kitchen tasks.
- Versatility: Lazy Susans can be used in various kitchen locations, including corner cabinets, pantry shelves, and even countertops, making them a versatile storage solution.
Best Uses and Placement Tips
- Best Uses:
- Spices and Condiments: Store spices, sauces, and condiments on a Lazy Susan to keep them organized and easily accessible while cooking.
- Pantry Items: Use a Lazy Susan in pantry cabinets to organize canned goods, jars, and other small pantry items, making it easier to see and reach everything.
- Corner Cabinets: Place a Lazy Susan in corner cabinets to maximize the use of the awkward, deep space and make it more functional.
- Under-Sink Storage: Use a Lazy Susan under the sink to organize cleaning supplies, making it easier to find and retrieve items without knocking over others.
- Table Centerpieces: A Lazy Susan can also be used as a centerpiece on dining or kitchen tables, allowing everyone to easily access condiments, napkins, and other items during meals.
- Placement Tips:
- Measure Your Space: Before purchasing a Lazy Susan, measure the dimensions of your cabinets or shelves to ensure a proper fit. Consider the height, width, and depth of the space.
- Choose the Right Size: Select a Lazy Susan that fits comfortably within the cabinet or shelf. Ensure there is enough clearance for the tray to rotate freely without hitting the cabinet walls or other items.
- Opt for Multi-Tiered Models: For added storage capacity, consider multi-tiered Lazy Susans. These provide additional levels for organizing more items while maintaining easy access.
- Secure Placement: Ensure the Lazy Susan is placed on a stable and flat surface. If using in a cabinet, consider adding a non-slip mat underneath to prevent it from shifting.
- Organize by Frequency of Use: Place frequently used items on the outer edges of the Lazy Susan for quick and easy access. Less frequently used items can be stored in the center.
- Regular Maintenance: Periodically clean the Lazy Susan and reorganize the items to keep them functional and hygienic. Check for any items that may have expired or need replenishing.
Final Thoughts
Implementing these 23 space-saving kitchen hacks can significantly transform your kitchen, making it more organized, efficient, and enjoyable to work in. From maximizing cabinet space with stackable containers and Lazy Susans to freeing up countertops with wall-mounted dish racks and hanging fruit baskets, each hack offers practical solutions to common kitchen storage challenges.
By incorporating these innovative ideas, you can optimize every inch of your kitchen, reduce clutter, and streamline your cooking process. Whether you’re dealing with a compact kitchen or simply looking to enhance your current setup, these hacks provide creative and effective ways to make the most of your space.
Don’t hesitate to try out these hacks in your kitchen. Start small by implementing a few changes, and gradually incorporate more as you see the benefits. With a more organized and efficient kitchen, you’ll find cooking and meal preparation to be a much more enjoyable and stress-free experience.
Katrina Smith is a seasoned expert with over 25 years of experience in all things related to cooking and the kitchen. As an avid cook and kitchen enthusiast, she is passionate about sharing her knowledge and expertise on cookware, kitchen appliances, kitchen tips, and kitchen staples.
Through her articles and reviews, Katrina aims to inspire and help others improve their cooking skills, experiment with different ingredients, and invest in quality cookware and appliances.

![How To Unclog A Sink Clogged With Coffee Grounds? [3 Effective Ways] 13 How-to-Unclog-a-Sink-Clogged-With-Coffee-Grounds](https://www.kitchensity.com/wp-content/uploads/2020/06/How-to-Unclog-a-Sink-Clogged-With-Coffee-Grounds.jpg)


![Best Insulation Under The Kitchen Sink [3 Top Insulations] 16 Best Insulation Under The Kitchen Sink](https://www.kitchensity.com/wp-content/uploads/2023/04/Best-Insulation-Under-The-Kitchen-Sink.jpg)

