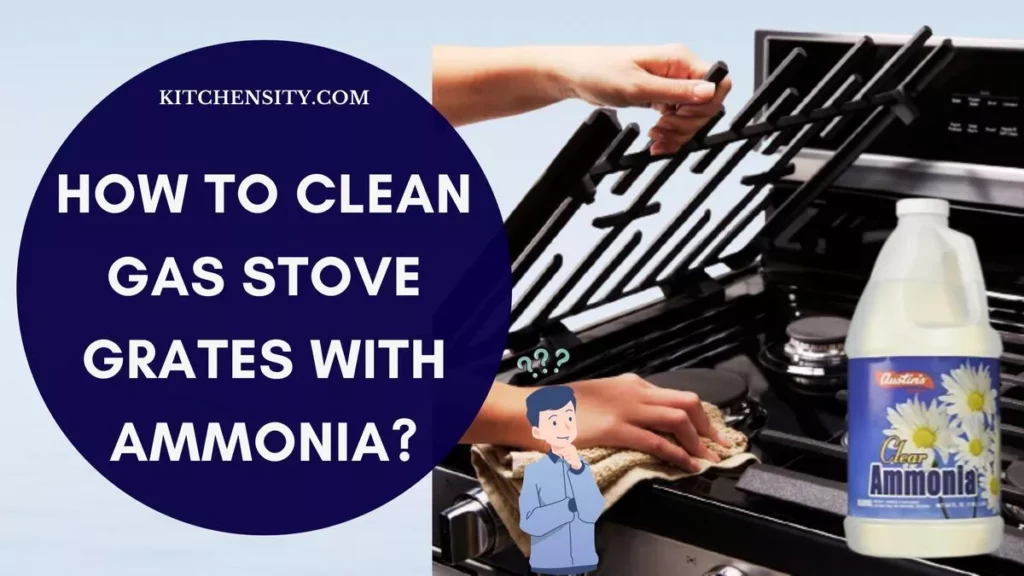
Cleaning gas stove grate is essential and various methods exist to achieve a sparkling clean result. One effective yet lesser-known method is cleaning gas stove grates with ammonia.
Yes, you can use ammonia to clean gas stove grates. Ammonia is an effective cleaning agent that can help remove stubborn stains, grease, and grime from the grates. But, using it safely and following the proper cleaning procedure is important.
By soaking the grates in an ammonia solution, scrubbing away residue, and rinsing them thoroughly, you can achieve spotless gas stove grates.
Always wear gloves, work in a well-ventilated area, and avoid mixing ammonia with other cleaning products, especially bleach, as it can produce toxic fumes.
Also Read – How To Clean Gas Stove Grates?
Table of Contents
- 1 Step-by-Step Process For Cleaning The Grates.
- 2 Will Ammonia Be Eat Through Plastic Bags?
- 3 How Long Do You Soak Stove Grates In Ammonia?
- 4 How To Prevent Future Buildup?
- 5 Final Thoughts: How To Clean Gas Stove Grates With Ammonia?
- 6 Frequently Asked Questions (FAQs)
- 6.1 How To Clean The Grates On A Gas Stove With Ammonia And Ziplock Bags?
- 6.2 Can I Use This Method For Grates With Stubborn, Baked-On Stains?
- 6.3 Is It Safe To Mix Ammonia With Other Cleaning Products?
- 6.4 How Often Should I Clean My Gas Stove Grates With Ammonia?
- 6.5 Can I Use This Method For Porcelain-Coated Grates?
- 6.6 Is There An Alternative To Ammonia For Cleaning Gas Stove Grates?
Step-by-Step Process For Cleaning The Grates.
You will need the following items:
- Ammonia
- Large resealable plastic bags or Ziplock Bags
- Gloves
- Scrub brush or sponge
- Mild dish soap
- Clean cloth or paper towels
Safety Precautions: Always wear gloves when handling ammonia, and ensure the area is well-ventilated. Open windows and turn on exhaust fans to prevent inhaling fumes. Also, keep ammonia away from other cleaning products, especially bleach, as the combination can produce toxic fumes.
Also Read – How To Clean Gas Stove Grates In The Dishwasher?
Step 1: Remove The Stove Grates.
- Before you start, make sure to turn off the gas supply to the stove. Safety should always be the top priority when working with gas appliances.
- Gas stove grates can become extremely hot during cooking. Allow the stove to cool down completely before removing the grates to avoid burns or injuries.
- They are usually placed above the burners. Depending on your stove model, they might lift off easily. Carefully grab the edges of the grates and lift them upward. If the grates are stuck due to residue or grease, gently wiggle them while lifting them to release them.
- Some gas stoves have grates that are held in place with clips or latches. Examine the grates and the stove surface for any clips or latches that might be securing the grates. If present, release them according to the stove’s user manual instructions.
- Once the grates are removed, wipe away any loose debris, spills, or grease. A clean surface underneath the grates ensures better hygiene and prevents any potential issues with the burners.
- While the grates are off, inspect them for any signs of damage, such as cracks or chipping. If you notice any significant damage, it might be a good time to consider replacing the grates.
Step 2: Prepare The Ammonia Solution.
When preparing the ammonia solution, it’s essential to use clear, unscented household ammonia. Ensure the ammonia is fresh and not diluted. To prepare the ammonia solution, you’ll need the following items:
- Clear, unscented household ammonia.
- Large resealable plastic bags (big enough to hold the grates).
- Rubber gloves (to protect your hands from the ammonia).
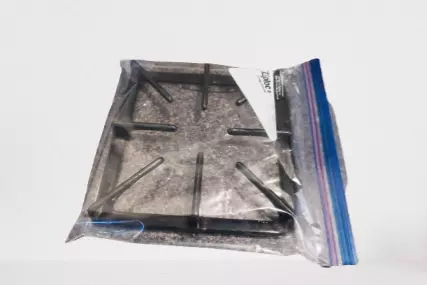
Preparation of Ammonia Solution: Pour approximately 1/4 to 1/2 cups of clear, unscented household ammonia into a large resealable plastic bag. The exact amount of ammonia needed depends on the size and number of grates you’re cleaning. Seal the plastic bag securely, ensuring there are no leaks (you can check the image below).
Ammonia fumes can be strong, so it’s crucial to work in a well-ventilated area. Open windows and doors to allow fresh air to circulate. If possible, wear a mask designed to filter out ammonia fumes. Also, wear rubber gloves to protect your hands from direct contact with the ammonia.
Step 3: Soak The Stove Grates In The Ammonia Solution.
Soaking the grates is the next step in the process of cleaning gas stove grates with ammonia. This step allows the ammonia solution to work its magic in loosening the stubborn stains and grime. Here’s how to do it:
- With the ammonia solution ready, carefully place the gas stove grates inside the resealable plastic bag that contains the solution. Make sure they are fully submerged in the ammonia.
- Once the grates are inside the bag, seal it tightly to prevent ammonia fumes from escaping. Double-check that the seal is secure to avoid any spills or leaks.
- The soaking duration is a critical aspect of this cleaning method. To remove grime and stains, allow the grates to soak in the ammonia solution for at least 8-10 hours. It’s often best to soak them overnight for the best results.
- While the grates are soaking, it’s a good idea to check on them periodically. After a few hours, you may notice that the ammonia solution has started to break down the stains and residue. This step helps you gauge the progress of the cleaning.
Step 4: Scrub Away All The Residues.
Here’s how to scrub away residue from the grates after soaking them in the ammonia solution.
- Before you start scrubbing, put on rubber gloves to protect your hands from both the residue and the ammonia solution remnants.
- Use a scrub brush or sponge specifically designated for cleaning tasks. A brush with firm bristles or an abrasive sponge can be effective in removing the softened residue. For stubborn spots, consider using an old toothbrush or a small, soft-bristled brush to access hard-to-reach areas.
- Take one grate at a time and scrub it thoroughly with the scrub brush or sponge. Apply moderate pressure to remove the residue. Focus on areas with stubborn stains and burnt-on residue. The ammonia solution will have loosened these spots, making it easier to scrub them away.
- Periodically rinse the grates under running water to remove the loosened residue and ammonia solution. This step allows you to assess your progress and identify any areas that might need additional scrubbing.
- For extra stubborn spots, you can create a paste using baking soda and water. Apply this paste to the grates and let it sit for a few minutes before scrubbing.
- Continue scrubbing until you’re satisfied that most of the residue has been removed. Focus on areas where the stains were particularly stubborn. The grates should start to look significantly cleaner than before the scrubbing process.
- After scrubbing, rinse the grates thoroughly under running water to remove any remaining residue, ammonia solution, or baking soda paste. Ensure all cleaning agents are completely washed off.
Step 5: Rinse And Dry The Stove Grates.
Proper rinsing ensures that all cleaning agents are completely removed, and thorough drying prevents the formation of rust. Here’s how to effectively rinse and dry the grates:
- Take each grate and rinse it thoroughly under running water. Remove all traces of the ammonia solution, residue, and cleaning agents. Use a gentle scrub brush or your fingers to help dislodge any remaining particles. Repeat the rinsing process multiple times to clean the grates entirely.
- After rinsing, inspect the grates carefully. Check for any signs of residue or remaining stains. If you spot any, repeat the scrubbing and rinsing process for those specific areas until they are completely clean.
- After rinsing, use a clean, dry cloth or paper towels to pat the grates dry. Make sure to remove as much moisture as possible. You can also leave the grates to air dry completely before reassembling them onto the gas stove.
- If you live in an area with hard water, water spots can form on the grates as they dry. To prevent this, you can polish the grates with a soft, dry cloth after the initial drying. This step adds an extra shine and ensures a spotless appearance.
- If you have the time, consider leaving the grates to air dry for a few hours. Place them on a clean surface in a well-ventilated area. Make sure they are completely dry before reassembling them on the stove.
- While drying, inspect the grates for any signs of rust. If you notice any rust spots, gently scrub them with a rust remover or a mixture of baking soda and water. Once the rust is removed, rinse and dry the affected areas thoroughly.
Step 6: Finally, Reassemble The Clean Stove Grates.
Here’s how to correctly reassemble the stove for seamless functionality:
- Before reassembling, ensure the grates are completely dry to prevent rust formation.
- Identify the correct placement of each grate on the stove, matching sizes to specific burners.
- Align the grates properly with the burner caps and heads for efficient heat distribution.
- Inspect the burner caps and heads beneath the grates for cleanliness.
- Gently press down on each grate to check for stability and reposition if necessary.
- Test each burner individually after reassembly to ensure correct functionality.
- Clean the stove surface with a mild cleaner to remove crumbs and debris.
- Polish the grates with a microfiber cloth or stainless steel cleaner for extra shine.
- Admire your clean gas stove, ready for your next cooking adventure.
Also Read – Why Gas Stove Grates Are Too High?
Will Ammonia Be Eat Through Plastic Bags?
Ammonia is a strong chemical that can potentially degrade certain types of plastic over time. While it may not immediately be eaten through a plastic bag during short-term use, prolonged exposure or storing ammonia in plastic containers for extended periods can lead to plastic degradation. This can result in the plastic becoming brittle, cracked, or weakened.
When using ammonia for cleaning purposes, it’s essential to choose the right kind of plastic container or bag designed to withstand the chemical. High-density polyethylene (HDPE) and polypropylene (PP) are plastic materials known for their resistance to ammonia. Therefore, if you plan to use ammonia for cleaning, it’s advisable to use plastic containers or bags made from HDPE or PP to store the solution safely.
Also Read – Why Did My Glass Stove Top Crack?
How Long Do You Soak Stove Grates In Ammonia?
When soaking stove grates in an ammonia solution for cleaning, try to soak them for at least 8-10 hours or overnight. Allowing the grates to soak for this extended period softens stubborn stains, grease, and grime, making it easier to scrub them away later.
However, if the grates are exceptionally dirty or have not been cleaned for a long time, you can choose to soak them for a longer duration, up to 24 hours, to ensure effective cleaning.
Also Read – Do Gas Stoves Have Pilot Lights?
How To Prevent Future Buildup?
Preventing future buildup on your gas stove grates is essential to maintain their cleanliness and ensure optimal performance. Here are some effective tips to prevent future buildup.
- Clean your gas stove grates after each use to remove spills and prevent grease buildup.
- Use stove burner covers or liners to catch drips and spills and make cleaning easier.
- Consider seasoning cast iron grates to create a protective layer against sticking and stains.
- Avoid cooking on excessively high heat to prevent food particles and grease from burning onto the grates.
- Promptly clean spills with a damp cloth or sponge to prevent them from hardening.
- Use mild cleaning products like dish soap, baking soda, or specialized stove cleaners for deep cleaning.
- Regularly inspect and clean the burners beneath the grates to ensure even heat distribution.
- Use cooking accessories like pots, pans, and grilling mats to minimize direct contact between food and the grates.
- Wipe down the stove surface regularly to prevent crumbs, spills, and grease from falling onto the grates.
- Periodically inspect the grates for buildup or damage and address any issues promptly.
Also Read – How To Fix A Pilot Light On A Gas Stove?
Final Thoughts: How To Clean Gas Stove Grates With Ammonia?
Cleaning gas stove grates with ammonia is a highly effective method for restoring them to their original cleanliness and ensuring optimal functionality. By following the step-by-step process outlined in this article, you can achieve remarkable results.
From the meticulous removal of the grates and the careful preparation of the ammonia solution to the thorough soaking, scrubbing, and rinsing processes, every step is essential to the cleaning journey.
Taking preventive measures, such as regular cleaning, using burner covers, and avoiding high heat for extended periods, can significantly reduce the chances of future buildup, ensuring your gas stove grates stay clean for a longer time.
Always work in a well-ventilated area, wear gloves, and handle ammonia with care. By dedicating some time and effort to cleaning your gas stove grates, you not only enhance the appearance of your kitchen appliance but also promote a healthier cooking environment. So, roll up your sleeves, follow these steps, and revel in the satisfaction of a sparkling clean kitchen.
Happy Cleaning!
Also Read – What Is An Infrared Gas Stove?
Frequently Asked Questions (FAQs)
-
How To Clean The Grates On A Gas Stove With Ammonia And Ziplock Bags?
To clean gas stove grates with ammonia and Ziplock bags, place the grates in the bags, add ammonia, seal tightly, and let soak overnight. Scrub grates the next day and rinse for sparkling clean results.
-
Can I Use This Method For Grates With Stubborn, Baked-On Stains?
Yes, soaking the grates in an ammonia solution is effective for even the toughest stains. For extremely stubborn spots, you can repeat the process or use a soft-bristle brush.
-
Is It Safe To Mix Ammonia With Other Cleaning Products?
No, never mix ammonia with other cleaning products, especially bleach, as it can create harmful fumes. Use ammonia in a well-ventilated area and wear gloves for protection.
-
How Often Should I Clean My Gas Stove Grates With Ammonia?
It’s recommended to clean your grates with ammonia at least once a month, depending on usage. Regular maintenance will keep your stove looking and functioning like new.
-
Can I Use This Method For Porcelain-Coated Grates?
Yes, you can use the ammonia cleaning method for porcelain-coated grates. Be gentle while scrubbing to avoid damaging the porcelain coating.
-
Is There An Alternative To Ammonia For Cleaning Gas Stove Grates?
Yes, you can use a mixture of equal parts water and vinegar as an alternative cleaning solution. Let the grates soak, then scrub and rinse as described in the article.
🔧 Stove Expert | 🔥 Gas Guru | 🏠 DIY Enthusiast | 🎨 Painter Extraordinaire
John Davis is your go-to source for all things stoves, from expert repairs to maintenance tips. With a deep understanding of gas systems, including natural and propane, John ensures your kitchen stays cooking safely. His passion for DIY home and kitchen projects shines through his stunning paint transformations. Trust John to bring warmth and functionality to your home, one stove at a time.

