In today’s fast-paced world, cooking has become more than just a necessity; it’s an art form that allows us to savor delicious meals right at home.
When it comes to cooking techniques, simmering is a fundamental skill that can elevate your dishes to a whole new level. Simmering ensures that your food is cooked evenly, flavors are melded, and textures are perfected.
In this comprehensive guide, we’ll delve into the world of simmering on an electric stove, breaking down the step-by-step process of simmering on an electric stove.

Table of Contents
- 1 How To Simmer On An Electric Stove?
- 2 What Is Simmering On A Stove?
- 3 Step-By-Step Guide To Simmer On An Electric Stove
- 4 Different Simmering Techniques
- 5 What Number Is Simmer On Electric Stove?
- 6 Is Simmer The Lowest Setting On Stove?
- 7 Should You Simmer With The Lid On Or Off?
- 8 Simmering Vs Other Cooking Methods
- 9 How To Achieve The Perfect Simmer?
- 10 Avoiding Common Mistakes While Simmering
- 11 Final Verdict On To Simmer On An Electric Stove
- 12 Frequently Asked Questions (FAQs)
How To Simmer On An Electric Stove?
To simmer on an electric stove, choose suitable cookware with a tight-fitting lid. Adjust your electric stove to medium heat and keep an eye on the liquid’s surface. Maintain a gentle simmer with small bubbles rising occasionally for precise and controlled cooking.
Read below for a detailed step-by-step process.
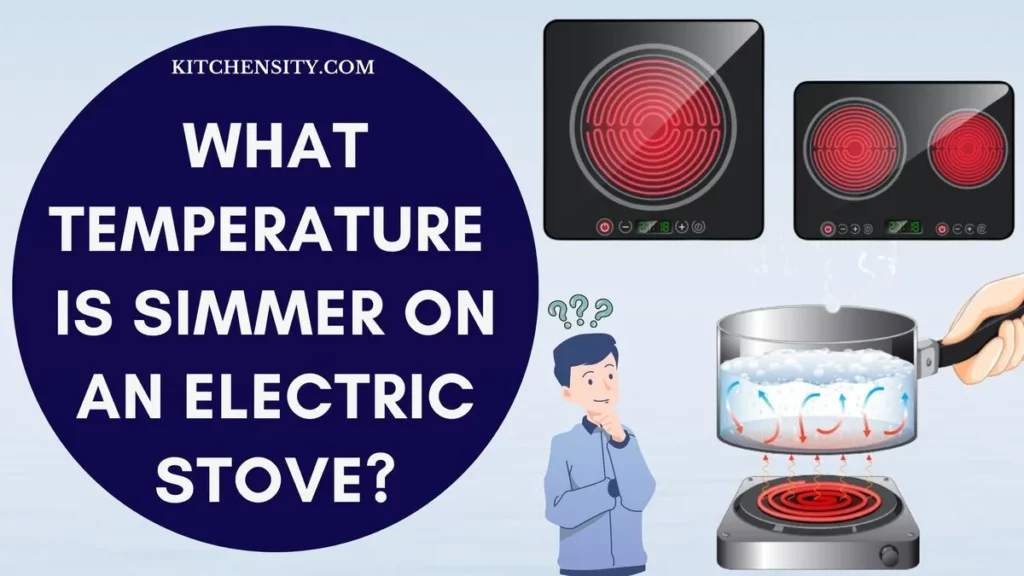
Also Read – What Temperature Is Simmer On An Electric Stove?
What Is Simmering On A Stove?
Simmering on a stove is a cooking technique where a liquid is maintained at a temperature just below its boiling point. Typically, this involves keeping the liquid at a temperature range between 185°F to 205°F (85°C to 96°C).
During simmering, small bubbles will occasionally rise to the surface, but the liquid should not reach a rolling boil. This gentle and steady cooking method cooks food slowly and evenly, allowing flavors to meld, and ingredients to become tender.
Simmering is commonly employed to prepare soups, stews, sauces, and various other dishes to achieve rich and well-developed flavors.
Why Is Simmering Important?
Simmering is important in cooking for several reasons. Here are the key benefits of simmering, presented in a list:
- Flavor Development: Simmering allows flavors from herbs, spices, and ingredients to meld and develop over time, creating a more complex and delicious taste in dishes.
- Tenderizing: It helps break down tough cuts of meat and fibrous vegetables, making them tender and easier to eat.
- Even Cooking: Simmering ensures that food cooks evenly, reducing the risk of overcooking or uneven textures.
- Reduction And Thickening: Simmering can reduce and thicken sauces, soups, and stews, concentrating their flavors and creating desirable consistencies.
- Infusion: It allows for the gradual infusion of flavors from ingredients like spices, herbs, and aromatics into the cooking liquid, enhancing the overall taste of the dish.
- Preservation Of Nutrients: Simmering at lower temperatures helps preserve the nutritional value of ingredients, especially delicate vitamins and minerals.
- Controlled Cooking: It provides a controlled and consistent cooking environment, making it easier to achieve desired results in recipes.
- Preventing Overcooking: Simmering is less likely to overcook delicate ingredients than higher-temperature cooking methods like boiling or frying.
- Complexity And Depth: It contributes to the complexity and depth of flavors in dishes, making them more enjoyable and satisfying.
- Versatility: Simmering is a versatile technique used in various cuisines and for a wide range of recipes, from soups and stews to sauces and braised dishes.
Also Read – Can You Put A Roasting Pan On The Stove?
Step-By-Step Guide To Simmer On An Electric Stove
To simmer on an electric stove, follow these steps for precise and controlled cooking:
- Select The Right Cookware: Choose a heavy-bottomed pot or pan with a tight-fitting lid. This type of cookware helps maintain a consistent simmer by distributing heat evenly.
- Prepare Your Ingredients:
- Chop, slice, or dice your ingredients as required for your recipe. Uniformly cut ingredients will cook more evenly during simmering.
- Season your dish with herbs, spices, and other flavorings as needed. Simmering allows these flavors to meld and develop over time.
- Set The Electric Stove:
- Place your chosen cookware on the electric stove’s burner.
- Turn on the stove to your desired heat setting. Electric stoves offer precise temperature control, so adjust accordingly.
- Begin with medium heat and adjust as necessary to achieve the desired simmer.
- Watch For Simmering Bubbles:
- Keep a close eye on the surface of the liquid in your pot or pan.
- Small bubbles should gently rise to the surface, indicating a proper simmer. These bubbles should be consistent but not rapid.
- Avoid allowing the liquid to reach a rolling boil, which is a higher temperature than simmering.
- Adjust The Heat As Needed:
- If the simmer becomes too vigorous, reduce the heat slightly to maintain a gentle, controlled simmer.
- If the simmer is too weak and the bubbles are barely visible, increase the heat slightly to achieve the desired simmering effect.
- Cover With A Lid:
- Cover the pot or pan with a lid. This helps retain heat, maintains the simmer, and prevents excessive evaporation.
- Use a clear lid if possible to monitor the simmering process without lifting the lid.
- Follow Recipe Guidelines:
- Refer to your recipe for specific simmering times. Different dishes require varying simmering durations.
- Avoid over-simmering, as this can lead to overcooking and the loss of flavor and texture.
- Occasionally Stir:
- Depending on your recipe, you may need to stir the contents of your pot or pan occasionally to prevent sticking or burning.
- Use a gentle stirring motion to avoid disrupting the simmer.
- Maintain Consistency:
- Keep the simmer consistent throughout the cooking process. Adjust the heat as needed to achieve this consistency.
- Taste And Adjust:
- Periodically taste your dish to ensure it’s developing the desired flavors and textures.
- Adjust seasonings, spices, or other ingredients as necessary to achieve the perfect taste.
- Serve And Enjoy:
- Once your dish has simmered for the required time and the flavors have melded, it’s ready to serve.
- Remove it from the heat and enjoy your delicious, simmered creation.
By following these steps, you’ll be able to master the art of simmering on an electric stove, creating flavorful and perfectly cooked dishes with precision and control.
Also Read – Best Cookware For Electric Stoves
Different Simmering Techniques
Simmering is a versatile cooking technique, and there are different simmering techniques you can employ based on your recipe and desired outcomes. Here are some common simmering techniques:
- Regular Simmer:
- This is the standard simmering technique, often used for most recipes.
- Small bubbles consistently break the surface of the liquid, but the liquid itself does not reach a rolling boil.
- It’s suitable for simmering soups, stews, sauces, and many other dishes.
- Gentle Simmer:
- A gentle simmer is used for delicate dishes that require slow and careful cooking.
- In this technique, the bubbles are minimal and rise slowly to the surface.
- It’s commonly used for poaching eggs, simmering delicate seafood, or preparing sauces like hollandaise.
- Rapid Simmer:
- Some recipes may call for a slightly more vigorous simmer.
- In a rapid simmer, you’ll see more active bubbling compared to a regular simmer, but it’s still controlled and not a rolling boil.
- This technique is used when you want to reduce the cooking time slightly but still maintain the benefits of simmering.
- Barely Simmer:
- This technique involves simmering at the lowest possible heat setting while still maintaining a few tiny bubbles.
- It’s used for extremely delicate dishes or when you need to keep a dish warm without further cooking it.
- Intermittent Simmer:
- In some recipes, you might use intermittent simmering, where you alternate between simmering and resting periods.
- This technique is used to achieve specific textures and flavors, such as when braising tough cuts of meat.
- Adjustable Simmer:
- For certain dishes, you might need to adjust the simmering intensity throughout the cooking process.
- Start with a regular simmer and then adjust the heat as needed to maintain the desired level of simmer.
- Simmering With Lid On/Off:
- The use of a lid during simmering can affect the outcome of your dish.
- Cooking with the lid on helps retain moisture and flavors, while cooking with the lid off can reduce liquid and concentrate flavors.
- Simmer And Reduce:
- This technique involves simmering a liquid to reduce its volume, concentrate flavors, and thicken the sauce or broth.
When choosing a simmering technique, it’s essential to consider your recipe’s requirements and the specific results you want to achieve. Adjust the heat and technique accordingly to ensure your dishes turn out perfectly simmered, flavorful, and well-cooked.
Also Read – Can Induction Pans Be Used On Gas Stoves?
What Number Is Simmer On Electric Stove?
The specific number on an electric stove that corresponds to a simmer can vary depending on the stove model and brand. Electric stoves typically have numbered heat settings or temperature dials, with “1” being the lowest and “10” or “High” being the highest.
For a simmer on most electric stoves, you’ll typically want to set the heat to somewhere around 2 to 4 on the dial. This range represents a low to medium-low heat, which is suitable for simmering.
However, the ideal setting may vary based on the type of dish you’re preparing, the cookware you’re using, and your stove’s specific characteristics.
It’s essential to become familiar with your electric stove and experiment with different settings to find the perfect simmer for your recipes.
Additionally, using a kitchen thermometer to monitor the temperature of the liquid can be a precise way to achieve and maintain the desired simmering temperature.
Is Simmer The Lowest Setting On Stove?
No, a simmer is not necessarily the lowest setting on a stove. Simmering typically involves maintaining a low, steady heat, but it’s not necessarily the lowest possible setting. On most stoves, there are heat settings below the simmer level.
Simmering usually falls within the range of low to medium-low heat. The exact heat setting for simmering can vary depending on the stove’s make and model, as well as the specific recipe and cookware being used.
It’s important to become familiar with your stove’s temperature settings and to adjust the heat as needed to achieve the ideal simmer for your dishes.
Also Read – Can Clay Pots Be Used On The Gas Stove?
Should You Simmer With The Lid On Or Off?
Whether you should simmer with the lid on or off depends on the recipe and the specific outcome you want to achieve. Both methods have their advantages:
Simmering With The Lid On
- Retains Moisture: Keeping the lid on traps moisture within the pot or pan, which can be beneficial for dishes like soups and stews. It helps prevent excessive evaporation and keeps the dish from drying out.
- Enhanced Flavor Infusion: The trapped steam and moisture can lead to better flavor infusion as it circulates within the closed environment.
- Temperature Control: Using a lid can help maintain a consistent temperature inside the cookware.
Simmering With The Lid Off
- Evaporation and Reduction: Simmering with the lid off allows moisture to evaporate more freely. This can be advantageous when you want to reduce the volume of a sauce or concentrate flavors.
- Thicker Consistency: The reduction of liquid can lead to a thicker sauce or broth, which is desirable in some recipes.
- Visual Monitoring: Simmering without a lid provides a clear view of the dish, making it easier to visually assess its progress.
Here Are Some General Guidelines
- Lid On: Use the lid when you want to retain moisture and create a well-hydrated dish, such as soups, braises, or dishes that require a consistent simmer.
- Lid Off: Simmer without the lid when you want to reduce liquid or concentrate flavors, such as when making sauces, gravies, or certain reductions.
It’s important to follow the specific instructions provided in your recipe, as they will often indicate whether to simmer with the lid on or off. Additionally, you can adjust the cooking process as needed based on your culinary goals and the desired consistency of the dish.
Simmering Vs Other Cooking Methods
Simmering is a cooking method that stands out for its unique characteristics and benefits. Let’s compare simmering to some other common cooking methods to understand its distinct advantages and differences:
Simmering Vs. Boiling
- Simmering: Simmering involves cooking a liquid at a temperature just below its boiling point (typically between 185°F to 205°F or 85°C to 96°C). Small, gentle bubbles occasionally rise to the surface.
- Boiling: Boiling, on the other hand, involves cooking a liquid at its boiling point (212°F or 100°C at sea level) with vigorous bubbles continuously breaking the surface.
- Difference: The key difference is the temperature and intensity of the bubbles. Simmering is gentler and more suitable for delicate ingredients and slow cooking while boiling is used for rapidly cooking foods like pasta or blanching vegetables.
Simmering Vs. Frying
- Simmering: Simmering is a moist-heat cooking method primarily used for liquids, such as soups, stews, and sauces. It involves slow cooking and infusing flavors.
- Frying: Frying is a dry-heat cooking method that involves submerging food in hot oil or cooking it on a hot, dry surface. It’s used for browning, crisping, and quick cooking.
- Difference: Simmering is about slow and gentle cooking, whereas frying is fast and intense. They serve different purposes in cooking, with simmering focusing on developing complex flavors and frying to achieve crispy textures.
Simmering Vs. Roasting
- Simmering: Simmering involves cooking food submerged in a liquid over a low, steady heat, ideal for tenderizing and flavor infusion.
- Roasting: Roasting is a dry-heat cooking method where food is cooked in an open, dry environment, often in an oven. It’s used for browning and caramelization.
- Difference: Simmering is a wet cooking method, whereas roasting is dry. Roasting is ideal for achieving crispy exteriors while simmering is best for creating moist, tender dishes.
Simmering Vs. Grilling
- Simmering: Simmering is a gentle cooking method, typically used indoors on stovetops, and is ideal for preparing dishes like soups and braised meats.
- Grilling: Grilling is an outdoor cooking method where food is cooked directly over an open flame or heat source, resulting in smoky flavors and grill marks.
- Difference: Simmering is a controlled, low-heat method, while grilling is high-heat and imparts a distinct grilled flavor. They serve different culinary purposes.
Simmering Vs. Poaching
- Simmering: Simmering involves cooking food in a liquid at a temperature just below its boiling point, typically between 185°F to 205°F (85°C to 96°C). It produces small, occasional bubbles on the liquid’s surface.
- Poaching: Poaching is a cooking method where food is gently cooked in a liquid, usually at a lower temperature than simmering, typically between 160°F to 180°F (71°C to 82°C). There should be no bubbles or very minimal, gentle movement in the liquid.
- Difference: The primary difference lies in the temperature and the degree of agitation in the liquid. Simmering is at a slightly higher temperature and involves small, consistent bubbles, while poaching is done at a lower temperature with no or minimal movement in the liquid.
How To Achieve The Perfect Simmer?
Achieving the perfect simmer is both an art and a science, and it often involves a combination of experimentation, practice, and tips from culinary experts. Here’s how you can master the art of simmering:
- Experiment And Learn:
- Simmering is a skill that improves with practice. Start by experimenting with different recipes and ingredients to understand how they respond to simmering.
- Try simmering various dishes like soups, stews, sauces, and braised meats to gain experience.
- Seek Culinary Expertise:
- Learn from culinary experts, whether through cookbooks, online tutorials, or cooking classes.
- They can provide valuable insights into achieving the perfect simmer.
- Use The Right Cookware:
- Invest in quality cookware with a heavy-bottomed design.
- This type of cookware helps distribute heat evenly, preventing scorching and ensuring consistent simmering.
- Temperature Control:
- Get to know your electric stove’s temperature settings intimately. Electric stoves provide precise control, so familiarize yourself with the heat levels and how they affect simmering.
- Use a kitchen thermometer to monitor the liquid’s temperature. This can help you maintain the ideal simmering range.
- Practice Patience:
- Simmering is a slow and patient cooking method.
- Avoid the temptation to rush the process by turning up the heat.
- Allow the flavors to develop over time.
- Lid On Or Off:
- Decide whether your recipe benefits from simmering with the lid on or off.
- A lid helps retain moisture and flavors while simmering without a lid can reduce liquid and concentrate flavors.
- Stir With Care:
- Depending on your recipe, stir the contents of the pot or pan occasionally to prevent sticking or burning.
- Use a gentle stirring motion to avoid disrupting the simmer.
- Adapt To Ingredients:
- Different ingredients require different simmering times. For example, tough cuts of meat may need longer simmering than delicate vegetables.
- Adjust the simmering time based on the ingredients you are using.
- Maintain Consistency:
- Consistency in the simmer is crucial.
- Continually monitor the bubbles on the liquid’s surface. They should be small and gentle, not turbulent.
- Adjust the heat as needed to maintain this steady simmer.
- Record Your Experiments:
- Keep a cooking journal where you note the results of your simmering experiments.
- Record the heat settings, ingredients, and the final taste and texture.
- This can be a valuable reference for future cooking endeavors.
- Seek Feedback:
- If possible, have experienced cooks or food enthusiasts taste your dishes and provide feedback.
- They can offer valuable insights and tips for improvement.
- Practice, Practice, Practice:
- The more you practice simmering, the more intuitive it becomes.
- Over time, you’ll develop a sense of when the simmer is just right for your dishes.
Remember that achieving the perfect simmer is a skill that evolves with experience. Don’t be discouraged by initial challenges; instead, embrace them as opportunities to refine your culinary abilities and create flavorful, beautifully simmered dishes.
Avoiding Common Mistakes While Simmering
Avoiding common mistakes during simmering is essential to achieving delicious and perfectly cooked dishes. Here are some tips to help you steer clear of common pitfalls:
- Overcrowding The Pot Or Pan:
- Mistake: Overloading the cookware with too many ingredients can prevent even cooking and hinder the simmering process.
- Solution: Ensure there’s enough space in the pot or pan for ingredients to simmer comfortably without overcrowding. Use a larger cookware if necessary.
- Using Too Much Liquid:
- Mistake: Adding excessive liquid can dilute flavors and lead to a watery dish.
- Solution: Follow your recipe’s guidelines for liquid measurements, or adjust as needed to achieve the desired consistency.
- Starting With Boiling Instead Of Simmering:
- Mistake: Beginning with high heat that brings the liquid to a rolling boil rather than a simmer can result in overcooking or uneven textures.
- Solution: Start with medium heat and gradually increase or decrease as necessary to reach the perfect simmer.
- Neglecting To Stir Occasionally:
- Mistake: Failing to stir occasionally can lead to ingredients sticking to the bottom of the pot or pan and burning.
- Solution: Stir gently and periodically to ensure even cooking and prevent sticking.
- Not Using A Lid When Needed:
- Mistake: Neglecting to cover the pot or pan with a lid when the recipe calls for it can lead to excessive evaporation and loss of moisture.
- Solution: Follow your recipe’s instructions regarding the use of a lid. A lid helps retain moisture and flavors in many simmering dishes.
- Ignoring Seasoning And Flavoring:
- Mistake: Neglecting to season or flavor the dish adequately can result in a bland outcome.
- Solution: Season and add herbs, spices, and aromatics as instructed in the recipe. Simmering allows these flavors to meld and develop over time.
- Overcooking Ingredients:
- Mistake: Allowing ingredients to simmer for too long can lead to overcooking and a loss of texture and flavor.
- Solution: Pay close attention to your recipe’s recommended simmering times and taste the dish to check for doneness.
- Not Adjusting The Heat:
- Mistake: Failing to adjust the heat to maintain a steady simmer can result in inconsistent cooking.
- Solution: Continually monitor the simmer and adjust the heat as needed to maintain a gentle, consistent bubbling.
- Lifting The Lid Too Frequently:
- Mistake: Frequent lid removal can cause temperature fluctuations and slow down the cooking process.
- Solution: Avoid unnecessary lid lifting. Use a clear lid when possible to monitor the simmer without removing it.
- Skipping The Skim:
- Mistake: Some recipes, particularly for broths and stocks, require skimming impurities and foam from the surface during simmering.
- Solution: Follow your recipe’s instructions for skimming to ensure a clear and clean result.
Final Verdict On To Simmer On An Electric Stove
In conclusion, mastering the art of simmering on an electric stove is a valuable culinary skill that can elevate your cooking to new heights. To achieve the perfect simmer:
- Select The Right Cookware: Use heavy-bottomed pots or pans with tight-fitting lids for even heat distribution.
- Set The Right Temperature: Understand your stove’s heat settings and start with medium heat, adjusting as needed.
- Observe The Bubbles: Look for small, gentle bubbles on the liquid’s surface as an indicator of a proper simmer.
- Adjust Heat And Lid: Continually monitor and adjust the heat to maintain a steady simmer. Use a lid when moisture retention is required, and remove it when reducing or concentrating flavors.
- Stir And Season: Stir occasionally to prevent sticking, and season your dish with herbs and spices to develop flavors.
- Follow Recipe Instructions: Pay attention to simmering times and other recipe-specific guidance.
- Practice And Experiment: Simmering is a skill that improves with practice and experimentation. Keep a cooking journal to record your findings.
Ultimately, achieving the perfect simmer on your electric stove allows you to create dishes that are rich in flavor, tender in texture, and beautifully cooked. With patience and attention to detail, you can become a simmering expert, bringing out the best in your culinary creations.
So, don’t hesitate to explore the world of simmering, experiment with various recipes, and savor the delicious results.
Frequently Asked Questions (FAQs)
-
What Is The Difference Between Simmering And Boiling?
Simmering involves maintaining a low, gentle boil while boiling is a rapid, rolling boil at a higher temperature.
-
Can I Simmer On Any Type Of Electric Stove?
Yes, you can simmer on most electric stoves. Just adjust the heat settings accordingly.
-
How Do I Prevent My Dish From Over-Simmering?
Keep an eye on the heat and reduce it if the simmer becomes too vigorous.
-
Can I Use A Slow Cooker Instead Of Simmering On The Stove?
Yes, a slow cooker can achieve similar results, but the method differs.
-
What Are Some Recipes That Benefit From Simmering?
Soups, stews, pasta sauces, and braised dishes are all excellent candidates for simmering.
Katrina Smith is a seasoned expert with over 25 years of experience in all things related to cooking and the kitchen. As an avid cook and kitchen enthusiast, she is passionate about sharing her knowledge and expertise on cookware, kitchen appliances, kitchen tips, and kitchen staples.
Through her articles and reviews, Katrina aims to inspire and help others improve their cooking skills, experiment with different ingredients, and invest in quality cookware and appliances.

