When it comes to cooking, traditional methods often hold a charm that modern alternatives can’t quite replicate.
Clay cooking pots, known for their ability to impart a unique flavor and retain moisture, have been used for generations across cultures. Sealing a clay cooking pot is essential to ensure its effectiveness and longevity.
In this article, we’ll explore the step-by-step process of sealing a clay cooking pot, preserving its traditional benefits while enhancing your culinary adventures.

Table of Contents
- 1 How To Seal A Clay Cooking Pot?
- 2 Understanding The Significance Of Clay Cooking Pots
- 3 Why Sealing Matters: The Science Behind It
- 4 A Step-By-Step Guide To Seal A Clay Cooking Pot
- 5 What Is The Best Thing To Seal Clay With?
- 6 Unlocking The Flavors: Cooking In Your Sealed Clay Pot
- 7 How To Seal Unglazed Pottery Food Safe?
- 8 Preservation And Longevity
- 9 Safety Measures
- 10 Final Verdict: Tradition Sealed with Flavor
- 11 FAQs – How To Seal A Clay Cooking Pot?
- 11.1 Do Clay Pots Need To Be Sealed?
- 11.2 What Can I Use To Seal The Inside Of A Clay Pot?
- 11.3 Is It Necessary To Seal A Clay Cooking Pot?
- 11.4 What Kind Of Sealant Should I Use?
- 11.5 Can I Use A Glazed Clay Pot?
- 11.6 How Often Should I Reapply The Sealant?
- 11.7 Can I Cook On Direct Flame With A Sealed Clay Pot?
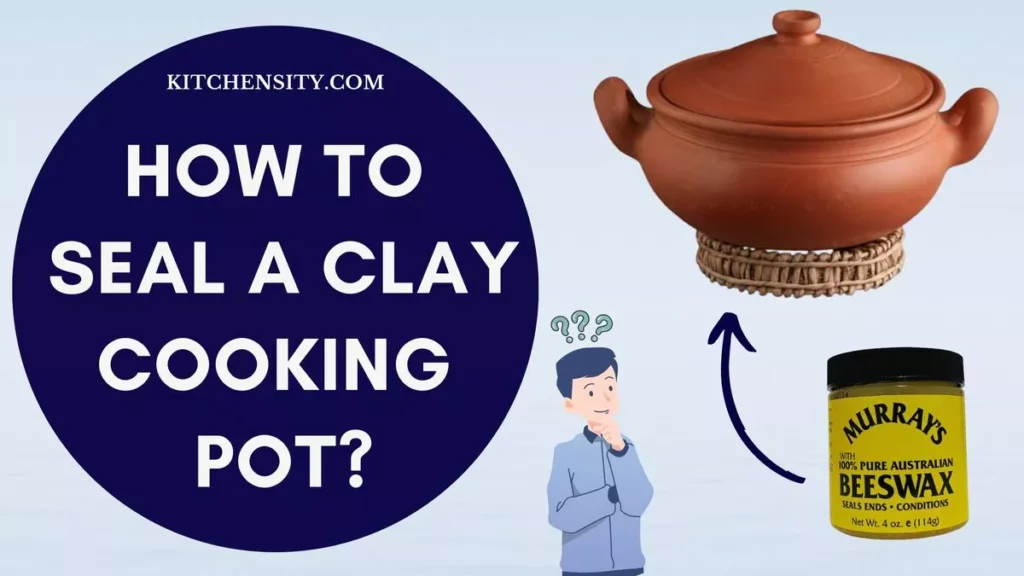
How To Seal A Clay Cooking Pot?
To seal a clay cooking pot, choose a natural sealant like beeswax or plant-based oil. Clean the pot thoroughly, apply the sealant to both the interior and exterior, and allow it to dry for a day. Optionally, cure the sealant in the oven gradually, and test the seal with a water test before using the pot.
Read below for a detailed step-by-step guide.
Also Read – How To Season A Clay Pot For Cooking?
Understanding The Significance Of Clay Cooking Pots
Clay cooking pots hold a rich historical importance across cultures. Dating back to ancient civilizations, they symbolize tradition and authenticity. Their porous nature allows even heat distribution, enhancing flavors and retaining moisture.
Beyond practicality, these pots carry cultural identity, with each region having its unique style. Cooking with clay connects us to our heritage, adding depth to modern culinary experiences. In a world of advanced cookware, clay pots remind us of the timeless, flavorful art of cooking.
Why Sealing Matters: The Science Behind It
Sealing clay cooking pots isn’t just a formality – it’s rooted in science and culinary wisdom. The porous nature of clay pots, while great for flavor infusion, poses challenges. Unsealed, they allow moisture and flavors to escape, resulting in drier dishes. This is where sealing steps in.
- By sealing a clay pot, you create a barrier that prevents the escape of steam and flavors during cooking. This simple yet effective process transforms your cooking experience.
- The sealed environment helps ingredients release their aromas and infuse the dish, resulting in succulent, flavorful meals.
- The science of sealing lies in maintaining the delicate balance of moisture and heat. As food simmers inside the sealed pot, steam forms, and flavors develop.
- Without proper sealing, these valuable components evaporate, leaving your dish lacking in taste and texture.
In essence, sealing a clay pot optimizes the cooking process. It ensures that your efforts in selecting and combining ingredients culminate in a harmonious, richly flavored outcome.
Through a combination of tradition and scientific understanding, sealing clay cooking pots is the secret to achieving extraordinary culinary results.
Also Read – How To Clean Clay Pots?
A Step-By-Step Guide To Seal A Clay Cooking Pot
Sealing a clay cooking pot is a straightforward yet essential process that elevates your cooking experience by retaining flavors and moisture. This step-by-step guide will walk you through the process, ensuring that your clay pot becomes a trusted tool in your culinary arsenal.
Step 1: Gather Your Supplies
Before you begin, gather all the necessary supplies:
- An unglazed clay cooking pot
- Natural sealant (beeswax, plant-based oil, or rice paste)
- Clean cloth
- Brush
Step 2: Clean And Soak The Pot
- Thoroughly clean the clay pot using mild detergent and water.
- Rinse it thoroughly to remove any residue. After cleaning, immerse the pot in water and let it soak for a few hours.
- This step ensures that the clay is properly hydrated and ready for the sealing process.
Step 3: Dry Thoroughly
- Once the pot has soaked, remove it from the water and allow it to air-dry completely.
- Make sure there is no excess water on the surface of the pot before proceeding to the next step.
Step 4: Select The Sealant
- Choose your preferred sealant.
- Beeswax offers a protective layer, while plant-based oils and rice paste provide natural sealing options.
- These options are food-safe and ensure that no harmful chemicals leach into your food.
Also Read – Benefits Of Clay Pot Cooking
Step 5: Apply The Sealant
- Using a brush, apply the selected sealant to both the interior and exterior surfaces of the pot.
- Ensure that the sealant is spread evenly, covering every inch of the clay.
- This even coat is crucial to creating an effective barrier that retains moisture and flavor.
Step 6: Achieve An Even Coat
- Take extra care to achieve an even coat of sealant.
- This prevents uneven heating during cooking and maximizes the effectiveness of the seal.
- Pay attention to the nooks and crannies of the pot, ensuring that every surface is covered.
Step 7: Allow Drying Time
- After applying the sealant, let the pot dry for at least a day.
- This drying time allows the sealant to set appropriately and create a strong barrier that will withstand cooking temperatures.
Step 8: Cure The Sealant
- To further enhance the seal, you can choose to cure the pot in the oven.
- Place the pot in a cold oven, then gradually increase the temperature.
- This process helps the sealant bond with the clay, providing a more durable and long-lasting seal.
Also Read – How To Use Clay Cooking Pans?
Step 9: Test The Seal
- Before you start cooking with your sealed pot, it’s essential to test the effectiveness of the seal.
- Fill the pot with water and let it sit for a few hours.
- Check the exterior of the pot for any signs of moisture. If the exterior remains dry, your seal is successful.
- If you notice any leaks, you may need to reapply the sealant to those areas.
Step 10: Maintain The Seal
- After using the sealed pot, clean it gently with a soft sponge and mild detergent.
- Avoid abrasive cleaners that could damage the seal.
- Depending on usage, you may need to reapply the sealant every few months to ensure its effectiveness over time.
Sealing a clay cooking pot is a simple yet rewarding process that enhances your cooking endeavors. By following these steps, you’re ensuring that your clay pot becomes a reliable tool that preserves flavors, retains moisture, and brings the joy of traditional cooking to your kitchen.
Also Read – Clay Pot Vs Dutch Oven
What Is The Best Thing To Seal Clay With?
When it comes to sealing clay, especially for pottery or cooking pots, choosing the right sealant is crucial. The best sealant for clay should be safe, effective, and compatible with both the clay’s porous nature and its intended use. Here are some options to consider:
- Beeswax: Beeswax is a natural and popular choice for sealing clay. It forms a protective barrier that helps retain moisture and enhances the clay’s natural qualities. Beeswax is food-safe, making it suitable for sealing pottery intended for culinary use.
- Plant-Based Oils: Certain plant-based oils like linseed oil and walnut oil can be used to seal clay. These oils penetrate the clay, providing a protective layer while preserving the clay’s breathability. Make sure to use oils that are safe for consumption if sealing pottery for food use.
- Commercial Ceramic Sealants: There are commercial sealants specifically designed for sealing ceramics and pottery. These sealants are often formulated to be food-safe and provide a durable protective layer. Always check the product label to ensure it’s suitable for your intended purpose.
- Rice Paste: Rice paste, made from a mixture of rice flour and water, can also be used as a natural sealant for clay. It’s safe, non-toxic, and easy to apply. While it may not offer as strong of a seal as other options, it’s a viable choice for decorative pottery.
- Food-Grade Silicone: Food-grade silicone sealants are designed to be safe for contact with food and can be used to seal clay for food-related purposes. These sealants create a flexible and water-resistant barrier.
- Glazing: If you’re working with pottery, glazing is a traditional method of sealing clay. Glazes are applied before firing the pottery in a kiln. Glazing not only seals the clay but also adds color and texture.
Ultimately, the best sealant for your clay project depends on its intended use, whether it’s for decorative purposes or culinary applications. Whichever option you choose, make sure to follow the manufacturer’s instructions for application and curing to achieve the best results.
Also Read – Glazed Vs Unglazed Clay Pots
Unlocking The Flavors: Cooking In Your Sealed Clay Pot
Cooking with a sealed clay pot is like embarking on a culinary adventure where flavors are heightened, aromas are preserved, and every bite is a revelation.
The process of cooking in a sealed clay pot takes your dishes to a whole new level, allowing you to unlock a symphony of tastes that are both delightful and memorable.
Slow Cooking Delicacies
Sealed clay pots are renowned for their ability to conduct heat evenly and gently. This makes them perfect for slow-cooked dishes that require time to develop rich flavors.
As you simmer ingredients over a low flame, the sealed environment traps steam and moisture, infusing every element of your dish with an intensified taste.
Retaining Aromas And Nutrients
One of the remarkable qualities of a sealed clay pot is its capacity to retain the natural aromas and nutrients of the ingredients.
As the ingredients release their fragrant notes, the pot captures and recirculates them, ensuring that each bite carries the essence of the dish. The result is a harmonious blend of flavors that dance on your taste buds.
Also Read – Can Clay Pots Be Used On The Gas Stove?
Preserving Moisture And Texture
Cooking in a sealed clay pot keeps the moisture within the pot, preventing your dishes from drying out.
The clay’s porous nature aids in the gradual release of steam, allowing the ingredients to baste in their juices. This not only keeps the food tender but also enhances its succulence, giving you a fork-tender experience that’s hard to replicate with other cookware.
Enhancing Flavor Infusion
The sealed environment of the clay pot allows ingredients to meld together, creating intricate layers of flavor.
As the pot heats up, the flavors interact, intensify, and intermingle, resulting in a dish that’s more than the sum of its parts.
It’s a magic that happens slowly and steadily, as the clay pot works its alchemical wonders on your culinary creation.
Also Read – Disadvantages Of Cooking In Clay Pots
Exploring Culinary Versatility
Sealed clay pots are versatile tools in the kitchen. From stews and soups to curries and casseroles, these pots adapt effortlessly to a variety of cuisines and cooking styles.
They are equally adept at making hearty comfort food as they are at bringing out the subtleties of delicate dishes, making them an indispensable tool for any cook.
Cooking in a sealed clay pot is more than just a cooking method; it’s an experience that engages your senses and elevates your meals to new heights.
With every dish that emerges from the pot, you’re unearthing a treasure trove of flavors that have been coaxed and cultivated in a sealed environment. So, embark on this flavorful journey, and let your sealed clay pot be your companion in the pursuit of culinary excellence.
How To Seal Unglazed Pottery Food Safe?
Sealing unglazed pottery for safe use with food involves a simple yet crucial process to ensure that your pottery remains both functional and food-friendly.
Whether you’re looking to create a food-safe mug, bowl, or any other pottery piece, follow these steps to seal it properly.
- Step 1: Clean The Pottery: Before sealing, make sure the pottery is clean and free from any dirt, dust, or residue. Wash it with mild soap and water, then rinse thoroughly to remove all cleaning agents.
- Step 2: Choose A Food-Safe Sealant: Select a food-safe sealant that’s specifically designed for pottery and ceramics. Look for sealants that are labeled non-toxic, lead-free, and safe for contact with food.
- Step 3: Apply The Sealant: Using a soft brush or a sponge, apply a thin, even layer of the food-safe sealant to the entire surface of the unglazed pottery. Ensure that the sealant covers the inside and outside of the piece.
- Step 4: Allow To Dry: Let the pottery dry for the time specified on the sealant’s instructions. This could range from a few hours to overnight. Avoid touching the pottery while it’s drying to prevent smudges or uneven application.
- Step 5: Apply Additional Coats (Optional): Depending on the sealant’s instructions, you might need to apply multiple coats for optimal coverage. Make sure to allow each layer to dry before applying the next.
- Step 6: Cure The Sealant: After the final coat, cure the sealant according to the manufacturer’s recommendations. This may involve air-drying or baking the pottery in an oven at a specific temperature and duration.
- Step 7: Test The Seal: Once the sealant is fully cured, perform a water test to ensure its effectiveness. Fill the pottery with water and let it sit for a few hours. If the pottery remains dry on the outside, the sealant is working.
- Step 8: Maintenance And Care: To maintain the food-safe seal, wash the pottery gently by hand using mild soap and water. Avoid abrasive scrubbers or harsh chemicals that could damage the sealant.
Preservation And Longevity
Proper care and storage can extend the life of your clay pot, ensuring that it remains a cherished part of your kitchen for years to come.
Storing Your Sealed Clay Pot
- When it comes to preserving your clay pot, proper storage is key.
- After each use, make sure to clean it gently with a soft sponge and mild detergent.
- Avoid using abrasive cleaners that could compromise the seal.
- Once cleaned, let the pot air-dry thoroughly before storing it.
- Moisture trapped in an enclosed space can lead to mold and deterioration, so it’s crucial to ensure the pot is thoroughly dry.
Choosing The Right Location
- Select a cool, dry location for storing your sealed clay pot.
- Excessive heat or humidity can impact the integrity of the seal over time.
- Avoid placing the pot near direct sunlight or sources of heat, as this can cause the clay to dry out and potentially crack.
- If you have limited storage options, consider wrapping the pot in a breathable cloth to protect it from dust and potential damage.
Avoiding Common Mistakes
- To ensure the longevity of your sealed clay pot, it’s essential to handle it with care.
- Avoid drastic temperature changes, such as placing a cold pot directly on a hot stove, as this can lead to cracks.
- Similarly, avoid sudden changes from hot to cold, such as transferring a hot pot to a cold surface.
- Gradual transitions in temperature are key to preventing thermal shock and preserving the pot’s structural integrity.
Regular Inspections
- Periodically inspect your sealed clay pot for any signs of wear or damage.
- Check the sealant for any cracks or areas that might need touch-ups.
- If you notice any issues, reapply the sealant as necessary and follow the curing process to ensure a strong bond.
- By addressing minor issues early, you can prevent them from developing into more significant problems that could compromise the pot’s effectiveness.
Also Read – How To Use A Baguette Pan?
Safety Measures
While cooking with a sealed clay pot is a rewarding experience, it’s essential to prioritize safety to ensure a hassle-free and enjoyable culinary journey. By following these safety measures, you can confidently harness the potential of your clay pot without any risks.
1. Handling Hot Clay Pots
- Use Oven Mitts Or Towels: Always use oven mitts or thick towels when handling a hot clay pot. The exterior of the pot can become extremely hot during cooking, and proper protection is crucial to prevent burns.
- Avoid Direct Contact: Never touch the exterior of the pot with bare hands while it’s hot. Even if it appears cool, residual heat can still cause burns.
2. Preventing Cracks And Breaks
- Gradual Temperature Changes: When using a clay pot, avoid sudden temperature changes. For example, don’t transfer a cold clay pot directly to a hot stovetop or a hot oven. Gradually increasing or decreasing the temperature helps prevent thermal shock that can lead to cracks.
- Heating Diffusers: When cooking on a stovetop, consider using a heat diffuser between the pot and the flame. This helps distribute heat more evenly, reducing the risk of localized high temperatures that can cause cracks.
- Avoid Impact: Handle your clay pot with care and avoid accidentally banging it against hard surfaces, as this can lead to cracks or breaks.
3. Cleaning And Maintenance
- Gentle Cleaning: When cleaning your sealed clay pot, use a soft sponge and mild detergent. Avoid abrasive scrubbers or harsh chemicals that could damage the sealant or the pot’s surface.
- Avoid Drastic Temperature Changes: After cooking, allow your clay pot to cool down naturally before cleaning it. Placing a hot pot in cold water or using cold water to clean a hot pot can lead to cracks.
4. Storage Considerations
- Cool And Dry Storage: Store your sealed clay pot in a cool, dry place away from direct sunlight, heat sources, and humidity. This ensures the pot’s longevity and prevents deterioration.
- Avoid Stacking: When storing multiple clay pots, avoid stacking them on top of each other, as this can lead to pressure and potential damage.
Also Read – Baguette Pan Vs Baking Stone
Final Verdict: Tradition Sealed with Flavor
Sealing a clay cooking pot isn’t just about cooking – it’s like keeping a tradition alive while making your food taste amazing. We’ve learned how to seal the pot step by step, and it’s not just sealing; it’s like giving your cooking a special power.
By sealing, we keep the yummy flavors in the pot. So when we cook things slowly, like stews or curries, the food becomes really tasty. It’s like a magic trick that makes the food smell and taste so good.
But it’s not just about cooking. It’s also about being safe. We need to use special mitts or towels when touching the hot pot. And we should be careful not to make the pot go from hot to cold too quickly because that can break it.
And when we’re done cooking, we should clean the pot gently and find a good spot to store it. Not too hot, not too wet. Taking care of the pot means it will stay with us for a long time.
So, when you use your sealed clay pot, you’re not just making food – you’re keeping a really old way of cooking alive. It’s like a special gift that makes your food taste awesome and connects you to people from a long time ago.
Try the flavors. Keep the tradition. Seal your memories.
Also Read – How To Clean White Mineral Deposits From Pans?
FAQs – How To Seal A Clay Cooking Pot?
-
Do Clay Pots Need To Be Sealed?
Sealing clay pots is recommended to prevent moisture loss, enhance flavors, and create a barrier against porous clay.
-
What Can I Use To Seal The Inside Of A Clay Pot?
You can use natural options like beeswax or plant-based oils to seal the inside of a clay pot, preserving its qualities while ensuring it’s food-safe.
-
Is It Necessary To Seal A Clay Cooking Pot?
Sealing a clay cooking pot is recommended to prevent moisture loss and enhance flavor retention.
-
What Kind Of Sealant Should I Use?
Natural options like beeswax or plant-based oils are preferable for sealing clay pots.
-
Can I Use A Glazed Clay Pot?
Glazed pots do not need sealing, as the glaze acts as a natural sealant.
-
How Often Should I Reapply The Sealant?
Depending on usage, you might need to reapply the sealant every few months.
-
Can I Cook On Direct Flame With A Sealed Clay Pot?
It’s best to use a heat diffuser or a low flame to prevent thermal shock and cracks in the pot.
Katrina Smith is a seasoned expert with over 25 years of experience in all things related to cooking and the kitchen. As an avid cook and kitchen enthusiast, she is passionate about sharing her knowledge and expertise on cookware, kitchen appliances, kitchen tips, and kitchen staples.
Through her articles and reviews, Katrina aims to inspire and help others improve their cooking skills, experiment with different ingredients, and invest in quality cookware and appliances.

![How To Season And Clean Cast Iron Cookware? [4 Effective Ways] 3 How To Season And Clean Cast Iron Cookware](https://www.kitchensity.com/wp-content/uploads/2020/06/How-To-Season-And-Clean-Cast-Iron-Cookware.jpg)

![Stainless Steel Vs Nonstick Vs Ceramic Cookware Set [An Ultimate Guide 2023] 5 Stainless Steel vs Nonstick vs Ceramic Cookware Set](https://www.kitchensity.com/wp-content/uploads/2019/09/Stainless-Steel-vs-Ceramic-vs-Nonstick-Cookware-Sets-e1621083482728.jpg)

![What Pans Can You Use Cooking Spray On? [Ultimate Guide] 7 Types of pans with which cooking spray can be used](https://www.kitchensity.com/wp-content/uploads/2023/02/What-Pans-Can-You-Use-Cooking-Spray-On.jpg)
