Gas stoves are a popular choice in many kitchens due to their efficiency and precise temperature control.
However, if you’ve noticed that the flame on your gas stove has turned yellow instead of the usual blue, it could indicate a problem that needs attention.
In this article, we will explore the common reasons behind a yellow flame on a gas stove and provide step-by-step instructions on how to fix it.
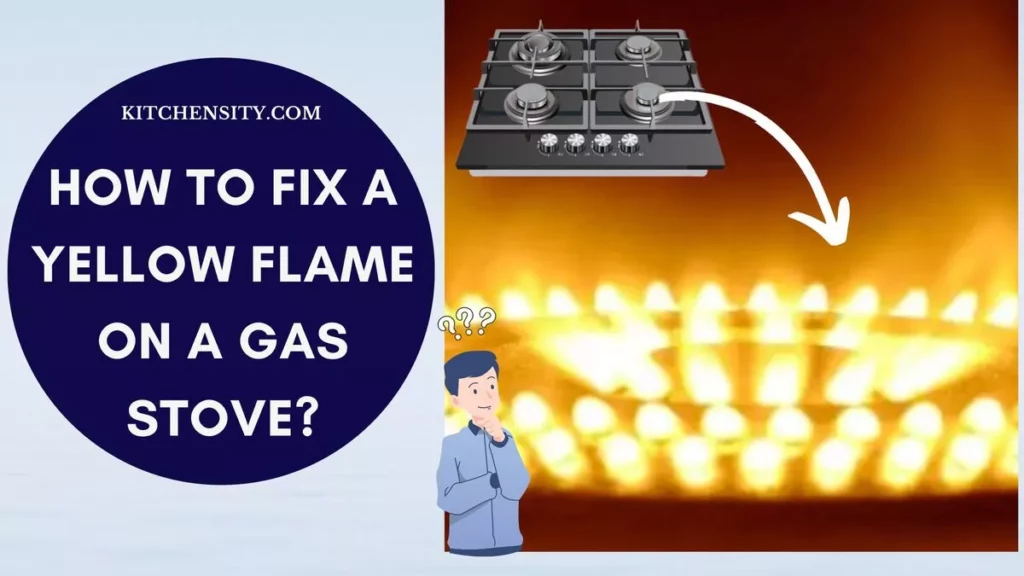
Table of Contents
- 1 How To Fix A Yellow Flame On A Gas Stove?
- 2 What Causes A Yellow Flame On A Gas Stove?
- 3 Step-By-Step Process To Fix A Yellow Flame On A Gas Stove
- 3.1 Step 1: Turn Off The Gas Supply
- 3.2 Step 2: Ensure Proper Ventilation
- 3.3 Step 3: Remove Grates And Burner Caps
- 3.4 Step 4: Check For Clogged Burner Ports
- 3.5 Step 5: Adjust The Air Shutter
- 3.6 Step 6: Inspect Gas Pressure
- 3.7 Step 7: Clean Burner Heads
- 3.8 Step 8: Reassemble And Test
- 3.9 Step 9: Monitor For Changes
- 3.10 Step 10: Professional Assistance
- 4 Is Yellow Flame On Gas Stove Dangerous?
- 5 Does Yellow Flame Mean Carbon Monoxide?
- 6 Does Yellow Flame Mean Too Much Oxygen?
- 7 Final Verdict On Fixing A Yellow Flame On A Gas Stove
- 8 FAQs (Frequently Asked Questions)
How To Fix A Yellow Flame On A Gas Stove?
First, clean the burner heads, removing any debris or blockages that may be disrupting combustion. After that, adjust the air shutter to ensure the proper mixture of gas and air for complete combustion. Finally, verify the gas pressure, and if necessary, seek professional assistance to adjust it.
Please refer to the step-by-step guide below.
Also Read – How Long Can You Leave An Electric Stove On?
What Causes A Yellow Flame On A Gas Stove?
A yellow flame on a gas stove is not just a cosmetic issue; it can signal potential problems with your stove’s performance and safety. The flame on a properly functioning gas stove should typically be blue, and a deviation to yellow can indicate several underlying issues.
Let’s elaborate on the common causes of a yellow flame on a gas stove:
- Incomplete Combustion: The primary reason behind a yellow flame is incomplete combustion of natural gas.
- When natural gas burns efficiently, it produces a blue flame because all the gas is being burned with sufficient oxygen.
- However, when combustion is incomplete, it results in a yellow flame, indicating that some of the gas hasn’t burned entirely.
- Airflow Problems:
- Clogged Burner Ports: The burner ports on your gas stove can become obstructed with debris, such as food particles, dust, or even spider webs. These blockages can disrupt the proper mixture of gas and air, leading to incomplete combustion and a yellow flame.
- Damaged Air Shutters: Each burner typically has an air shutter, which controls the amount of oxygen that mixes with the gas. If these shutters become misaligned or damaged, they can affect the airflow, again leading to incomplete combustion and a yellow flame.
- Gas Pressure Issues (Low Gas Pressure): A lack of adequate gas pressure can also result in incomplete combustion. This can occur due to problems with the gas supply line, regulator, or other components of the gas delivery system.
- Dirty Burners (Grease And Residue): Over time, grease, oil, and cooking residue can accumulate on the burners. This buildup can interfere with the combustion process, causing a yellow flame. It’s crucial to regularly clean your burners to prevent this issue.
- Ventilation Problems (Poor Ventilation): Inadequate ventilation in the kitchen can affect the oxygen supply to the burners, leading to incomplete combustion. Proper kitchen ventilation is essential to ensure a steady flow of oxygen for the combustion process.
So, a yellow flame on a gas stove is typically a sign of trouble. It indicates incomplete combustion, which can potentially release harmful gases like carbon monoxide.
To address this issue, it’s crucial to identify the specific cause by checking for clogged burner ports, adjusting air shutters, ensuring proper gas pressure, cleaning burners regularly, and maintaining adequate kitchen ventilation.
Safety should always be a priority when dealing with gas appliances, and if you’re uncertain about the issue or unable to resolve it on your own, it’s best to seek professional assistance to ensure the safe and efficient operation of your gas stove.
Also Read – How Hot Do Electric Stove Burners Get?
Step-By-Step Process To Fix A Yellow Flame On A Gas Stove
Fixing a yellow flame on a gas stove involves a systematic approach to address the underlying issues that cause incomplete combustion. Here is a step-by-step process to help you resolve this problem safely and efficiently:
Step 1: Turn Off The Gas Supply
Before you begin any troubleshooting or maintenance, ensure your safety by turning off the gas supply to the stove. Locate the gas valve behind or beneath the stove and turn it off completely.
Step 2: Ensure Proper Ventilation
Check the kitchen’s ventilation. Make sure there’s adequate airflow to supply oxygen for combustion. To ensure proper ventilation for your gas stove:
- Open windows or use an exhaust fan when cooking to improve airflow in the kitchen.
- Proper ventilation ensures an adequate supply of oxygen for combustion, helping maintain a blue flame and prevent the release of harmful gases.
- Regularly clean and maintain exhaust fans and vents to optimize ventilation.
- Adequate ventilation is crucial for the safe and efficient operation of your gas stove.
Step 3: Remove Grates And Burner Caps
To begin addressing the issue of a yellow flame on your gas stove, you’ll first need to access the burners and inspect them properly. This involves removing the grates and burner caps, which are essential components for protecting and supporting the burners.
Grates Removal:
- Locate The Grates: These are the sturdy, often cast iron or steel frames that cover the burners on your gas stove. They provide a stable surface for your pots and pans.
- Ensure Safety: Before proceeding, it’s essential to ensure the safety of your working area. Make sure the stove is turned off, and the gas supply is shut off completely. Allow the stove to cool down if it has been in use recently.
- Lift The Grates: Grasping the edges of the grates firmly, lift them off the stove’s surface. Grates are usually not attached permanently and can be lifted without the need for tools.
Burner Caps Removal:
- Locate The Burner Caps: Beneath the grates, you’ll find the burner caps. These are usually round or oval-shaped components that sit directly over the burner ports.
- Remove The Burner Caps: Carefully lift the burner caps off each burner. They may be slightly heavy but can usually be lifted by hand without any specialized tools.
Note: Some gas stoves have individual burner caps for each burner, while others have a single, larger cap covering multiple burners. In either case, remove all the caps for a thorough inspection.
Why Remove Grates And Burner Caps?
Removing the grates and burner caps allows you to access the burners more effectively. It’s necessary for the following reasons:
- Cleaning: Grates and burner caps can accumulate grease, food residue, and other debris over time. By removing them, you can clean both the grates and the burners more thoroughly.
- Inspection: It’s essential to inspect the burner ports (small holes where the gas comes out) beneath the burner caps. These ports can become clogged, leading to incomplete combustion and a yellow flame. Removing the caps allows you to check for any blockages.
- Adjustment: In some cases, adjusting the air shutter (the component that controls the mixture of gas and air) may be necessary. Accessing the burner caps facilitates this adjustment.
Once you have successfully removed the grates and burner caps, you can proceed with cleaning, inspecting, and making any necessary adjustments to address the yellow flame issue on your gas stove effectively.
Also Read – Why Gas Stove Won’t Light But Smells Gas?
Step 4: Check For Clogged Burner Ports
One of the common reasons for a yellow flame on a gas stove is obstructed or clogged burner ports. These small holes or openings are where the gas is released and ignited to create the flame.
When these ports become blocked, it disrupts the proper mixture of gas and air, resulting in incomplete combustion and the appearance of a yellow flame.
To address this issue, follow these steps:
- Access The Burner Ports: To access the burner ports, you will need to have already removed the grates and burner caps (as mentioned in Step 3). This will expose the burners and their respective ports.
- Visual Inspection: Carefully examine each burner port for any signs of obstruction. Common blockages include:
- Food particles or residue from cooking
- Dust or dirt
- Spider webs
- Grease buildup
- Cleaning The Burner Ports: To clean the burner ports, you can use one of the following methods:
- Soft Brush: Gently brush the ports with a soft-bristle brush, such as a toothbrush or a small paintbrush. This should dislodge most loose debris.
- Compressed Air: If you have access to compressed air, you can use it to blow air through the ports, effectively clearing out any blockages.
- Needle Or Pin: For stubborn blockages, you can carefully use a needle or pin to poke through the port and remove any debris. Be cautious not to damage the port.
- Soaking: In cases where there is significant grease buildup, you may need to soak the burner caps and heads in warm, soapy water. After soaking, scrub them gently with a soft brush and rinse thoroughly.
- Reassembly: After cleaning the burner ports, ensure they are clear of any obstructions. Reassemble the grates and burner caps.
Also Read – What Happens If You Use Propane On A Natural Gas Stove?
Step 5: Adjust The Air Shutter
The air shutter on a gas stove plays a crucial role in controlling the amount of oxygen that mixes with the gas, ensuring proper combustion. When the air shutter is misaligned or not set correctly, it can lead to incomplete combustion and result in a yellow flame.
To address this issue, follow these steps to adjust the air shutter:
- Locate The Air Shutter: The air shutter is typically located near the burner that is producing the yellow flame. It’s a small, adjustable component that controls the airflow into the burner.
- Check Manufacturer’s Recommendations: Refer to your stove’s user manual or the manufacturer’s recommendations for the correct air shutter setting. Different stoves may have slightly different configurations, so it’s important to follow the specific guidelines for your model.
- Adjust The Air Shutter: To adjust the air shutter, you’ll typically need a screwdriver or a similar tool. Here’s how to do it:
- Loosen the screw securing the air shutter in place.
- Gradually open or close the shutter to achieve the recommended setting. This will vary depending on your stove’s requirements.
- Ensure the shutter is positioned to allow the right amount of air for combustion.
- Test The Flame: Turn on the gas supply and test the stove. The flame should now be blue, indicating that the adjustment of the air shutter has allowed for the correct mixture of gas and air for complete combustion.
- Observe And Fine-Tune: Watch the flame closely for a few moments. If it’s still not completely blue, you may need to fine-tune the air shutter adjustment slightly. Make small adjustments and test the flame again until it is consistently blue.
- Reassembly: After achieving a blue flame, reassemble the grates and burner caps that you had removed earlier for access.
Step 6: Inspect Gas Pressure
Gas pressure issues can contribute to a yellow flame on a gas stove. If you suspect that low gas pressure is causing the problem, it’s essential to inspect and potentially adjust the gas pressure. Here’s how to proceed:
- Safety Precautions: Safety is paramount when working with gas appliances. Before you begin, ensure that the gas supply to the stove is turned off completely. Allow the stove to cool down if it has been in use recently.
- Locate The Gas Regulator: The gas regulator is typically located either near the stove or along the gas supply line. It’s a device that controls the flow and pressure of gas entering the stove.
- Check The Gas Pressure: To inspect the gas pressure, you’ll need a gas pressure gauge, which can be purchased at a hardware store or online. Follow these steps:
- Attach the gas pressure gauge to the gas supply line where it connects to the stove.
- Turn on the gas supply temporarily (for a brief moment) to allow the pressure to register on the gauge.
- Note the pressure reading on the gauge. This reading should match the recommended pressure specified by the stove manufacturer in your appliance’s user manual.
- Adjust The Gas Pressure (If Necessary):
- If the pressure reading on the gauge does not match the manufacturer’s specifications, you may need to adjust it.
- However, adjusting gas pressure is a task that should only be done by a qualified technician.
- It involves specialized tools and expertise, and an incorrect adjustment can be dangerous.
- Professional Assistance:
- If the gas pressure is not within the recommended range and you’re unsure about how to proceed, it’s strongly recommended that you contact a professional technician.
- They will have the necessary equipment and expertise to adjust the gas pressure safely and accurately.
- Reassembly: After the gas pressure has been inspected and adjusted by a professional if needed, you can reassemble the grates and burner caps if they were removed for access.
- Testing: Turn on the gas supply and test the stove. The flame should now be blue, indicating that proper combustion is taking place due to the correct gas pressure.
- Ongoing Monitoring: Keep an eye on the flame over the next few uses to ensure it remains blue. If you notice a return to a yellow flame, it may indicate an ongoing issue that requires professional attention.
Also Read – Master Medium Heat On A Stove
Step 7: Clean Burner Heads
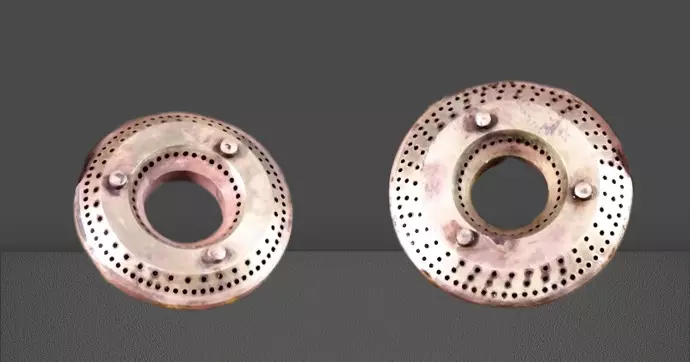
Cleaning the burner heads is an important step in maintaining the efficiency and safety of your gas stove. Over time, these components can accumulate grease, food residue, and other debris, which can interfere with the combustion process and lead to a yellow flame.
Here’s how to clean the burner heads effectively:
- Remove The Burners: To access and clean the burner heads, you’ll need to remove them from the stove. Depending on your stove model, this process may involve unscrewing the burners or simply lifting them out. Here’s how:
- Locate the burners beneath the grates and burner caps.
- Carefully lift each burner out of its socket. Be gentle to avoid damaging any components.
- Soak The Burner Heads: Fill a sink or basin with warm, soapy water. Submerge the burner heads in the soapy water to soften and loosen any grease or residue. Allow them to soak for 15-30 minutes.
- Scrub With A Soft Brush: After soaking, use a soft brush, such as a toothbrush or a dedicated brush for kitchen appliances, to gently scrub the burner heads. Pay special attention to areas with visible buildup.
- Rinse Thoroughly: Rinse the burner heads under running water to remove the soap and any remaining debris. Ensure that they are completely clean and free from soap residue.
- Dry Completely: Use a clean, dry cloth or paper towel to thoroughly dry the burner heads. Ensure there is no moisture left, as water in or around the burners can affect the ignition process.
- Reassembly: Once the burner heads are clean and dry, you can reassemble them by placing them back into their respective sockets on the stove.
- Testing: Turn on the gas supply and test the stove. The flame should now be blue, indicating that proper combustion is taking place due to clean burner heads.
- Ongoing Maintenance: To prevent future issues with dirty burner heads, it’s a good practice to clean them regularly. Depending on how often you use your stove, aim to clean the burner heads at least once a month or as needed.
Cleaning the burner heads is an essential part of maintaining your gas stove’s performance. By keeping these components clean and free from debris, you ensure that gas is evenly distributed and burns efficiently, resulting in a safe and consistent blue flame.
If the yellow flame issue persists despite cleaning the burner heads, consider exploring the other steps mentioned earlier or seeking professional assistance to diagnose and resolve the problem.
Also Read – Should A Slow Cooker Simmer On Low?
Step 8: Reassemble And Test
After you have thoroughly cleaned the burner heads and made any necessary adjustments, it’s time to reassemble the various components of your gas stove and test it to ensure that the flame is now blue, indicating complete combustion.
- Reassemble The Burners, Grates, And Burner Caps:
- Begin by placing the cleaned and dried burner heads back into their respective sockets on the stove. Ensure that they fit snugly and securely.
- Next, position the grates over the burners. Grates provide a stable surface for your pots and pans while allowing proper airflow.
- Finally, add the burner caps over each burner. These caps help distribute the flames evenly and protect the burner heads.
- Safety Check: Before proceeding with testing, double-check the following safety measures:
- Make sure the gas supply to the stove is still turned off.
- Confirm that the stove has cooled down if it was in use recently.
- Turn On The Gas Supply: Carefully turn on the gas supply to the stove. You can typically do this using the gas shut-off valve or knob located near the stove.
- Test The Stove:
- Select one of the burners on your stove and turn the corresponding control knob to the “ignite” or “light” position.
- You should observe a small, blue flame near the burner’s ports.
- Observe The Flame: Watch the flame closely for a few moments to ensure it is consistently blue. A blue flame indicates that the gas is burning efficiently with adequate oxygen, resulting in complete combustion.
- Test Other Burners: Repeat the testing process for each burner on your stove. Each burner should produce a blue flame.
- Confirm Proper Operation: Check that the flame height and intensity are consistent across all burners. If one burner behaves differently or continues to produce a yellow flame, it may require further inspection and adjustments.
- Ongoing Monitoring: Over the next few uses of your stove, pay attention to the flames to ensure they remain consistently blue. This will help confirm that the cleaning and adjustments have resolved the yellow flame issue.
- Maintain Regular Cleaning: To prevent the recurrence of a yellow flame, make cleaning the burner heads and other stove components a regular part of your kitchen maintenance routine.
Step 9: Monitor For Changes
After you have cleaned the burner heads, adjusted the air shutter, and conducted the necessary maintenance steps to address the yellow flame issue on your gas stove, it’s crucial to continue monitoring your stove for any changes or irregularities.
This ongoing observation ensures that your stove remains safe and efficient. Here’s how to do it:
- Initial Observation: Initially, after cleaning and making adjustments, closely observe the flame on each burner as you use them. It should be consistently blue, indicating complete combustion.
- Over The Next Few Uses: Continue to pay attention to the flames on your stove over the next several uses. Cook as you normally would and observe the flame characteristics.
- Look For Changes: Specifically, watch out for any changes in flame color, height, or behavior. If you notice a return to a yellow flame or any other unusual signs, it could indicate a problem.
- Address Changes Promptly: If you observe any changes or irregularities in the flame, don’t ignore them. Address the issue promptly to prevent potential safety hazards or further problems.
- Recheck Cleaning And Adjustments: If you notice a yellow flame or other issues, consider rechecking the cleaning and adjustments you performed earlier. It’s possible that debris has built up again or that further fine-tuning of the air shutter is necessary.
- Professional Assistance: If the problem persists or worsens despite your efforts, it’s advisable to seek professional assistance. Gas-related issues should always be taken seriously, and a qualified technician can diagnose and resolve complex problems.
- Regular Maintenance: Even if you don’t observe any issues, it’s essential to continue with regular maintenance of your gas stove. Clean the burner heads and other components at recommended intervals to prevent future problems.
- Practice Safe Habits: Always practice safe cooking habits, such as ensuring proper ventilation in your kitchen and using appropriate cookware. These practices can help maintain the efficiency and safety of your gas stove.
Also Read – Is Simmer Lower Than Low?
Step 10: Professional Assistance
If you are unable to fix the yellow flame issue on your own or if it reoccurs despite your efforts, it’s crucial to call a professional technician. They can perform a comprehensive inspection and address any underlying problems with the gas stove.
Is Yellow Flame On Gas Stove Dangerous?
Yes, a yellow flame on a gas stove can be dangerous. It indicates incomplete combustion of natural gas, which can have several concerning implications:
- Carbon Monoxide (CO) Emission: Incomplete combustion produces carbon monoxide, a colorless, odorless, and highly toxic gas. Exposure to even small amounts of carbon monoxide can lead to symptoms such as dizziness, nausea, headaches, and, in severe cases, can be fatal.
- Release of Harmful Gases: Besides carbon monoxide, incomplete combustion can result in the release of other harmful gases and compounds, including nitrogen oxides and formaldehyde.
- Wasted Energy: When combustion is incomplete, you’re not efficiently using the natural gas, leading to energy wastage and higher utility bills.
- Potential Fire Hazard: A yellow flame can indicate that the gas is not burning as it should, potentially leading to gas leaks or even fires.
Therefore, if you observe a yellow flame on your gas stove, it should not be ignored. It’s essential to investigate and address the underlying causes promptly to ensure your safety and the efficient operation of your gas appliance.
Also Read – How To Simmer On An Electric Stove?
Does Yellow Flame Mean Carbon Monoxide?
A yellow flame on a gas stove does not necessarily mean that carbon monoxide (CO) is present, but it does indicate the potential for CO production.
Here’s the connection:
- Yellow Flame: A yellow flame on a gas stove is typically a sign of incomplete combustion. This means that not all the natural gas is burning properly, resulting in the yellow color. Incomplete combustion can produce carbon monoxide (CO) as a byproduct.
- Carbon Monoxide (CO): CO is a colorless, odorless gas that is harmful when inhaled in high concentrations. It can be produced when there isn’t enough oxygen available for the complete combustion of natural gas.
So, while a yellow flame itself doesn’t mean CO is present, it suggests conditions that could lead to CO production. This is why it’s essential to address a yellow flame promptly and investigate the root causes, such as clogged burner ports, improper gas pressure, or ventilation issues, to ensure safety and prevent the potential formation of carbon monoxide.
Also Read – What Temperature Is Simmer On An Electric Stove?
Does Yellow Flame Mean Too Much Oxygen?
No, a yellow flame on a gas stove does not typically mean there is too much oxygen. Instead, it usually indicates the opposite: incomplete combustion due to a lack of sufficient oxygen.
Here’s how it works:
- Blue Flame: A properly functioning gas stove typically produces a blue flame. This blue flame indicates that the natural gas is burning efficiently with an appropriate balance of gas and oxygen. In this case, there is enough oxygen for complete combustion.
- Yellow Flame: A yellow flame, on the other hand, suggests that the combustion process is incomplete. It means that there is not enough oxygen mixing with the gas, which can lead to inefficient burning. The yellow color in the flame is caused by the presence of soot or unburned carbon particles.
So, a yellow flame usually indicates a problem with oxygen supply or other factors that prevent complete combustion, rather than an excess of oxygen.
Common causes of a yellow flame include clogged burner ports, a misadjusted air shutter, or inadequate ventilation, all of which disrupt the proper balance of gas and oxygen needed for a blue flame.
Also Read – What Does Simmer Look Like?
Final Verdict On Fixing A Yellow Flame On A Gas Stove
Addressing a yellow flame on your gas stove is not merely a matter of aesthetics; it’s a critical step in ensuring the safety and efficiency of your appliance.
A yellow flame indicates incomplete combustion, which can lead to the production of harmful gases like carbon monoxide and wasted energy.
To fix a yellow flame on a gas stove, a systematic approach is essential. This includes cleaning the burner heads, adjusting the air shutter, checking gas pressure, and ensuring proper ventilation. These steps, when followed carefully, can help restore the blue flame, indicating complete combustion and safe operation.
However, vigilance does not end with the initial resolution. It’s imperative to monitor your gas stove for any changes or irregularities, as ongoing maintenance and safe cooking practices are crucial for continued safety and efficiency.
By maintaining a consistently blue flame and a well-maintained gas stove, you can enjoy safe and efficient cooking for years to come.
FAQs (Frequently Asked Questions)
-
How To Stop The Yellow Flame On The Gas Stove?
To eliminate a yellow flame on your gas stove, first, clean the burner heads and ports to ensure proper airflow. Next, adjust the air shutter for the correct gas-to-air ratio, resulting in a safe and efficient blue flame.
-
Is A Yellow Flame Dangerous?
A yellow flame can be dangerous as it indicates incomplete combustion, potentially releasing harmful gases like carbon monoxide. It should be addressed promptly.
-
Can I Clean Burner Ports With Water?
No, it’s not advisable to use water to clean burner ports. Use a soft brush or compressed air to remove debris safely.
-
Why Is Proper Ventilation Important?
Proper ventilation ensures an adequate supply of oxygen for combustion, helping maintain a blue flame and preventing the release of harmful gases.
-
When Should I Call A Professional?
If you’re unable to fix the issue on your own or suspect gas pressure problems, it’s best to call a professional technician to assess and repair your gas stove.
-
How Often Should I Clean My Gas Stove Burners?
Regularly cleaning your burners, ideally once a month, can help prevent issues like yellow flames and maintain efficient stove performance.
Katrina Smith is a seasoned expert with over 25 years of experience in all things related to cooking and the kitchen. As an avid cook and kitchen enthusiast, she is passionate about sharing her knowledge and expertise on cookware, kitchen appliances, kitchen tips, and kitchen staples.
Through her articles and reviews, Katrina aims to inspire and help others improve their cooking skills, experiment with different ingredients, and invest in quality cookware and appliances.

