Are you tired of feeling chilly drafts and hearing annoying noises in your kitchen?
Are you looking for an easy and affordable way to improve energy efficiency in your home?
Look no further than insulating under your kitchen cabinets!
By properly insulating this area, you can help to prevent heat loss, reduce noise, and make your kitchen a more comfortable place to spend time in.
In this article, we’ll walk you through the step-by-step process of insulating under your kitchen cabinets, so you can get started on this DIY project with confidence.
From measuring the area to choosing the right insulation material and sealing any gaps or cracks, we’ll cover everything you need to know to get the job done right.
So, let’s dive in and learn how to insulate under kitchen cabinets!

Table of Contents
- 1 How to Insulate Under Kitchen Cabinets?
- 2 Why Is Insulating Under Kitchen Cabinets Important?
- 3 Tools And Materials Required For Insulation
- 4 Methods Of Insulating Under Kitchen Cabinets
- 5 Preparing for Insulation
- 6 Step-By-Step Process To Insulate Under Kitchen Cabinets
- 7 Precautions And Safety Tips
- 8 Benefits Of Insulating Under Kitchen Cabinets
- 9 Some Important Questions
- 10 YOU MAY ALSO LIKE
- 11 Conclusion
- 12 FAQs
- 12.1 Is It Necessary To Insulate Under Kitchen Cabinets?
- 12.2 What Type Of Insulation Should I Use Under My Kitchen Cabinets?
- 12.3 Can I Do It Myself?
- 12.4 How Much Money Can I Save By Insulating Under Kitchen Cabinets?
- 12.5 Do I Need To Remove The Cabinets To Insulate Under Them?
- 12.6 Can You Put Insulation Behind Kitchen Cabinets?
- 12.7 Can You Insulate Under Kitchen Units?
How to Insulate Under Kitchen Cabinets?
Insulating under your kitchen cabinets is a simple and effective way to improve the energy efficiency of your home while making your kitchen more comfortable. To insulate you need to:
- Measure the area
- Choose the insulation material
- Prepare the area
- Cut the insulation to size
- Fit the insulation
- Seal any gaps or cracks
- Replace the items
Following these steps can help you effectively insulate the area under your kitchen cabinets, making your kitchen more comfortable and energy-efficient.
Check below for a complete step-by-step process
Why Is Insulating Under Kitchen Cabinets Important?
Insulating under kitchen cabinets is important for various reasons.
- Firstly, it helps in reducing heat loss, keeping the kitchen warm during winter and cool during summer.
- Secondly, it prevents the growth of mold and mildew by reducing the chances of moisture accumulation.
- Thirdly, it helps in reducing energy bills by improving the energy efficiency of your home.
Tools And Materials Required For Insulation
Before we dive into the methods of insulating under kitchen cabinets, let’s take a look at the tools and materials required for the job.
- Insulation (foam board, fiberglass, or spray foam)
- Utility knife
- Tape measure
- Caulk gun
- Caulk
- Gloves
- Safety glasses
- Dust mask
- Flashlight
- Screwdriver
Methods Of Insulating Under Kitchen Cabinets
There are three main methods of insulating under kitchen cabinets: foam board insulation, fiberglass insulation, and spray foam insulation.
Let’s take a look at each of these methods in detail.
Foam Board Insulation
Foam board insulation is a popular choice for insulating under kitchen cabinets. It is made of polystyrene or polyurethane and comes in large sheets.
Foam board insulation is easy to install and provides good insulation. It is also resistant to moisture and mold.
Fiberglass Insulation
Fiberglass insulation is another popular choice for insulating under kitchen cabinets. It is made of glass fibers and comes in batts or rolls.
Fiberglass insulation is easy to install and provides excellent insulation. However, it is not moisture-resistant and can lead to mold growth if not installed properly.
Spray Foam Insulation
Spray foam insulation is a newer method of insulating under kitchen cabinets. It is made of polyurethane foam and is applied using a spray gun.
Spray foam insulation provides excellent insulation and is moisture-resistant. However, it is more expensive than other methods and requires professional installation.
Preparing for Insulation
Before you start insulating under kitchen cabinets, it’s essential to prepare the area.
Start by removing all the items from the cabinets and cleaning the area thoroughly. Check for any gaps, cracks, or holes in the cabinets that need to be sealed.
Step-By-Step Process To Insulate Under Kitchen Cabinets
Now that you have prepared the area, it’s time to start insulating under the kitchen cabinets. Follow these step-by-step instructions to ensure a successful insulation job.
1. Measure The Area
Here are the steps for measuring the area:
- Get a measuring tape and place it at one end of the area under your kitchen cabinets.
- Extend the tape measure to the other end of the area, making sure that the tape measure is straight and not bent.
- Once you have measured the length of the area, note down the measurement.
- Next, measure the width of the area by placing the measuring tape at one end of the area and extending it to the other end, making sure that the tape measure is straight and not bent.
- After measuring the width of the area, note down the measurement.
- Finally, multiply the length and width measurements to get the total square footage of the area under the kitchen cabinets that need to be insulated.
By measuring the area accurately, you can ensure that you purchase the right amount of insulation material needed for the job.
2. Choose The Insulation Material
Here are the steps for choosing the insulation material:
- Start by researching the different types of insulation materials available on the market. You can do this by browsing online, reading articles, or consulting with a professional.
- Consider the R-value of the insulation materials. This value represents the material’s ability to resist heat flow.
- The higher the R-value, the more effective the insulation material will be in keeping your home warm.
- Take into account the area under your kitchen cabinets that you want to insulate. This will help you determine how much insulation material you need.
- Consider the insulation material’s cost, availability, and ease of installation.
- Some materials, such as fiberglass or mineral wool, may be more readily available and easy to install, while others, such as spray foam, may require professional installation.
- Think about the environmental impact of the insulation material. Some materials, such as recycled cellulose or denim, are eco-friendly options that can reduce your carbon footprint.
- Finally, consider any specific needs you may have, such as allergy concerns or fire resistance.
- Some materials, such as spray foam, may cause allergic reactions in some individuals, while others, such as rock wool, have fire-resistant properties.
By following these steps, you can choose the right insulation material for your under-kitchen cabinets project and make an informed decision that suits your specific needs and budget.
3. Prepare The Area
Here are the steps for preparing the area before insulation:
- Firstly, remove any items that may be stored under the kitchen cabinets. This includes pots, pans, dishes, and any other items that may be stored in the cabinet space.
- Next, clean the area under the kitchen cabinets with a broom or vacuum cleaner to remove any debris or dirt that may be present.
- If necessary, apply a layer of pest control or insecticide to the area to prevent any insects or pests from entering the space.
- If there are any gaps or holes in the area, use a caulking gun to seal them. This will help prevent any drafts or air leaks that may affect the insulation’s effectiveness.
- Finally, wear appropriate protective gear, such as gloves, a dust mask, and safety glasses, when handling insulation materials to protect yourself from any potential hazards.
By following these steps, you can prepare the area under your kitchen cabinets for insulation and ensure that the insulation material is properly installed.
4. Cut The Insulation To Size
Here are the steps for cutting the insulation material:
- Firstly, measure the area under the kitchen cabinets where you plan to install the insulation material. Use a measuring tape to get an accurate measurement of the length and width of the area.
- Next, transfer the measurements to the insulation material. Use a pen or marker to mark the measurements on the insulation material.
- Use a utility knife or a pair of scissors to cut the insulation material to the correct size. Make sure to cut the insulation material slightly larger than the measured size to ensure a snug fit.
- If you are using fiberglass insulation, be sure to wear gloves and a dust mask when cutting the material to prevent skin irritation and inhalation of the fibers.
- Cut the insulation material to fit around any obstacles, such as pipes or electrical wiring, that may be present under the kitchen cabinets.
- Once the insulation material is cut to size, place it under the kitchen cabinets and ensure that it fits snugly against the floor and the cabinets.
By following these steps, you can cut the insulation material to size for insulating under your kitchen cabinets and ensure that it fits properly in the space.
5. Fit The Insulation
Here are the steps for fitting the insulation material:
- Firstly, carefully lift the cut insulation material and fit it under the kitchen cabinets.
- Make sure that the insulation is positioned correctly and covers the entire area under the cabinets.
- If you are using fiberglass insulation, be sure to wear gloves and a dust mask when handling the material to avoid skin irritation and inhalation of fibers.
- Ensure that the insulation material is snugly fitted against the floor and the cabinets. Make sure there are no gaps or spaces between the insulation and the surrounding areas.
- If necessary, use a utility knife or scissors to trim any excess insulation material that may be sticking out from under the cabinets.
- Repeat the process for all areas under the kitchen cabinets that you wish to insulate.
- Once you have installed the insulation material, use a caulking gun to seal any gaps or spaces that may be present to further improve the insulation’s effectiveness.
By following these steps, you can fit the insulation material under your kitchen cabinets and ensure that it is properly installed to improve your kitchen’s energy efficiency.
6. Seal Any Gaps Or Cracks
Here are the steps for sealing any gaps or cracks:
- Firstly, inspect the area under the kitchen cabinets where you installed the insulation material.
- Look for any gaps or spaces between the insulation and the surrounding areas.
- If you notice any gaps or spaces, use a caulking gun to apply a bead of caulking material along the edges of the insulation.
- Be sure to use a high-quality caulking material that is specifically designed for sealing gaps and cracks.
- Use your finger or a caulking tool to smooth out the caulking material and ensure that it is evenly distributed along the edges of the insulation.
- Repeat the process for any other areas where you notice gaps or spaces around the insulation material.
- Allow the caulking material to dry completely before using the kitchen cabinets.
By following these steps, you can seal any gaps or cracks around the insulation material under your kitchen cabinets to further improve your kitchen’s energy efficiency.
7. Replace The Items
Here are the steps for replacing the items:
- Begin by carefully removing all items that you had placed under the kitchen cabinets before insulating. This includes pots, pans, and any other items you may have stored under the cabinets.
- Inspect the area under the cabinets to ensure that there are no loose insulation materials or debris that may have accumulated during the insulation process.
- Once you are satisfied that the area is clean and free of debris, carefully place the items back under the cabinets.
- Make sure that the items are placed in their original locations and that they are not touching or compressing the insulation material.
- If necessary, rearrange the items to create more space under the cabinets and avoid compressing the insulation material.
- Finally, ensure that all items are securely placed under the cabinets and will not shift or move around when you open or close the cabinet doors.
By following these steps, you can safely and effectively replace the items under your kitchen cabinets after insulating the area to improve your kitchen’s energy efficiency.
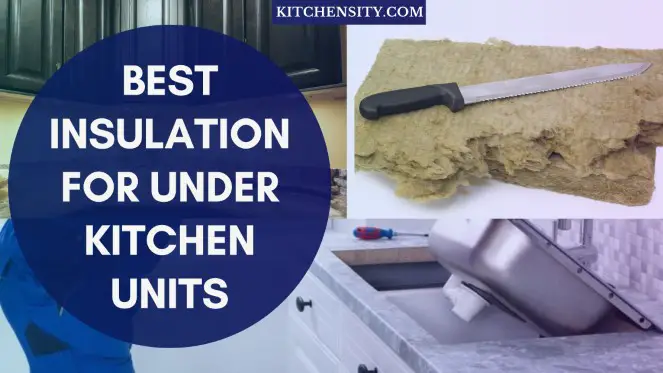
Also Read – Best Insulation for Under Kitchen Units
Precautions And Safety Tips
Insulating under kitchen cabinets can be a messy job, so it’s important to take precautions to protect yourself.
Wear gloves, safety glasses, and a dust mask to protect yourself from insulation fibers. Use a flashlight to check for any hidden gaps or cracks.
Benefits Of Insulating Under Kitchen Cabinets
Insulating under kitchen cabinets has numerous benefits.
- It can help in reducing heat loss, keeping the kitchen warm during winter and cool during summer.
- It can also prevent the growth of mold and mildew by reducing the chances of moisture accumulation.
- Additionally, it can help in reducing energy bills by improving the energy efficiency of your home.
Some Important Questions
How Do You Seal Gaps Under Kitchen Cabinets?
Sealing gaps under kitchen cabinets is an important step in insulating them. Here’s how you can do it:
- Start by identifying any gaps or cracks between the cabinets and the wall, or between the cabinets themselves. Use a flashlight to inspect the area thoroughly.
- Clean the gaps or cracks using a brush or vacuum to remove any dirt, debris, or loose material.
- Measure the size of the gap or crack, and choose a suitable sealant that fits the size of the gap.
- For small gaps or cracks, you can use a caulk or sealant that comes in a tube, while for larger gaps, you may need to use foam insulation or weather stripping.
- Apply the sealant or foam insulation into the gap or crack using a caulk gun or your hands.
- Be sure to fill the gap completely, but avoid overfilling it, as this can cause the sealant to expand and make a mess.
- Smooth the sealant or foam insulation with a putty knife or your finger to ensure an even finish. Wipe away any excess sealant with a damp cloth.
- Allow the sealant or foam insulation to dry according to the manufacturer’s instructions. This can take anywhere from a few hours to a day, depending on the type of sealant or foam insulation you used.
By following these steps, you can seal any gaps or cracks under your kitchen cabinets effectively, helping to improve the insulation and prevent air leaks.
What Should I Put Under My Kitchen Cabinets?
When it comes to what to put under your kitchen cabinets, there are a few options to consider:
- Cabinet Mats Or Liners: These are specifically designed to fit under your kitchen cabinets and protect the surface from spills, stains, and scratches. Cabinet mats or liners are typically made of rubber, vinyl, or cork and come in a variety of sizes and styles.
- Shelf Liners: These are similar to cabinet mats or liners, but are designed to line the inside of your cabinets and drawers. They can help protect your dishes and other items from scratches and can make cleaning up spills easier.
- Insulation: If you are looking to improve the insulation under your kitchen cabinets, you may want to consider adding a layer of insulation material, such as foam board or fiberglass insulation.
- Nothing: If you prefer to leave the area under your kitchen cabinets as is, you can simply clean it regularly to prevent any buildup of dirt or debris.
Ultimately, the decision of what to put under your kitchen cabinets depends on your personal preferences and needs. Consider the benefits of each option and choose the one that works best for you.
YOU MAY ALSO LIKE
- How to Insulate Under Kitchen Sink?
- Best Insulation Under The Kitchen Sink
- Can You Use Loft Insulation Under Kitchen Cabinets?
- Do Kitchen Cabinets Need Crown Molding?
- What Can I Put Under My Kitchen Sink to Protect My Cabinets?
- Can You Put Kitchen Cabinets On Top Of Vinyl Plank Flooring?
- How To Fix Scratched Kitchen Cabinets?
Conclusion
In conclusion, insulating under your kitchen cabinets is a smart and easy way to improve the energy efficiency of your home while making your kitchen a more comfortable place to spend time in.
By following the simple steps outlined in this article, you can insulate this often-overlooked area and reap the benefits of a warmer, quieter, and more comfortable kitchen.
Remember to measure the area carefully, choose the right insulation material for your needs, and seal any gaps or cracks to ensure maximum effectiveness.
With a little bit of effort, you can complete this DIY project and enjoy the benefits for years to come.
So, what are you waiting for?
Start insulating under your kitchen cabinets today and take the first step towards a more energy-efficient and comfortable home!
FAQs
-
Is It Necessary To Insulate Under Kitchen Cabinets?
Yes, insulating under kitchen cabinets can help in reducing heat loss, prevent mold and mildew growth, and reduce energy bills.
-
What Type Of Insulation Should I Use Under My Kitchen Cabinets?
You can use foam board insulation, fiberglass insulation, or spray foam insulation.
-
Can I Do It Myself?
Yes, you can insulate it yourself. However, it’s important to take precautions to protect yourself from insulation fibers.
-
How Much Money Can I Save By Insulating Under Kitchen Cabinets?
The amount of money you can save by insulating under kitchen cabinets depends on various factors, such as the size of your kitchen and the type of insulation you use.
-
Do I Need To Remove The Cabinets To Insulate Under Them?
No, you don’t need to remove the cabinets to insulate under them. You can fit the insulation under the cabinets and seal any gaps or cracks using caulk.
-
Can You Put Insulation Behind Kitchen Cabinets?
Yes, it is possible to put insulation behind kitchen cabinets. However, it can be a difficult and time-consuming task that may require professional assistance.
It’s important to weigh the potential benefits of insulation against the cost and effort required to install it. -
Can You Insulate Under Kitchen Units?
Yes, it is possible to insulate under kitchen units. It can help improve energy efficiency and reduce noise levels in the kitchen.
However, it’s important to choose the right insulation material and take proper safety precautions during installation.
It may also require moving and replacing kitchen items, which can add to the overall cost and effort of the project.
Katrina Smith is a seasoned expert with over 25 years of experience in all things related to cooking and the kitchen. As an avid cook and kitchen enthusiast, she is passionate about sharing her knowledge and expertise on cookware, kitchen appliances, kitchen tips, and kitchen staples.
Through her articles and reviews, Katrina aims to inspire and help others improve their cooking skills, experiment with different ingredients, and invest in quality cookware and appliances.

![3 Effective Ways To Update Old Kitchen Cabinets [Under $100] 3 How To Update Old Kitche Cabinets](https://www.kitchensity.com/wp-content/uploads/2021/05/How-To-Update-Old-Kitche-Cabinets.jpg)
![Refacing Kitchen Cabinets: An Ultimate DIY Guide [2023] 4 Refacing Kitchen Cabinets](https://www.kitchensity.com/wp-content/uploads/2021/05/Refacing-Kitchen-Cabinets.jpg)


