It’s a common problem to have painted kitchen cabinets chip and sometimes peel. But, it’s not a significant issue as people have already discovered solutions to these problems.
Repairing chipped paint on kitchen cabinets is not a difficult task until you find the matching color. It’s an easy DIY; you need to do some touch-ups with the right products and procedures.
The only difficulty is finding the right color that will match your cabinet. If the color does not match, you have to color the entire cabinets but don’t worry; we will help you find the right products.
I will come to the procedure but first, learn to choose the color or the materials required for the project.
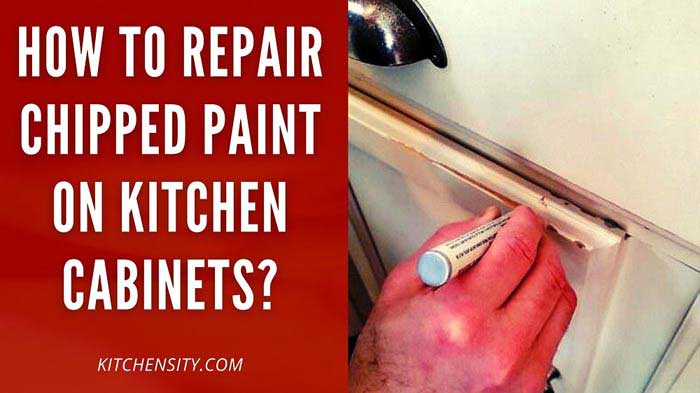
Table of Contents
- 1 How To Repair Chipped Paint On Kitchen Cabinets?
- 2 Finding The Right Color and Composition
- 3 Steps To Repair Chipped Paint On Kitchen Cabinets
- 4 Types Of Paints
- 5 Importance Of Using The Right Products
- 6 How To Repair Chipped Gloss Kitchen Cabinets?
- 7 How To Keep Painted Cabinets From Chipping?
- 8 How To Touch Up Factory Painted Cabinets?
- 9 How To Repair Chipped Wood Cabinets?
- 10 Problems With Painted Kitchen Cabinets
- 11 Common Mistakes People Make While Repairing Chipped Paint
- 12 Why Are My Painted Kitchen Cabinets Chipping?
- 13 Tips For Preventing Future Paint Damage
- 14 You May Also Like
- 15 Final Words
- 16 FAQ’s
How To Repair Chipped Paint On Kitchen Cabinets?
To repair chipped paint on kitchen cabinets, start by cleaning and sanding the area around the chip. Then, apply wood filler to the chip and sand it down to create a smooth surface. Next, prime the area and let it dry completely. Finally, paint the area with the same color and finish as the rest of the cabinet, using a brush or roller. Allow the paint to dry completely before using the cabinet.
Check below for a step-by-step process.
Finding The Right Color and Composition
If you are aware of the exact color, it is good because it will save you a lot of time and work.
If you have painted them yourself, you will know the exact color; if you haven’t or have bought it pre-painted from the store, you can contact them to get a paint sample to know the exact color.
If you are the new owner of the house and have no idea about the color, then you can contact the previous owner if you have the contact details, or if you don’t, then take a small cabinet door to the shop and ask him/her to give the exact match or composition.
Either way, you will get the exact match, but it will take a little more work to get it. But, if you don’t want to do all these, you have to bring home lots of paint chips to find the closest match possible.
Choosing The Right Paint Sheen
After choosing the right color, now you have to choose the right paint sheen.
The kitchen is a high-traffic area, and due to this, the cabinets are usually painted with a semi-gloss or high-gloss finish to protect them from water and stains.
But, this can be different in your case. So, to identify the right sheen, you can make an educated guess by looking at your cabinets.
If they are very shiny, then it’s a high-gloss paint, if they are pretty shiny, then it’s a semi-gloss paint, and if they have a hint of shine then, it’s a satin finish.
If they don’t shine at all, then it’s a matte finish that is not ideal in kitchen cabinets as they are prone to stains.
As you have got the right color and sheen, now it’s time to repair the chipped paint.
Steps To Repair Chipped Paint On Kitchen Cabinets
The best way to repair chipped paint on kitchen cabinets is to clean the chipped areas with a soap solution and then wipe it with a towel. After drying, lightly sand the damaged areas with high-grit sandpaper (240-320) to smooth the surface, and finally, apply the primer and paint it to match the color.
Let’s discuss it step by step:
Materials Required
- Sandpaper (240-320 grit)
- Cleaner (mix dish soap and water)
- Towel
- Wood Filler (if required)
- Primer (if required)
- Paint
- Paint Brush (take small brush)
- Screwdriver (for unscrewing the knobs or handles)
Steps To Prepare The Cabinets
Step 1: First, you have to prepare your cabinets for the painting so, remove any handles or knobs to clean the surface properly.
Step 2: Now, clean the chipped areas with a soap solution (fill a spray bottle with 50% water and 50% dish soap) and wipe them with a towel to dry. Cleaning is essential as the paint will never stick to dust or grease.
Step 3: After that, take high grit sandpaper like 240-320 and lightly sand the chipped areas to smooth.
Don’t go so hard; otherwise, you will remove too much paint, but it is fine enough to smooth the damaged paint lightly.
Step 4: After sanding, you will notice the chipped areas will become more prominent, which is fine. The touch-up paint will fix it completely.
Step 5: If your chipped areas are deep, you have to fill them with a wood filler. But before that, make two or three ½ inch holes with a driller to hold the filler properly.
Step 6: Let the wood filler dry for some time. For better results, keep it overnight.
Step 7: Again, sand the wood-filling areas with 240 or 320-grit sandpaper and try to make it a smooth surface.
Step 8: One final time, clean the damaged areas with a dry towel to remove the dust particles.
It’s done. Now, you can move to the next step, i.e., painting.
Steps To Paint The Chipped Kitchen Cabinets
Before painting, check whether your paint requires primer or not. If you are using paints like chalk paint, milk paint, etc., you can skip the primer and go straight to painting.
But, if you are using paints like latex paints, you have to use a primer before painting to get a perfect blend and smoothness.
Step 1: Take a small brush and apply a light coat of primer first. If you are using milk or chalk paint, you can skip this and apply a light coat of the paint.
Step 2: After 5-6 hours, when the primer will dry, apply the second coat of primer and let it dry.
Step 3: When the second coat of primer will dry, you can now touch up the chipped areas with the paint. I like to use these small brushes for touching up and love the smooth finish they give. First, please give it a light coat and let it dry.
Step 4: When the first coat of paint will dry, check the paint is perfectly blended with the previous color. If it is blended, then no need to apply the second coat; if not, then apply a light coat of paint again.
Step 5: Most of the time, it gets blended with the first coat, but it depends on the cabinets or how they are damaged.
After the second coat, you will notice the color will blend adequately; if not, then you have to apply the paint again. Repeat this process several times to get the perfect blended color.
Always apply a thin layer of paint, don’t make it thick. It is ok to coat several thin layers to get the perfect blend.
If your chipped areas are tiny, you can skip the primer and directly touch up with the paint but, if it is large enough, you have to use primer for extra protection of the paint.
If you have messed up the work, then you have to paint the entire cabinet or you can also update the kitchen cabinets for under $100 (Click to learn more).
Your chipped cabinets are repaired, and you have got a perfect blend. Now, some questions may arise in your mind; let me clear them.
Types Of Paints
The types of paints that are suitable for kitchen cabinets:
- Oil-Based Paint: Oil-based paints are durable and water-resistant, making them ideal for kitchen cabinets. They offer a hard and glossy finish that resists scratches and stains, but they take longer to dry and emit strong fumes during application.
- Latex Paint: Latex paint is the most popular type of paint used for kitchen cabinets due to its easy application and quick drying time. It is also available in a range of finishes, including matte, satin, and semi-gloss. However, it is less durable and water-resistant than oil-based paint.
- Chalk Paint: Chalk paint has a matte finish and is easy to apply. It is also water-based, making it less harmful to the environment than oil-based paint. However, it may require wax or sealant to protect against scratches and stains.
- Milk Paint: Milk paint is another water-based option that is eco-friendly and easy to apply. It offers a smooth finish and is ideal for achieving a vintage or distressed look. However, it may require a topcoat to protect against wear and tear.
- Acrylic Paint: Acrylic paint is a water-based paint that dries quickly and offers a durable finish. It is also easy to clean and maintain. However, it may not adhere well to glossy surfaces and may require a primer before application.
In summary, when selecting paint for kitchen cabinets, it is essential to consider the durability, water resistance, and finish of the paint.
Oil-based paints offer the highest level of durability and water resistance, while latex paint is the easiest to apply.
Chalk paint and milk paint are ideal for achieving a vintage or distressed look, while acrylic paint offers durability and ease of maintenance.
Importance Of Using The Right Products
Choosing the right products is essential when it comes to repairing chipped paint on kitchen cabinets. Using the wrong products can cause more harm than good and damage your cabinets further.
- For example, if you use the wrong primer, the paint may not adhere properly, which can lead to the paint peeling or chipping soon after you finish your repairs.
- Similarly, if you use low-quality paint, you may find that the paint begins to peel or chip again, leaving you right back where you started.
When repairing chipped paint, it’s important to use high-quality, durable products that will help protect your cabinets and ensure your repairs last.
- This means using the right type of primer and paint that are designed specifically for kitchen cabinets, as well as any additional products like sandpaper, fillers, and sealants that may be necessary.
- Using high-quality products can also save you time and money in the long run.
By using products that are designed to last, you won’t have to worry about repainting or repairing your cabinets again anytime soon, which can save you both time and money.
On the other hand, using low-quality products may seem like a cost-saving measure in the short term, but it can end up costing you more in the long run if you have to keep repairing or repainting your cabinets over and over again.
How To Repair Chipped Gloss Kitchen Cabinets?
Repairing chipped gloss kitchen cabinets can be done with the following steps:
- Clean The Area: First, clean the chipped area using mild detergent and warm water. Dry the area with a clean cloth.
- Sand The Chipped Area: Use fine-grit sandpaper to sand the chipped area gently. This helps to smooth out any rough edges and helps the new paint to adhere properly.
- Apply A Primer: Apply a coat of primer over the chipped area. Make sure to use a primer that is designed for glossy surfaces and matches the color of the cabinets. Allow the primer to dry completely.
- Apply Touch-Up Paint: Using a small brush, apply a thin layer of touch-up paint over the chipped area. Start from the edges of the chip and work your way inwards. Allow the paint to dry completely.
- Apply A Clear Coat: Apply a clear coat of varnish or polyurethane over the touch-up paint to protect it from further damage. Allow the clear coat to dry completely.
- Buff The Area: Use a soft cloth to buff the area gently. This will help to blend the new paint with the existing paint, giving it a smooth and seamless finish.
By following these steps, you can repair chipped gloss kitchen cabinets and restore their original beauty.
It’s important to note that for more extensive damage, it may be best to hire a professional to ensure the repair is done properly.
How To Keep Painted Cabinets From Chipping?
Painted cabinets can chip due to various reasons such as wear and tear, exposure to moisture, harsh cleaning chemicals, and accidental bumps.
Here are some tips on how to keep painted cabinets from chipping:
- Clean The Cabinets Gently: Harsh chemicals and abrasive sponges can damage the painted surface of the cabinets. Use a soft cloth or a sponge with mild soap and warm water to clean the cabinets.
- Avoid Using Sharp Objects: Knives, scissors, and other sharp objects can scratch the painted surface and cause it to chip. Use a cutting board when cutting vegetables or other items, and avoid leaning sharp objects against the cabinets.
- Apply A Protective Topcoat: Applying a protective topcoat such as polyurethane or wax can help to protect the painted surface from scratches, moisture, and wear and tear.
- Use High-Quality Paint: High-quality paint is more durable and resistant to chipping than low-quality paint. Choose a paint that is specifically formulated for cabinets and has a hard, durable finish.
- Allow The Paint To Dry Completely: Rushing the painting process and not allowing enough time for the paint to dry can cause it to chip. Follow the manufacturer’s instructions for drying time and avoid using the cabinets until the paint is completely dry.
By following these tips, you can help to keep your painted cabinets looking new and prevent chipping.
How To Touch Up Factory Painted Cabinets?
Touching up factory-painted cabinets can be a bit tricky, but it is possible to do so. Here are some steps you can follow:
- Identify The Color: To touch up the paint on factory-painted cabinets, it’s important to identify the exact color. Check the back of a door or drawer for a label with the color information. If you can’t find it, take a cabinet door or drawer to a paint store to have it color-matched.
- Clean The Area: Before painting, clean the area with soap and water to remove any dirt or grime. Then, wipe the area with a damp cloth and let it dry completely.
- Sand The Chipped Area: Use fine-grit sandpaper to gently sand the chipped area. This will create a smooth surface for the touch-up paint to adhere to. Be careful not to sand too much or too hard, as you may remove too much of the surrounding paint.
- Apply The Touch-Up Paint: Use a small brush to apply the touch-up paint to the chipped area. Apply it in thin layers, allowing each layer to dry completely before applying the next one. Use a light touch to avoid creating a buildup of paint.
- Blend The Paint: Once the touch-up paint has dried, use fine-grit sandpaper to gently blend the new paint into the surrounding area. Be careful not to sand too hard, as you may remove too much of the touch-up paint.
- Apply A Clear Coat: To protect the new paint, apply a clear coat of polyurethane or lacquer. Use a small brush to apply the clear coat in thin layers, allowing each layer to dry completely before applying the next one.
By following these steps, you should be able to touch up your factory-painted cabinets and make them look as good as new.
How To Repair Chipped Wood Cabinets?
To fix the chips in wood cabinets, you have to follow the below steps:
- First, sand the damaged areas properly with 180-240 grit sandpaper.
- Make 2-3 holes of ½ inches with a driller in the chipped areas. It will help to hold the wood filler properly.
- Now, clean the area with cleaner or soap water and rub with a towel to dry.
- With the help of a putty knife, apply the wood filler to fill all the gaps in the chipped kitchen cabinets.
- After drying the wood filler, sand the damaged areas again to get a smooth finish.
- Now, apply the first coat of primer with a small brush and let it dry.
- After drying, apply the second coat of primer and wait for it to dry.
- Now, you can apply the first coat of paint and let it dry.
- When the paint will dry, check if it is blended or not.
- If the paint is not blended correctly, give a second coat and repeat this process till you get a perfect blend.
Problems With Painted Kitchen Cabinets
Painted kitchen cabinets can face a variety of problems, including:
- Chipping And Peeling: If the cabinets were not properly prepared before painting or if low-quality paint was used, the paint can chip and peel off easily.
- Fading And Discoloration: Exposure to sunlight or heat can cause the paint to fade or change color over time.
- Stains And Marks: Kitchen cabinets are often exposed to food spills, grease, and water, which can leave stains and marks on the paint’s surface.
- Warping And Cracking: Changes in temperature or humidity can cause wood cabinets to warp or crack, which can also affect the paint.
- Uneven Finish: Uneven application of paint or using the wrong type of brush or roller can result in an uneven or streaky finish.
To avoid these problems, it’s important to properly prepare the cabinets before painting, use high-quality paint and tools, and take proper care of the cabinets to prevent damage. Regular cleaning and maintenance can also help prolong the life of painted kitchen cabinets.
Common Mistakes People Make While Repairing Chipped Paint
Here are some common mistakes that people make:
- Not Cleaning The Surface Properly: This is a crucial step that many people skip. If the surface isn’t cleaned thoroughly, the paint won’t adhere correctly, and the chipping may occur again.
- Using Too Much Filler: Filling holes and gaps with too much filler can create an uneven surface. Therefore, it’s essential to use the right amount of filler to avoid this mistake.
- Not Sanding The Surface: Sanding the surface before applying paint is essential because it helps the paint adhere better. Skipping this step can cause the paint to peel off.
- Not Using The Right Primer: Using the wrong primer can lead to paint not adhering properly. Therefore, it’s essential to choose a primer that is suitable for your kitchen cabinets.
- Not Allowing The Primer To Dry Completely: This is a common mistake that many people make. They apply paint before the primer is entirely dry, which can cause the paint to peel off.
- Using Low-Quality Paint: Using low-quality paint can lead to chipping and peeling of the paint. Therefore, it’s essential to use high-quality paint to ensure that the paint lasts longer.
By being aware of these common mistakes, people can avoid them while repairing chipped paint on their kitchen cabinets.
Why Are My Painted Kitchen Cabinets Chipping?
There may be many reasons for cabinets chipping, but the main reasons are:
- Damaged by Impact
- Not Preparing the Cabinets Before Painting.
- Damaged by Water
Damaged By Impact
- If the hardware becomes loose, then friction, can cause paint to chip, tear, and peel, even if you’ve used the best paint.
- It can also happen due to your fingernail. Chipping usually happens around knobs or at the ends of a drawer or door because there is no hardware to use.
- If you have trash inside like cans, plates, etc., it can also damage the cabinets.
- Moreover, the metal utensils, cabinet tools, toys (if you have children), or even the dog may be responsible for your chipped kitchen cabinets.
Not Preparing The Cabinets Before Painting
- This is one of the main reasons for your chipping or peeling cabinets.
- If your cabinets are not prepared before painting, then this is usual to happen.
- Before painting, you must sand it properly and apply two coats of primer.
- After that, you can apply paint and try to give a minimum of 2 coats. Priming helps to bond the color properly with the cabinets.
- If you fail to do this, then your cabinet’s paint will start chipping or peeling off.
Damaged by Water
- It is a usual case because everyone washes their kitchenware, vegetables, chicken, etc., in the kitchen, and also, during cooking, water may splash and gets into the cabinets.
- When this is repeated again and again, in the long run, your cabinets get chipped. But, it can be prevented by applying water-repellent paints.
- Regularly tighten hardware to prevent it from contributing to a paint chipping problem.
Tips For Preventing Future Paint Damage
Here are some tips to prevent future paint damage on kitchen cabinets:
- Apply A Protective Coat: Applying a protective coat of wax or polyurethane over the paint can help prevent chipping and peeling. This will create a barrier that protects the paint from scratches, stains, and water damage.
- Use Gentle Cleaning Products: Harsh chemicals, abrasives, and scrubbers can damage the paint on your cabinets. Instead, use gentle cleaning products and a soft cloth or sponge to clean the cabinets. Avoid using ammonia-based cleaners, bleach, or vinegar, as they can break down the paint and cause it to chip or peel.
- Handle With Care: Avoid using sharp objects or utensils on the cabinets, as they can scratch or chip the paint. Be careful when opening and closing cabinet doors and drawers to avoid causing damage.
- Maintain Proper Ventilation: High humidity and temperature changes can cause the paint to expand and contract, leading to cracking and chipping. Ensure that there is proper ventilation in the kitchen to prevent humidity buildup and keep the temperature stable.
- Touch Up As Needed: Keep an eye on the cabinets and touch up any areas where the paint has chipped or peeled as soon as possible. This will prevent further damage and keep the cabinets looking fresh and new.
You May Also Like
- Why Are Kitchen Cabinets So Expensive?
- Does Flooring Go Under Kitchen Cabinets?
- 3 Effective Ways To Update Old Kitchen Cabinets
Final Words
You have seen how easy it is to fix scratches or repair chipped paint on kitchen cabinets. One can easily do it without calling the painter.
The main thing is to get the exact match paint. If you got it, then you are good to go. If not, then you have to struggle a little bit. But, at last, it’s exciting and fun work to do.
I love to do DIY whenever I find the opportunity. You can share your exciting stories while doing such DIY in your home.
If you like the article, then please share it with your friends and family.
FAQ’s
-
What Type Of Paint Is Best For Kitchen Cabinets?
Oil-based paints are typically more durable and water-resistant than latex paints, but they take longer to dry and require solvents for cleanup.
Latex paints are easier to work with and have a faster drying time, but may not be as durable as oil-based paints. -
Can I Paint Over The Chipped Paint On My Kitchen Cabinets?
Yes, you can paint over chipped paint on your kitchen cabinets, but it’s important to properly prepare the surface before painting.
This may involve sanding down the chipped areas, filling in any gaps with wood filler, and applying primer before painting. -
How Do I Prepare My Kitchen Cabinets Before Painting?
To prepare your kitchen cabinets before painting, you should clean them thoroughly with a degreaser and then sand them to create a smooth surface for painting.
You may also need to remove any hardware and fill in any gaps with wood filler before applying primer and paint. -
Do I Need To Remove The Cabinet Doors Before Painting Them?
It’s not necessary to remove the cabinet doors before painting them, but it can make the job easier and allow you to paint both sides of the doors.
If you choose to leave the doors in place, be sure to protect the surrounding areas with painter’s tape and drop cloths. -
How Long Does It Take To Paint Kitchen Cabinets?
The length of time it takes to paint kitchen cabinets can vary depending on several factors, including the size of the kitchen, the number of cabinets, and the type of paint used.
Generally, it can take anywhere from several days to a week or more to complete the job.
Katrina Smith is a seasoned expert with over 25 years of experience in all things related to cooking and the kitchen. As an avid cook and kitchen enthusiast, she is passionate about sharing her knowledge and expertise on cookware, kitchen appliances, kitchen tips, and kitchen staples.
Through her articles and reviews, Katrina aims to inspire and help others improve their cooking skills, experiment with different ingredients, and invest in quality cookware and appliances.

![3 Effective Ways To Update Old Kitchen Cabinets [Under $100] 3 How To Update Old Kitche Cabinets](https://www.kitchensity.com/wp-content/uploads/2021/05/How-To-Update-Old-Kitche-Cabinets.jpg)
![Refacing Kitchen Cabinets: An Ultimate DIY Guide [2023] 4 Refacing Kitchen Cabinets](https://www.kitchensity.com/wp-content/uploads/2021/05/Refacing-Kitchen-Cabinets.jpg)
