Hey there, fellow cooking enthusiasts! Ready to learn a cool trick for your ceramic frying pan?
If your food often sticks or you want cooking to be smoother, you’re in for a treat. In this article, we’re going to talk about seasoning a ceramic frying pan – an easy technique that makes a big difference.
No matter if you’re new to cooking or experienced, get set to discover how to make your ceramic pan non-stick like magic.
Let’s jump in and make your pan a kitchen superstar!
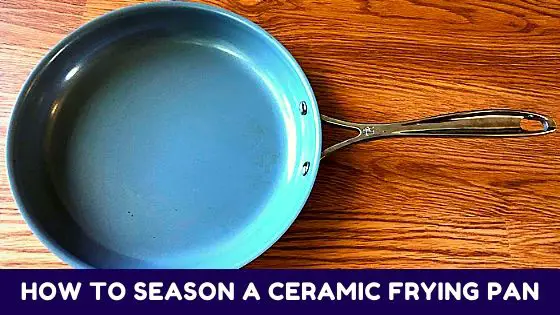
Table of Contents
- 1 Method 1: How to Season a Ceramic Frying Pan on the Stovetop?
- 2 Method 2: How to Season a Ceramic Frying Pan on the Oven?
- 3 Method 3: How to Season a Ceramic Frying Pan By Sunlight? (The Hidden One)
- 4 What kind of oil do you use to season ceramic frying pan?
- 5 Troubleshooting Tips
- 6 Comparative Analysis: Choosing Your Ideal Seasoning Method
- 7 How To Reseason Ceramic Pan?
- 8 Maintenance Tips: Nurturing Your Seasoned Ceramic Pan
- 9 Final Thoughts: How To Season A Ceramic Frying Pan?
- 10 Frequently Asked Questions (FAQ’s)
Method 1: How to Season a Ceramic Frying Pan on the Stovetop?
Seasoning a ceramic frying pan on the stovetop is the most popular and user-friendly method. Most people have access to a stovetop, making it a convenient choice for seasoning your pan properly. Here’s how to do it:
Step 1: Begin by preheating the pan. Light your stove and place the ceramic pan on it. Heat the pan until it’s warm enough to touch with your bare hands.
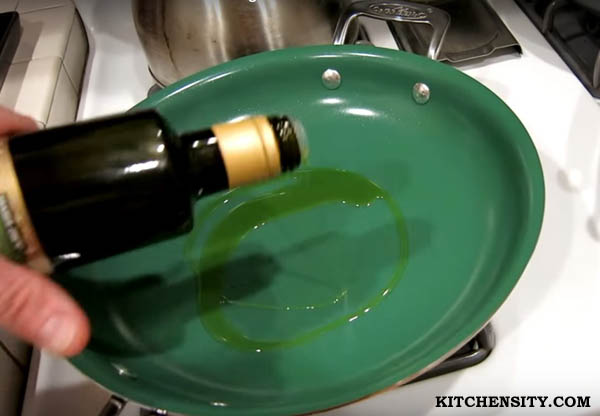
Step 2: Add about 2 to 3 tablespoons of coconut oil or any high-heat retention oil, depending on the pan’s size. Swirl the oil around the pan, ensuring it spreads evenly to all sides. It’s crucial to cover every corner without leaving gaps.
Step 3: Heat the pan over medium heat until you observe smoke rising from the oil. This heating process typically takes 3 to 4 minutes, depending on the type of oil you’re using. It’s essential to maintain medium heat; avoid high heat as it can damage the seasoning. Seasoning requires a slow and steady heat application.
Step 4: Once you see smoke emanating from the oil, turn off the flame and let the pan cool down completely. Allow it to cool naturally; refrain from putting the pan in the refrigerator, as rapid cooling could harm the ceramic coating.
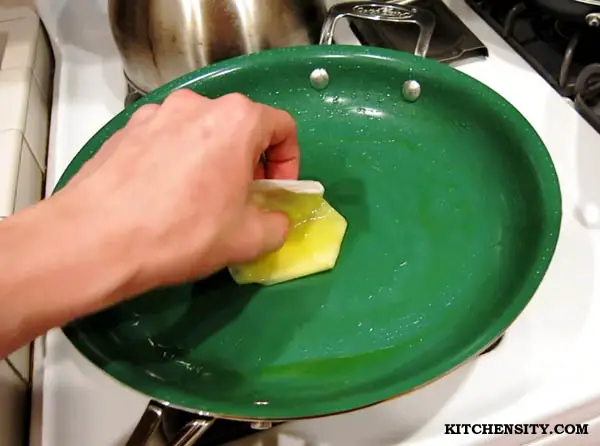
Step 5: After the pan has cooled down entirely, you might notice some residual oil in the pan. Don’t worry; simply blot out the excess oil using a paper towel or a soft cloth.
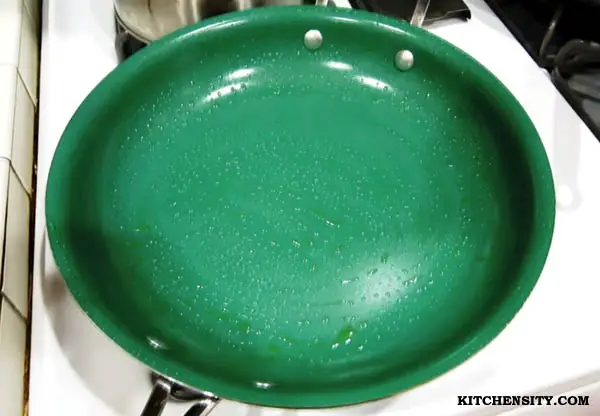
Now, your ceramic pan is fully seasoned and ready for cooking delicious dishes. Enjoy your non-stick cooking experience!
Also read – How To Season Stainless Steel Pots And Pans
Method 2: How to Season a Ceramic Frying Pan on the Oven?
Seasoning a ceramic frying pan in the oven is a convenient alternative, especially when your stovetop is unavailable or you’re occupied with other cooking tasks. While the process resembles stovetop seasoning, there’s no need to preheat the pan in the oven. Here’s how to do it:
Step 1: Begin by preheating your oven to 300 degrees Fahrenheit or 150 degrees Celsius. This temperature range (250-350°F or 130-180°C) is ideal for seasoning. Avoid exceeding 350°F (180°C) or going lower than 250°F (130°C).
Step 2: Pour the same amount of oil into the ceramic pan as you would for stovetop seasoning. Swirl the oil around, ensuring it reaches every corner of the pan. It’s okay to use a slightly extra amount of oil for this method.
Step 3: Carefully place the ceramic pan in the middle rack of the preheated oven. The middle rack provides even heat distribution. Allow the pan to remain in the oven for about 20 to 30 minutes or until you notice smoke emerging. The exact time may vary based on the pan type and the chosen temperature.
Step 4: Once the pan develops a seasoned layer and you see smoke, remove it from the oven. Let it cool down completely to room temperature, which may take approximately 15 to 20 minutes.
Step 5: After the pan has cooled down, wipe away any excess oil using a paper towel or a soft cloth.
Now your ceramic pan is fully seasoned through the oven method, ready to be used for a variety of cooking tasks. Happy cooking!
Also read – How to Season a Nonstick Pan for First Time
Method 3: How to Season a Ceramic Frying Pan By Sunlight? (The Hidden One)
Yes, you read that right – sunlight! While it might sound surprising, it’s indeed possible to season a ceramic pan using sunlight, provided you have ample free time and, most importantly, a bright sunny day.
I’m sharing this method for those seeking unconventional options for seasoning their pans. I’ve personally tried this method, and it works, but it’s essential to have a sunny day for it to be effective.
Step 1: Start by pouring 1 or 2 tablespoons of oil into the pan (a smaller amount this time). Swirl the oil around, ensuring it coats every corner of the pan.
Step 2: Next, find a dark-colored paper bag, preferably black, and place the ceramic pan inside it. If the handle isn’t covered, that’s okay. The dark-colored bag helps absorb heat and protects the pan from direct sunlight.
Step 3: Locate a sunny spot and position the pan in direct sunlight for the entire day. Periodically touch and check the paper bag to see if it’s warming up. If it isn’t receiving enough warmth, consider changing its position to a sunnier spot.
Step 4: After a few hours, when the pan becomes sufficiently hot to touch, remove it from the bag and let it cool down.
Step 5: Once the ceramic pan has completely cooled, wipe away any excess oil using a paper towel or a soft cloth.
Congratulations, your pan has been seasoned through a natural process using sunlight! Now you’re all set to cook up a storm in your newly seasoned ceramic pan.
You May Also Like: How To Season And Clean Cast Iron Cookware?
What kind of oil do you use to season ceramic frying pan?
Selecting the appropriate oil is crucial when seasoning a ceramic frying pan. Opt for oils with high-heat retention for optimal results. Animal fats are excellent due to their high heat retention properties, ensuring effective seasoning.
However, animal fats are not the only option. Coconut oil and flaxseed oil are also excellent choices, both possessing good heat retention. If these options are unavailable, extra virgin olive oil or grapeseed oil can be used as alternatives.
Using high-heat retention oil is essential because it takes longer to heat up. This slow heating process significantly contributes to better pan seasoning.
The quantity of oil required depends on the pan’s size. For a 12-inch pan, approximately 3 tablespoons of oil are necessary, or you should pour oil until the pan’s surface is fully covered. Adjust the amount according to the pan’s size to ensure thorough and even seasoning.
Also Read – Ceramic Cookware Vs Aluminum Cookware
Troubleshooting Tips
We’ve compiled a list of troubleshooting tips to help you navigate through potential challenges and ensure a successful seasoning process.
1. Uneven Seasoning
- Issue: Finding that your pan’s seasoning appears uneven or patchy after the process.
- Solution:
- Uneven seasoning can occur due to insufficient oil coverage or inconsistent heating.
- To address this, make sure to evenly coat the pan with oil, ensuring it reaches all corners and surfaces.
- Additionally, ensure you heat the pan gradually and uniformly, preventing any hotspots that might lead to uneven seasoning.
2. Uneven Heat Distribution
- Issue: Noticing that certain areas of your pan seem to heat up more quickly or retain heat differently than others.
- Solution:
- Uneven heat distribution can be caused by various factors, including the pan’s construction and the type of stove you’re using.
- To counter this, consider rotating the pan periodically during seasoning to promote consistent heat exposure.
- When cooking, also use proper utensils and manage your heat source to prevent concentrated hotspots.
Also Read – T Fal Ceramic Cookware Review
3. Overheating And Burnt Oil
- Issue: Accidentally overheating the oil during the seasoning process, leading to burnt oil and a less effective seasoning layer.
- Solution:
- Keep a close eye on the oil’s temperature as it heats.
- Remember that the goal is to achieve a gentle sizzle, not to reach the point of smoking or burning.
- If you notice smoke or a burnt smell, remove the pan from the heat source immediately and allow it to cool down before wiping away any excess oil.
- Restart the seasoning process if needed.
4. Inadequate Non-Stick Performance
- Issue: Your seasoned pan still exhibits some degree of sticking, despite your efforts.
- Solution:
- If your seasoned pan isn’t performing as expected, it might require additional seasoning rounds.
- Consider repeating the chosen seasoning method, ensuring proper oil coverage and consistent heat.
- Over time, as the seasoning layer builds up, you’ll likely experience improved non-stick performance.
Also Read – Best 100 Percent Ceramic Nonstick Cookware Set
5. Discoloration Or Residue Buildup
- Issue: Noticing discoloration or a buildup of residue on your pan’s surface after seasoning.
- Solution:
- Discoloration can occur due to various factors, including the type of oil used and the seasoning process itself.
- To address this, gently scrub the pan using a soft sponge and mild dish soap, followed by thorough rinsing.
- Remember, a slight discoloration over time is normal and won’t affect the pan’s performance.
Comparative Analysis: Choosing Your Ideal Seasoning Method
As you stand at the crossroads of seasoning your ceramic frying pan, you’re faced with three distinct paths – stovetop, oven, and sunlight.
Each method offers its own set of advantages and considerations, allowing you to tailor your choice to your unique cooking habits and available resources.
Let’s delve into a comparative analysis to help you make an informed decision:
Stovetop Seasoning
PROS
- Accessibility: Requires only a stovetop, a pan, and oil, making it accessible to most.
- Controlled Heat: Allows for precise control over the heat level, preventing overheating.
- Even Coating: Easier to ensure even oil distribution across the pan’s surface.
- Immediate Results: The seasoning process is relatively quick and provides immediate use of the pan.
CONS
- Stovetop Space: Might compete for stovetop space, especially during busy cooking sessions.
- Continuous Supervision: Requires constant attention to prevent oil from overheating.
Also Read – Why Do Ceramic Pans Lose Their Nonstick Properties?
Oven Seasoning
PROS
- Space Efficiency: Ideal for those with limited stovetop space or multitasking needs.
- Uniform Heating: The oven’s even distribution of heat promotes consistent seasoning.
- Hands-Free Approach: Once placed in the oven, requires less active supervision.
CONS
- Preheating Time: Oven preheating time adds to the overall seasoning process.
- Resource Usage: Consumes energy, which might be a concern for eco-conscious individuals.
Sunlight Seasoning
PROS
- Eco-Friendly: Leverages natural sunlight, minimizing energy consumption.
- Novelty: Offers an unconventional and intriguing approach to seasoning.
- Hands-Free and Safe: Requires minimal intervention once set up.
CONS
- Weather Dependency: Highly reliant on bright sunlight, making it less predictable.
- Time-Consuming: The process can be lengthier compared to other methods.
- Consistency Challenge: Achieving consistent exposure might be challenging due to changing sun angles.
In choosing your seasoning method, consider your cooking routine, kitchen setup, and personal preferences. If space is scarce or you’re seeking a hands-off approach, the oven might be your go-to.
If you’re adventurous and the weather cooperates, sunlight seasoning could add a unique touch. Alternatively, if you prefer direct control and immediate results, the stovetop method is likely your best bet.
Also Read – Can You Put An Aluminum Pan In The Microwave?
How To Reseason Ceramic Pan?
Reseasoning a ceramic pan helps maintain its non-stick properties and extends its lifespan. Here’s how you can do it:
- Wash The Pan: Start by washing the pan thoroughly with warm, soapy water. Use a soft sponge or cloth to avoid scratching the ceramic surface.
- Dry Completely: Ensure the pan is completely dry before you begin the reseasoning process. Use a clean, dry cloth to wipe off any moisture.
- Apply Oil: Apply a thin layer of high-smoke-point oil such as vegetable oil, canola oil, or grapeseed oil to the ceramic surface. Use a paper towel or cloth to spread the oil evenly across the pan, including the sides.
- Heat The Pan: Place the pan on a stovetop burner set to medium heat. Allow the pan to heat up gradually. Heating the oil helps it bond with the ceramic surface.
- Let It Smoke: Heat the pan until it starts to smoke slightly. This indicates that the oil is polymerizing, creating a natural non-stick coating.
- Cool And Wipe: Turn off the heat and let the pan cool down completely. Once it’s cool, use a paper towel or cloth to wipe off any excess oil. Your ceramic pan is now reseasoned and ready to use.
Tips
- Avoid High Heat: While ceramic pans can handle moderate heat, avoid using high heat settings, as excessive heat can damage the non-stick coating.
- Use The Right Utensils: Use wooden, silicone, or nylon utensils to prevent scratching the ceramic surface.
- Hand Wash Only: Avoid putting ceramic pans in the dishwasher, as harsh detergents and high water pressure can damage the non-stick coating.
- Avoid Abrasive Cleaners: Stick to gentle, non-abrasive cleaners to maintain the ceramic surface.
Also Read – How To Clean Oxidized Aluminum Pans?
Maintenance Tips: Nurturing Your Seasoned Ceramic Pan
Congratulations, you’ve successfully seasoned your ceramic frying pan! But the journey doesn’t end here – now it’s time to ensure your seasoned surface remains in pristine condition for countless cooking endeavors.
By following these maintenance tips, you’ll prolong the life of your seasoning and continue to enjoy a flawless non-stick cooking experience.
- Gentle Cleaning Practices:
- When cleaning your seasoned pan, opt for gentle cleaning tools. Abrasive scouring pads and harsh brushes can damage the delicate seasoning layer.
- After each use, wash your pan with warm water and a soft cloth or sponge. Avoid using excessive force to prevent scratching the surface.
- Say No to Metal Utensils:
- To maintain the integrity of your seasoning, opt for non-metal utensils.
- Wooden, silicone, or plastic utensils are gentle on the surface and won’t scratch or chip away the seasoning.
- Gentle Drying Methods:
- After cleaning, pat your pan dry with a soft towel. Avoid aggressive wiping, as it may wear down the seasoning layer.
- If you have the time, allow your pan to air dry to prevent any moisture accumulation.
- Store with Care:
- Before storing your pan, consider applying a light coating of high smoke point oil.
- This protective layer helps prevent the seasoning from drying out and maintains its non-stick properties.
- Regular Re-Seasoning:
- Over time, even the most resilient seasoning can gradually diminish.
- To restore your pan’s non-stick prowess, consider re-seasoning every six months or as needed.
- Avoid Thermal Shock:
- While ceramic pans are sturdy, they’re vulnerable to sudden temperature changes.
- Avoid placing a hot pan directly under cold water, as this can cause the ceramic to crack.
- Love Your Pan:
- While seasoning enhances the pan’s non-stick properties, it’s still wise to apply a bit of cooking oil or butter before each use for added protection.
- Be cautious not to overheat your pan. Excessive heat can lead to oil breakdown and damage the seasoning.
Also Read – Are Calphalon Pans Oven-Safe?
Final Thoughts: How To Season A Ceramic Frying Pan?
In conclusion, seasoning your ceramic frying pan is a simple yet essential process that enhances its non-stick capabilities and prolongs its lifespan. Whether you choose the stovetop, oven, or even sunlight method, using high-heat retention oils like coconut or flaxseed oil is key.
Proper seasoning not only prevents sticking but also ensures your pan serves you well for years. Remember, a well-seasoned ceramic pan not only transforms your cooking experience but also preserves the flavors of your favorite dishes.
Happy seasoning and happy cooking!
Frequently Asked Questions (FAQ’s)
-
Does Ceramic Cookware need to be seasoned?
No, ceramic cookware does not require seasoning. Unlike cast iron pans, ceramic coatings are naturally non-stick and do not benefit from additional seasoning.
-
Why does everything stick to my Ceramic Frying Pan?
Food sticking to your ceramic pan could be due to high heat, improper preheating, or using metal utensils. Using moderate heat and non-metal utensils can prevent sticking.
-
Do You Use Oil In A Ceramic Pan?
Yes, using a small amount of oil is recommended in ceramic pans to enhance non-stick properties and prevent food from sticking.
-
How do you restore a Ceramic Frying Pan?
To restore a worn ceramic pan, try reseasoning it with oil and heating it gently. If the non-stick surface is severely damaged, consider replacing the pan.
-
How long does Ceramic Cookware last?
With proper care, ceramic cookware can last 3 to 5 years or even longer. Regular seasoning, gentle cleaning, and avoiding high heat can extend its lifespan.
Katrina Smith is a seasoned expert with over 25 years of experience in all things related to cooking and the kitchen. As an avid cook and kitchen enthusiast, she is passionate about sharing her knowledge and expertise on cookware, kitchen appliances, kitchen tips, and kitchen staples.
Through her articles and reviews, Katrina aims to inspire and help others improve their cooking skills, experiment with different ingredients, and invest in quality cookware and appliances.

![How To Season And Clean Cast Iron Cookware? [4 Effective Ways] 6 How To Season And Clean Cast Iron Cookware](https://www.kitchensity.com/wp-content/uploads/2020/06/How-To-Season-And-Clean-Cast-Iron-Cookware.jpg)
![Stainless Steel Vs Nonstick Vs Ceramic Cookware Set [An Ultimate Guide 2023] 8 Stainless Steel vs Nonstick vs Ceramic Cookware Set](https://www.kitchensity.com/wp-content/uploads/2019/09/Stainless-Steel-vs-Ceramic-vs-Nonstick-Cookware-Sets-e1621083482728.jpg)
![What Pans Can You Use Cooking Spray On? [Ultimate Guide] 10 Types of pans with which cooking spray can be used](https://www.kitchensity.com/wp-content/uploads/2023/02/What-Pans-Can-You-Use-Cooking-Spray-On.jpg)
