Welcome to the comprehensive guide on how to season a nonstick pan for the first time!
If you’re new to the world of nonstick cookware and want to ensure your pan’s longevity and optimal performance, you’ve come to the right place.
Seasoning your nonstick pan is a crucial step in maintaining its nonstick properties and preventing the coating from deteriorating over time.
In this article, we will take you through the step-by-step process of seasoning, discuss the importance of choosing the right oil, provide tips for proper cleaning, and even explore alternative seasoning methods.
By the end of this guide, you’ll be equipped with the knowledge to season your nonstick pan like a pro and enjoy hassle-free cooking experiences.
So let’s dive in and learn how to make your nonstick pan a true kitchen companion!
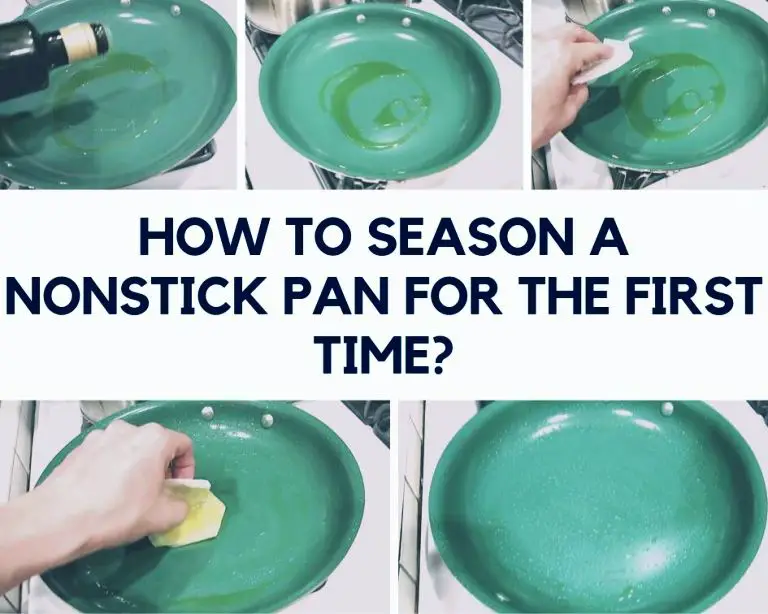
Now, let’s start the topic:
Table of Contents
- 1 How To Season A Nonstick Pan For The First Time?
- 2 What is Seasoning of a Nonstick Pan?
- 3 Step-By-Step Process To Season A Non-Stick Pan
- 4 Precautions For Seasoning a Nonstick Pan
- 5 What To Do If You Had Already Cooked Food Before Seasoning?
- 6 Best Oil To Season Non-Stick Pan
- 7 Alternative Seasoning Products
- 8 How Often To Season Non-Stick Pan?
- 9 How To Use Non-Stick Pan The First Time?
- 10 How To Wash Non-Stick Pan The First Time?
- 11 Troubleshooting Tips
- 12 You May Also Like –
- 13 Conclusion
- 14 FAQs
- 14.1 Do Non-Stick Pans Need To Be Seasoned?
- 14.2 How To Season Tramontina Non-Stick Pans?
- 14.3 Can I Grease A Pan With Coconut Oil?
- 14.4 Can I Use Olive Oil To Season A Non-Stick Pan?
- 14.5 What Should I Do If My Nonstick Pan Starts To Stick?
- 14.6 Can I Use Metal Utensils With A Nonstick Pan?
- 14.7 How Do I Clean My Nonstick Pan After Each Use?
How To Season A Nonstick Pan For The First Time?
To season a nonstick pan for the first time, start by heating the pan for a few minutes. Then, apply a high-heat retention oil like vegetable or canola oil to the pan’s surface, ensuring even coverage. Heat the pan again, let it cool, and wipe off any excess oil. Repeat the process at least twice a year to maintain the quality of the nonstick coating.
Refer below for a complete step-by-step process.
Also Read – How To Season Stainless Steel Pots And Pans?
What is Seasoning of a Nonstick Pan?
- Seasoning of a nonstick pan refers to the process of applying a coating or greasing of high heat retention oil, such as vegetable oil, canola oil, or coconut oil, to the inner surface of the pan.
- This process helps to enhance the durability and nonstick properties of the pan, making it smoother and preventing food from sticking.
- Seasoning creates a protective layer on the pan’s surface, extending its lifespan and improving cooking performance.
Step-By-Step Process To Season A Non-Stick Pan
Here are the steps to season a nonstick pan for various cooktops-
For Gas Stoves Or Electric Or Induction Cooktops
Step 1
First, heat the nonstick pan for about 1 to 2 mins or up to when you can touch it with your hand.
Step 2
Then take some oil (usually 2 to 3 tablespoons) depending upon the size of the pan. You can take any oil which has high heat retention.
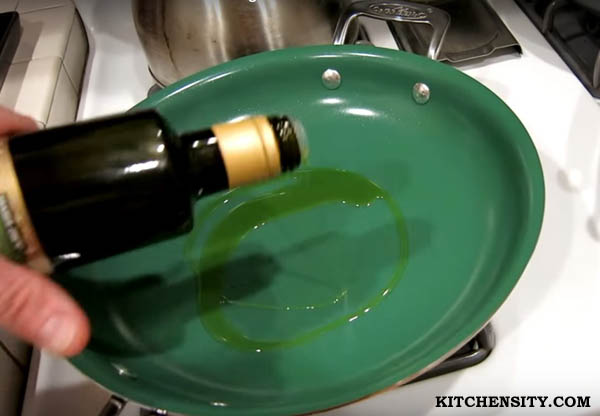
And apply the oil to the inner surface of the pan, which means, you have to grease the oil properly with each corner covering.
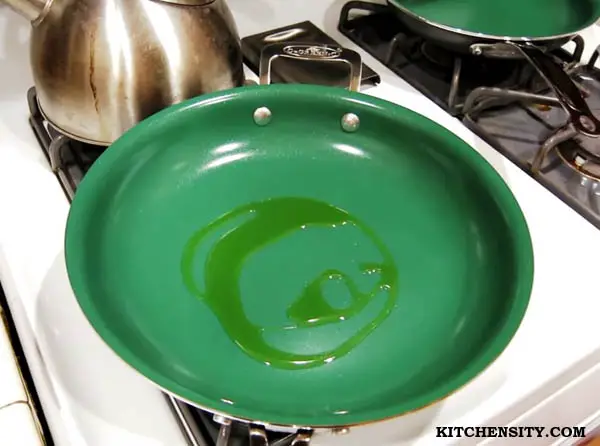
You have to swirl it around for better coverage of oil or you can take a cloth or paper towel to grease it nicely.
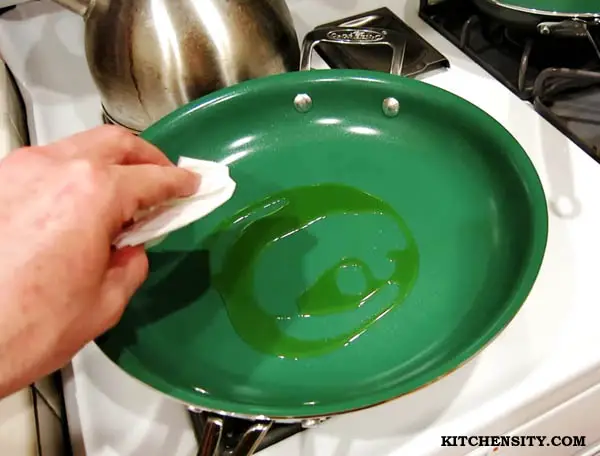
Step 3
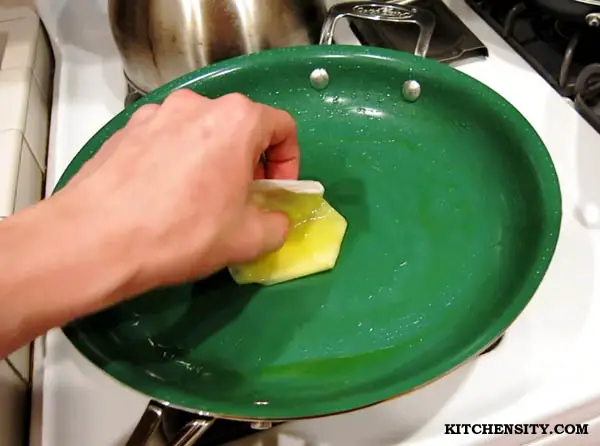
Now, heat the pan again for about 1 to 2 mins or you can make sure by just placing your hand over it when you feel the heat there that’s.
Step 4
After heating the nonstick pan for 1-2 mins then put the flame off and let it cool down. After cooling down, just clean the pan with a soft cloth or paper towel. Basically, you need to clean or soak the excess oil remaining on the pan.
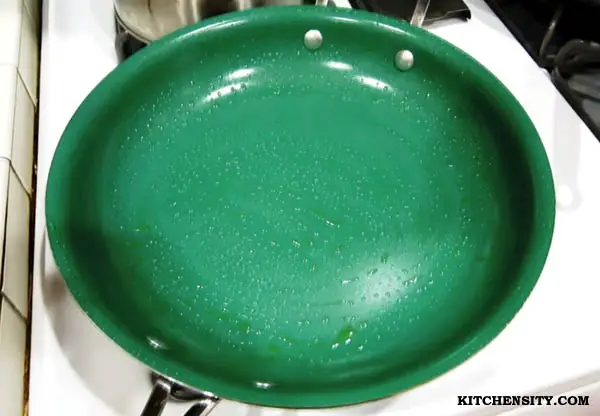
That’s it, you have seasoned your first nonstick pan. Just make sure, to repeat this process at least twice a year to maintain the quality of the nonstick pan.
Also Read – Do You Need To Season Enameled Cast Iron?
For Any Oven
Step 1
For the oven no need to heat the pan before oiling. Here, you have to heat the pan after applying oil to the pan.
But, here if you use coconut oil or grapeseed oil, then it will be much better. Don’t worry you can use olive oil as well.
Step 2
Repeat the step 2 process of a gas cooktop. This process will be exactly the same as above.
Step 3
Here you have to preheat the oven at 300-degree Celcius. Then put the pan into the oven for about 20 mins to 30 mins (see the manual for best results) and after that, off the oven and keep the pan inside.
Don’t take out the pan from the oven until it cools down. Because after turning off the oven, the heat is present there for some time, which is beneficial, so let the pan cool down there.
Step 4
After cooling down, just clean the pan with a soft cloth or paper towel. You need to clean or soak the excess oil remaining on the pan. And now your pan is ready for cooking.
So, in these ways, you can season your nonstick pan for making it long-lasting.
Also Read – How To Season And Clean Cast Iron Cookware?
Precautions For Seasoning a Nonstick Pan
Heating the pan is the most crucial part because you cannot overheat it. Just make sure you read the manual before seasoning it. Because different pans need different temperatures and times.
Sometimes some cookware requires up to 2 hours of heating in an oven or for 15-30 mins on gas stove cooktops. Depending upon the brand, size, and quality of the pan, the time of heating varies.
So, don’t mess up the pan, just read the manual and do it properly.
What To Do If You Had Already Cooked Food Before Seasoning?
If you had already cooked food before seasoning then no need to worry, we have the solution.
When you’re cooking I mean what do you want these expensive pans to be, you want them to last longer. Depending on what you use, whether it’s cast iron or nonstick, just follow the instructions.
- First, take a soft cloth or sponge and apply some soap water. Then clean it gently and rinse with clean water.
- Make sure nothing sticks on it and keep the pan completely dry out.
- After the pan gets completely dried then repeat the seasoning process which I have mentioned above.
Caution: Don’t clean the pan in a dishwasher, do it manually with your hands. Though your pan may be dishwasher safe then also do it manually.
Also Read – How To Season A Ceramic Frying Pan?
Best Oil To Season Non-Stick Pan
When it comes to selecting the best oil to season a nonstick pan, it’s important to choose an oil with a high smoke point.
Oils with high smoke points can withstand higher temperatures without breaking down and producing smoke.
Here are some oils commonly used for seasoning nonstick pans:
- Vegetable Oil: Vegetable oil is a popular choice for seasoning nonstick pans due to its high smoke point and neutral flavor. It can withstand high temperatures without smoking or burning, making it suitable for the seasoning process.
- Canola Oil: Canola oil is another excellent option for seasoning nonstick pans. It has a high smoke point, making it ideal for high-heat cooking methods. Canola oil is also relatively flavorless, so it won’t interfere with the taste of your food.
- Grapeseed Oil: Grapeseed oil is derived from grape seeds and has a high smoke point, making it suitable for seasoning nonstick pans. It has a mild flavor, allowing the natural flavors of your food to shine through.
- Avocado Oil: Avocado oil is known for its high smoke point and is a great choice for seasoning nonstick pans. It has a buttery and slightly nutty flavor that can add a pleasant taste to your dishes.
It’s important to note that oils with lower smoke points, such as olive oil or butter, are not recommended for seasoning nonstick pans.
These oils tend to smoke and burn at higher temperatures, which can result in a sticky residue on the pan’s surface.
To season your nonstick pan, simply apply a thin layer of your chosen oil to the pan’s interior surface and follow the seasoning instructions outlined in the article.
This process will help create a protective layer on the pan, enhancing its nonstick properties and improving its longevity.
Remember to always refer to the manufacturer’s instructions for any specific recommendations they may have regarding seasoning and oil selection for your particular nonstick pan.
Also Read – HOW TO TELL IF A PAN IS OVEN SAFE?
Alternative Seasoning Products
There are specific seasoning products available on the market that are designed to simplify and enhance the seasoning process.
These products often contain a combination of oils and additives that promote a smooth nonstick surface.
Follow the instructions provided with the seasoning product you choose, as they may vary. In general, the process involves:
- Clean the nonstick pan thoroughly to remove any residue.
- Apply the seasoning product to the interior surface of the pan, following the recommended amount.
- Spread the seasoning product evenly, making sure to cover all areas of the pan’s surface.
- Heat the pan according to the product’s instructions, which may involve stovetop or oven heating methods.
- Allow the pan to cool completely before wiping away any excess seasoning product.
- Your nonstick pan is now seasoned and ready for use.
It’s important to note that when using alternative seasoning methods or seasoning products, always follow the manufacturer’s instructions for the best results.
Additionally, consider the specific needs of your nonstick pan and adjust the seasoning frequency accordingly.
Also Read – Why Do Ceramic Pans Lose Their Nonstick Properties?
How Often To Season Non-Stick Pan?
The frequency of seasoning a nonstick pan can vary depending on factors such as the manufacturer’s recommendations, the quality of the pan, and the frequency of use.
While seasoning twice a year is a general guideline, it’s important to consider other factors as well.
Here are some additional factors to help determine how often to season your nonstick pan:
- Manufacturer’s Recommendations: Check the manufacturer’s instructions or guidelines that come with your nonstick pan. Some manufacturers may provide specific recommendations on the frequency of seasoning based on their product’s design and materials.
- Usage: Consider how frequently you use your nonstick pan. If you use it regularly for cooking high-heat dishes or frequently expose it to intense cooking conditions, more frequent seasoning may be necessary. Regular usage can wear down the nonstick coating, and seasoning helps maintain its performance.
- Visual And Performance Cues: Observe the condition of your nonstick pan. If you notice signs of the coating wearing off, food starting to stick, or a decline in nonstick performance, it may be time to re-season the pan. These cues can indicate that the coating is deteriorating and needs to be refreshed.
- Personal Preference: Some individuals prefer to season their nonstick pans more frequently to ensure optimal performance and longevity. If you value a consistently smooth and nonstick surface, you may choose to season your pan more often, such as once every few months or even monthly.
Remember that proper cleaning and maintenance of your nonstick pan are also crucial for its longevity and performance.
- Cleaning it gently after each use and avoiding abrasive materials will help preserve the nonstick coating.
- Additionally, avoid using metal utensils that can scratch the surface and opt for utensils made of silicone, plastic, or wood.
While seasoning your nonstick pan at least twice a year is a good starting point, the frequency can be adjusted based on the manufacturer’s recommendations, usage patterns, visual cues, and personal preference.
Regular seasoning and proper maintenance will help extend the life of your nonstick pan and ensure its optimal nonstick performance.
Also Read – How To Clean Burnt Hard Anodized Cookware?
How To Use Non-Stick Pan The First Time?
When using a nonstick pan for the first time, it’s important to take a few steps to ensure optimal performance and preserve the nonstick coating.
Here’s a guide on how to use a nonstick pan for the first time:
- Remove Packaging And Labels: Start by removing any packaging materials or labels from the pan. Check for any protective coatings or stickers and peel them off.
- Wash The Pan: Before using the nonstick pan, wash it with warm water and mild dish soap to remove any manufacturing residue or dust that may be present. Use a soft sponge or cloth to gently clean the pan. Rinse it thoroughly and dry it with a towel.
- Preheat The Pan: Place the nonstick pan on the stovetop over medium heat. Allow it to preheat for a few minutes. Preheating helps to ensure even heat distribution and enhances the nonstick properties of the pan.
- Use Adequate Cooking Oil: While nonstick pans are designed to reduce the need for excessive oil or butter, it’s still recommended to use a small amount of cooking oil or spray to prevent sticking. Add a small amount of oil or cooking spray to the pan’s surface and distribute it evenly.
- Cook At Appropriate Heat: Adjust the heat to the desired level for your recipe. It’s important not to use high heat with a nonstick pan, as excessive heat can damage the nonstick coating. Medium to medium-high heat is typically sufficient for most cooking tasks.
- Cook With Utensils: When using a nonstick pan, it’s advisable to use non-metallic utensils such as silicone, nylon, or wooden utensils. Metal utensils can scratch or damage the nonstick surface.
- Monitor Cooking Time: Keep an eye on your food while it cooks and adjust the heat as necessary. Nonstick pans heat up quickly, so food may cook faster compared to traditional pans. Avoid overheating the pan or leaving it unattended for extended periods.
- Clean And Care For The Pan: After cooking, allow the pan to cool down before cleaning it. Follow the proper cleaning instructions for nonstick pans, which typically involve gentle hand washing with mild dish soap and a soft sponge. Avoid using abrasive cleaners, steel wool, or harsh scrubbing brushes, as they can damage the nonstick coating.
By following these steps, you can effectively use a nonstick pan for the first time and ensure a positive cooking experience with easy food release and minimal sticking.
Remember to always refer to the manufacturer’s instructions and guidelines specific to your nonstick pan for any additional recommendations or precautions.
Also Read – How To Get Sticky Residue Off Non-Stick Pans?
How To Wash Non-Stick Pan The First Time?
When washing a nonstick pan for the first time, it’s essential to follow proper cleaning procedures to ensure the longevity and performance of the nonstick coating.
Here are step-by-step instructions on how to wash a nonstick pan for the first time:
- Let the Pan Cool: Allow the nonstick pan to cool down completely before starting the cleaning process. Placing a hot pan under running water can cause warping or damage to the pan.
- Hand Washes Only: Nonstick pans should always be washed by hand and not in a dishwasher. The harsh detergents and high temperatures in dishwashers can degrade the nonstick coating over time.
- Use Mild Dish Soap: Choose a mild dish soap or a non-abrasive cleaner specifically designed for nonstick cookware. Avoid using harsh abrasive cleaners, steel wool, or scouring pads, as they can scratch or damage the nonstick surface.
- Gently Clean The Surface: Fill the sink with warm water and add a few drops of dish soap. Use a soft sponge or cloth to gently scrub the interior and exterior of the pan. Pay extra attention to any food residue or stains, and gently remove them without scrubbing too aggressively.
- Rinse Thoroughly: After cleaning the pan, rinse it thoroughly with warm water to remove any soap residue. Ensure that all soap is rinsed off to avoid affecting the pan’s nonstick properties.
- Dry Completely: Once rinsed, use a soft towel or paper towel to dry the pan completely. Avoid air-drying, as water droplets can cause water spots or discoloration on the pan’s surface.
By following these steps, you can effectively clean your nonstick pan for the first time.
It’s important to continue practicing proper cleaning habits after each use to maintain the nonstick coating and extend the lifespan of your nonstick pan.
Also Read – Why Does Food Stick To My Enamel Cast Iron?
Troubleshooting Tips
Troubleshooting Tips for Seasoning Nonstick Pans:
1. Uneven Coating
If you notice an uneven coating after seasoning your nonstick pan, there are a few steps you can take to rectify the issue:
- Ensure that you are applying a thin, even layer of oil to the pan’s surface during the seasoning process. Use a cloth or paper towel to spread the oil evenly, making sure to cover all areas.
- If you encounter areas with an uneven coating, you can re-season those specific spots. Clean the pan, reapply a small amount of oil, and repeat the seasoning process for the affected areas.
- Be mindful of the temperature during the seasoning process. Ensure that the pan is evenly heated, allowing the oil to spread and adhere uniformly.
2. Flaking Or Peeling
If you experience flaking or peeling of the nonstick coating after seasoning, take the following steps:
- Stop using the pan if you notice significant flaking or peeling. Continued use in this condition can lead to further damage and affect the performance of the pan.
- Thoroughly clean the pan, removing any loose or flaking coating. Use a soft sponge or cloth to gently scrub the affected areas.
- After cleaning, assess the extent of the damage. If the flaking is minor, you can try re-seasoning the pan to provide a new protective layer. Follow the seasoning process carefully and ensure even coverage.
- If the flaking is extensive or the nonstick coating continues to peel, it may be time to consider replacing the pan. Continued use with a compromised coating can impact the pan’s effectiveness and potentially affect the quality of your food.
Also Read – Does Vinegar Ruin Non-Stick Pans?
3. Sticking
If you experience food sticking to your nonstick pan, even after seasoning, try the following suggestions:
- Ensure that you are using an appropriate amount of oil or cooking spray before cooking. Applying a thin layer of oil or using a nonstick cooking spray can help prevent sticking.
- Avoid using excessive heat, as it can cause the nonstick coating to deteriorate and lose its effectiveness. Opt for medium to medium-high heat settings for best results.
- Allow the pan to preheat adequately before adding food. Preheating helps create a protective barrier and reduces the chances of sticking.
- Use the right utensils when cooking with a nonstick pan. Avoid using metal utensils that can scratch the coating. Opt for silicone, plastic, or wooden utensils that are gentle on the nonstick surface.
By addressing these common issues and following the appropriate steps, you can maintain the nonstick surface effectively and enhance the performance of your pan.
Remember to handle and clean the pan with care, avoiding abrasive materials or harsh cleaning agents that can damage the coating.
Regular seasoning and proper maintenance will help ensure the longevity and effectiveness of your nonstick pan.
You May Also Like –
- How To Fix Scratched Non-Stick Pans?
- Best Nonstick Pans for Your Kitchen
- Best 100 Percent Ceramic Nonstick Cookware Set Reviews
- Best Non-Stick Cookware Brands
Conclusion
If you have followed all the steps carefully, then you’ll notice that food items won’t stick at all, that’s the point of seasoning your pan.
By seasoning the nonstick pan you are not only making it smooth, but also you are making the pan durable. The nonstick coating will remain smooth for a long time.
Remember to always season it twice a year or even thrice to maintain its quality. Some of the manufacturers even recommend seasoning it 7 to 8 times. But that’s not required if you do it twice that will be enough.
So, before buying any pots and pans we always think that what to look for when buying any non-stick cookware set. You can check the article to clarify your doubts.
So hopefully, if you like this article you can share it with your friends and family. And don’t forget to leave a comment below or if you have any doubts, feel free to ask anything in the comment section.
FAQs
-
Do Non-Stick Pans Need To Be Seasoned?
Non-stick pans do not necessarily need to be seasoned, as they come with a pre-applied nonstick coating. However, seasoning can help improve the performance and longevity of the nonstick surface.
-
How To Season Tramontina Non-Stick Pans?
To season Tramontina non-stick pans, follow the general seasoning process: heat the pan, apply a high-heat retention oil like vegetable or canola oil, swirl it around for even coverage, heat again, let it cool, and wipe off any excess oil.
-
Can I Grease A Pan With Coconut Oil?
Yes, you can grease a pan with coconut oil. Coconut oil has a relatively high smoke point, making it suitable for greasing and cooking at higher temperatures.
-
Can I Use Olive Oil To Season A Non-Stick Pan?
Using olive oil to season a non-stick pan is not recommended, as olive oil has a lower smoke point and can create a sticky residue when exposed to high heat. It’s better to use oils with higher smoke points like vegetable oil, canola oil, or grapeseed oil for seasoning.
-
What Should I Do If My Nonstick Pan Starts To Stick?
If your nonstick pan starts to stick, it may be an indication that the nonstick coating has worn off or been damaged. In such cases, it is recommended to replace the pan. Additionally, ensure that you are using appropriate utensils and avoiding high heat, as misuse can also affect the nonstick performance.
-
Can I Use Metal Utensils With A Nonstick Pan?
It is generally advised to avoid using metal utensils with nonstick pans, as they can scratch or damage the nonstick coating. It’s best to use non-metallic utensils, such as silicone, nylon, or wooden utensils, to preserve the nonstick surface.
-
How Do I Clean My Nonstick Pan After Each Use?
After each use, hand wash your nonstick pan with warm water and mild dish soap. Use a soft sponge or cloth to gently clean the surface. Avoid using abrasive cleaners or scrubbing pads, as they can damage the nonstick coating.
Katrina Smith is a seasoned expert with over 25 years of experience in all things related to cooking and the kitchen. As an avid cook and kitchen enthusiast, she is passionate about sharing her knowledge and expertise on cookware, kitchen appliances, kitchen tips, and kitchen staples.
Through her articles and reviews, Katrina aims to inspire and help others improve their cooking skills, experiment with different ingredients, and invest in quality cookware and appliances.

![How To Season And Clean Cast Iron Cookware? [4 Effective Ways] 8 How To Season And Clean Cast Iron Cookware](https://www.kitchensity.com/wp-content/uploads/2020/06/How-To-Season-And-Clean-Cast-Iron-Cookware.jpg)
![Stainless Steel Vs Nonstick Vs Ceramic Cookware Set [An Ultimate Guide 2023] 10 Stainless Steel vs Nonstick vs Ceramic Cookware Set](https://www.kitchensity.com/wp-content/uploads/2019/09/Stainless-Steel-vs-Ceramic-vs-Nonstick-Cookware-Sets-e1621083482728.jpg)
![What Pans Can You Use Cooking Spray On? [Ultimate Guide] 12 Types of pans with which cooking spray can be used](https://www.kitchensity.com/wp-content/uploads/2023/02/What-Pans-Can-You-Use-Cooking-Spray-On.jpg)
The boiling speed is almost 3 minutes less in hot plates as compared to stove. Next, let us talk about the temperature ranges of both these products.