Cleaning an electric coil stove top might seem like a daunting task, but with the right approach and a bit of elbow grease, you can keep your stove looking brand new.
In this article, we’ll walk you through a comprehensive guide on how to effectively clean an electric coil stove top. Say goodbye to stubborn stains and greasy residues, and hello to spotless cooking!
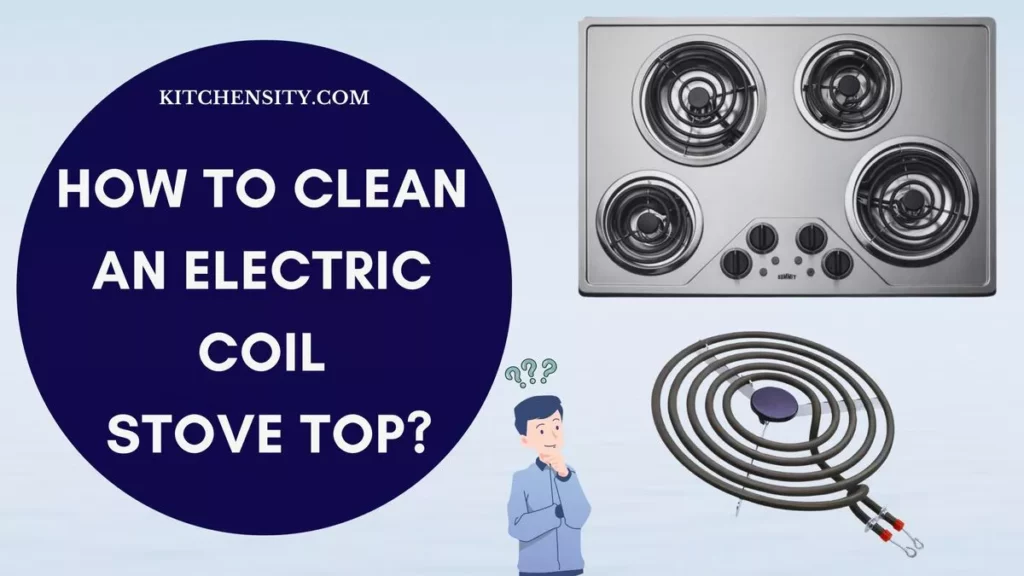
Table of Contents
- 1 Understanding Your Electric Coil Stove Top
- 2 Gathering Your Cleaning Essentials
- 3 How To Clean An Electric Coil Stove Top? Step-By-Step Cleaning Process
- 4 How To Clean Under Electric Coil Stove Top?
- 5 Cleaning Stove Coils With Tin Foil
- 6 Can You Put Electric Stove Coils In Water?
- 7 Maintaining Your Electric Coil Stove Top
- 8 Final Thoughts: How To Clean An Electric Coil Stove Top?
- 9 Frequently Asked Questions (FAQs)
Understanding Your Electric Coil Stove Top
Before diving into the cleaning process, it’s essential to understand the components of your electric coil stove top. Knowing how it works will help you clean it more efficiently and safely.
1. Identifying The Parts
- Coil Burners: These are the heating elements on your stove. They are made of durable material and are where the heat is generated. Coil burners come in different sizes, catering to various pot and pan dimensions.
- Drip Bowls: Located beneath the coil burners, drip bowls catch any spills or drips during cooking. They are removable, making it easier to clean any residue that accumulates. Drip bowls prevent food particles and grease from reaching the electrical components, ensuring the stove’s safety and longevity.
- Control Knobs: The control knobs allow you to adjust the temperature of the coil burners. They are an essential part of the stove, enabling you to regulate heat levels for different cooking tasks. Understanding how to use these knobs correctly ensures precise cooking control.
2. Safety First
- Turn Off The Power: Before attempting any cleaning, always turn off the power supply to your stove. This step is vital to prevent electric shock or accidents while handling the components. Ensure the stove is completely cool before you start cleaning.
- Allow Cooling Time: Even after turning off the power, allow the stove to cool down before you touch any part of it. The components can retain heat for a while after usage, and touching them while hot can lead to burns or injuries. Patience in this step ensures your safety.
Understanding these basic elements of your electric coil stove top provides a foundation for efficient and safe cleaning.
Also Read – How To Clean Electric Stove Burners And Drip Pans?
Gathering Your Cleaning Essentials
To clean your electric coil stove top effectively, gather the following items:
- Mild Dish Soap
- Baking Soda
- White Vinegar
- Soft Bristle Brush
- Microfiber Cloth
- Rubber Gloves
How To Clean An Electric Coil Stove Top? Step-By-Step Cleaning Process
To clean an electric coil stove top, start by removing the coils and drip bowls. Wipe the surface with a damp cloth and mild dish soap, avoiding abrasive cleaners. For stubborn stains, create a paste with baking soda, scrub gently, and dry all components thoroughly before reassembling.
Also Read – Can You Replace Burners On An Electric Stove?
Here’s a detailed step-by-step guide to help you clean your electric coil stove top effectively:
1. Removing The Coils
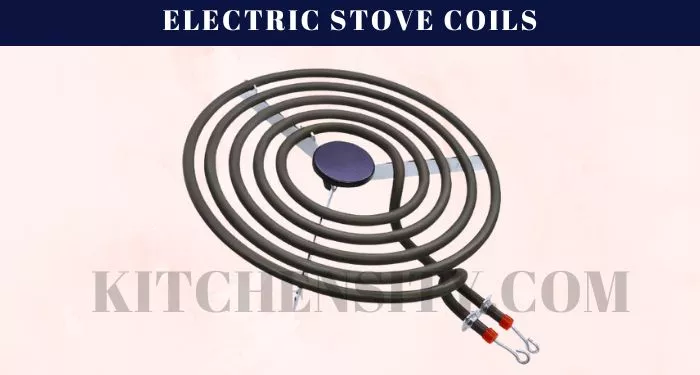
- Gently Lift The Coil Burners: Begin by ensuring your stove is completely cool. Gently lift the coil burners from their sockets. Do this by grasping the sides of the coil and lifting upward. The coils are usually designed to come off easily without excessive force.
- Clean Drip Bowls Separately: Once the coils are removed, take out the drip bowls beneath them. These bowls often collect spills and can be quite dirty. Wash them separately with warm, soapy water. For stubborn, baked-on residues, create a paste with baking soda and water. Apply the paste, let it sit for a few minutes, and then scrub with a soft brush. Rinse thoroughly and ensure they are completely dry before placing them back.
2. Cleaning The Coils
Cleaning the coil burners of your electric stove is essential for maintaining efficient cooking and a tidy kitchen. Here’s how to clean the coils effectively:
- Brush Off Loose Debris: Begin by using a soft-bristle brush to gently sweep away any loose debris from the coil burners. This includes food particles, crumbs, and any other residue. Be gentle to avoid damaging the coils.
- Soak In Warm, Soapy Water: Fill a basin or sink with warm water and add a small amount of mild dish soap. Carefully place the coil burners in the soapy water. Let them soak for 15-20 minutes. This helps to loosen stubborn residue, making it easier to clean.
- Scrub Gently With A Soft Bristle Brush: After soaking, take each coil burner and scrub it gently with a soft bristle brush or sponge. Pay special attention to areas with stubborn stains or grease. Avoid using abrasive materials or brushes that could scratch the coils. For persistent stains, apply a baking soda paste (baking soda mixed with water) and let it sit for a few minutes before scrubbing.
- Rinse Thoroughly: Once you’ve scrubbed the coils, rinse them thoroughly with clean water to remove any soap or baking soda residue. Ensure there is no residue left, as it can cause smoking when you use the stove.
- Air Dry Completely: After rinsing, let the coil burners air dry completely. You can place them on a clean, dry towel or rack to speed up the drying process. Ensure they are completely dry before reattaching them to the stove. Moisture can cause electrical issues if not dried thoroughly.
- Inspect For Damage: While cleaning, inspect the coils for any signs of damage, such as cracks or deformities. If you notice any issues, it’s essential to replace the damaged coil promptly to maintain the stove’s efficiency and safety.
Also Read – How To Clean Gas Stove Grates?
3. Basic Cleaning
Basic cleaning is essential to remove surface dirt and grease, preparing your electric coil stove top for a more thorough cleanse. Follow these steps for a quick and effective basic clean:
- Wipe Down The Surface With A Damp Cloth: Start by wiping down the entire surface of the stove top with a damp microfiber cloth. This helps remove loose debris, grease, and food particles. For greasy spots, add a small amount of mild dish soap to the damp cloth and gently scrub the area. Make sure to cover the entire surface, including around the coils and control knobs.
- Clean Control Knobs: Remove the control knobs, if possible, and clean them separately. Use a soft cloth or a cotton swab dipped in warm, soapy water to clean both the knobs and the area they fit onto. Pay attention to crevices where dirt can accumulate. Ensure the knobs are completely dry before reattaching them to the stove.
- Check For Lingering Spills: Inspect the surface closely for any lingering spills or stains. If you find any, dampen a cloth with a mixture of water and mild dish soap. Gently rub the stained area to lift the residue. Avoid using abrasive materials that might scratch the surface.
- Dry Thoroughly: After cleaning, use a clean, dry microfiber cloth to thoroughly dry the stovetop. Moisture left on the surface can lead to streaks or water spots. Proper drying ensures your stove top looks spotless and avoids any issues when you turn on the burners.
Also Read – How To Clean Gas Stove Grates In The Dishwasher?
4. Deep Cleaning
Deep cleaning is essential for removing stubborn stains and grease buildup on your electric coil stove top. Follow these steps for a thorough and effective deep clean:
- Baking Soda Paste For Stubborn Stains: For tough stains on the stove’s surface, create a paste by mixing baking soda with a small amount of water. Apply the paste to the stained areas and let it sit for 15-20 minutes. The mild abrasiveness of baking soda helps break down stains without scratching the surface. Afterward, gently scrub the area with a soft brush or cloth.
- White Vinegar Soak For Drip Bowls: If the drip bowls have stubborn stains or mineral deposits, soak them in a mixture of equal parts white vinegar and water. Let them soak for 20-30 minutes. The acidity of the vinegar helps dissolve the stains. After soaking, scrub the drip bowls with a soft brush, ensuring all residues are removed. Rinse them thoroughly with water.
- Clean Control Knobs Thoroughly: While the control knobs were wiped during basic cleaning, deep cleaning requires extra attention. Remove the knobs and soak them in warm, soapy water. Use a soft brush or cloth to clean around and inside the knob openings. If there are intricate designs, use a toothbrush to reach every crevice. Rinse the knobs thoroughly and ensure they are completely dry before reattaching them.
- Inspect And Clean Underneath The Coils: Lift the coil burners and inspect the area beneath them. Often, crumbs and spills accumulate in these spaces. Use a vacuum cleaner with a nozzle attachment or a can of compressed air to remove the debris. Wipe the area with a damp cloth to ensure it’s completely clean.
- Polish The Surface: After removing stains and cleaning all components, polish the stove top surface with a clean, dry microfiber cloth. This step adds a shine to your stove and ensures no cleaning residues are left behind.
- Dry All Components Thoroughly: Before reassembling, make sure all components, including the coil burners, drip bowls, and control knobs, are completely dry. Any moisture left can cause electrical issues or corrosion.
Deep cleaning your electric coil stove top periodically not only keeps it looking brand new but also ensures optimal performance.
Also Read – How To Clean Gas Stove Grates With Ammonia?
5. Drying And Reassembling
After cleaning the components of your electric coil stove top, it’s crucial to ensure they are thoroughly dried and reassembled correctly for safe and effective use. Here’s how to complete the drying and reassembling process:
- Air Dry Completely: Place all cleaned components, including the coil burners and drip bowls, on a clean, dry surface. Let them air dry completely. This step is vital to ensure there is no moisture left, preventing any electrical issues when you turn on the stove.
- Inspect For Moisture: Before reassembling, double-check all components for any signs of moisture. Even a small amount of water can cause problems. Use a clean, dry cloth to pat them down and make sure they are entirely dry.
- Reassemble The Components Carefully: Once everything is dry, carefully reassemble the stove components. Place the drip bowls back under the coil burners, ensuring they fit securely. Then, gently lower the coil burners into their sockets. Make sure they are positioned correctly and sit flush with the stovetop. Proper reassembly guarantees safe and efficient cooking.
- Check Control Knobs: Ensure the control knobs are completely dry before reattaching them. Make sure they align correctly with the stove and turn smoothly. Faulty knobs can lead to difficulty in adjusting temperatures, affecting your cooking experience.
- Final Surface Check: Before using the stove, give the surface a final check. Ensure there are no cleaning residues, water spots, or streaks. A clean and dry surface not only looks appealing but also functions optimally.
- Test The Burners: After reassembly, turn on each burner individually to confirm they are heating correctly. This quick test ensures that all components are properly connected and functioning as they should.
By following these steps, you complete the cleaning process, leaving your electric coil stove top in excellent condition. Proper drying and reassembling are as crucial as the cleaning itself, ensuring your stove works efficiently and safely, and providing you with a hassle-free cooking experience.
Also Read – How To Clean An Infrared Gas Stove?
How To Clean Under Electric Coil Stove Top?
Cleaning under the electric coil stove top is crucial for maintaining a clean and functional kitchen. Over time, food particles, grease, and spills can accumulate in this area. Here’s how to clean under your electric coil stove top effectively:
- Safety First: Ensure the stove is completely cool before attempting any cleaning underneath it. If possible, disconnect the power source to eliminate the risk of electric shock.
- Prepare Your Cleaning Tools: Gather a flashlight, a long, thin cleaning brush, or a vacuum cleaner with a narrow nozzle, a damp cloth, mild dish soap, warm water, and rubber gloves.
- Lift The Coil Burners: Gently lift the coil burners from their sockets and set them aside on a clean surface. Be careful not to damage the coils during this process.
- Use A Flashlight To Inspect: Use a flashlight to illuminate the area underneath the stove. This will help you see any debris or spills that need cleaning.
- Vacuum Or Brush Away Debris: If you have a vacuum cleaner with a narrow nozzle, carefully vacuum the area under the stove. Alternatively, use a long, thin cleaning brush to sweep away loose debris, such as crumbs and dust. Be gentle to avoid scratching the floor or damaging any components.
- Clean Stubborn Stains: For stubborn stains or sticky residues, mix mild dish soap with warm water. Dampen a cloth or sponge with this soapy solution and gently scrub the stained area. Avoid excessive moisture to prevent any water from seeping into the electrical components.
- Dry The Area Thoroughly: After cleaning, use a clean, dry cloth to wipe the area under the stove. Ensure it is completely dry before you reassemble the coil burners. Moisture can cause electrical issues or corrosion if not dried thoroughly.
- Reassemble The Stove Carefully: Once the area underneath the stove is clean and dry, carefully reinsert the coil burners into their sockets. Ensure they fit securely and are properly aligned. Press them down gently to make sure they are fully seated.
- Inspect And Test: Before turning on the stove, inspect the area one more time to ensure it’s clean and free of debris. Then, test each burner to confirm they are heating correctly.
By following these steps, you can effectively clean under your electric coil stove top, maintaining a hygienic kitchen environment and ensuring the optimal performance of your stove.
Also Read – Can You Replace Burners On An Electric Stove?
Cleaning Stove Coils With Tin Foil
Cleaning stove coils with tin foil is a method often used to remove burnt-on residues and grime. However, it’s essential to proceed with caution, as improper use can damage the coils. Here’s a step-by-step guide on how to clean stove coils with tin foil safely:
- Safety Precautions:
- Turn Off The Power: Before attempting any cleaning, ensure the stove is turned off and unplugged to prevent electrical accidents.
- Allow Cooling: Let the stove cool down completely to avoid burns while cleaning.
- Prepare Your Materials:
- Tin Foil: Tear a sheet of aluminum foil, making sure it’s large enough to cover the entire coil.
- Damp Cloth: Have a damp cloth or sponge nearby for wiping after cleaning.
- Wrap The Coil With Tin Foil:
- Gently Wrap The Coil: Carefully wrap the coil with the tin foil. Ensure it fits snugly but not too tight. The foil will help loosen the burnt-on residues.
- Avoid Distorting The Shape: Be cautious not to distort the coil’s shape while wrapping it with foil. Gentle, precise movements are crucial.
- Turn On The Stove Briefly:
- Turn On Low Heat: Turn on the stove to a low setting. Let it heat for a minute or two. The heat will help loosen the grime on the coil.
- Monitor Carefully: Keep a close eye on the coil while it’s heating. Do not leave it unattended, as excessive heat can damage the foil or the coil.
- Remove The Foil And Clean:
- Let It Cool: Turn off the stove and let the coil cool down for a minute or two.
- Remove The Foil: Carefully unwrap the foil from the coil. The grime should have loosened due to the heat.
- Wipe The Coil: Use a damp cloth or sponge to gently wipe the coil, removing the loosened residues. Be cautious not to scratch or damage the coil’s surface.
- Inspect And Reassemble:
- Inspect For Residues: Check the coil for any remaining residues. If needed, repeat the process.
- Ensure Dryness: Make sure the coil is completely dry before turning on the stove again.
- Reassemble: Once the coil is clean and dry, reassemble it carefully into its socket.
- Dispose Of The Foil Properly: Dispose of the used foil properly. Fold it and place it in the trash. Do not leave it on or near the stove, as it can pose a fire hazard.
Remember, while cleaning stove coils with tin foil can be effective, it should be done cautiously to prevent damage to the coils and ensure your safety. If you’re unsure or uncomfortable with this method, consider using alternative cleaning techniques or consulting a professional for assistance.
Also Read – Are Electric Stove Burners Interchangeable?
Can You Put Electric Stove Coils In Water?
No, you should not put electric stove coils in water. Electric stove coils are electrical components, and immersing them in water can lead to serious safety hazards and damage. Here’s why:
- Electrical Hazard: Water conducts electricity, and immersing electric stove coils in water can cause electrical shorts, leading to shocks or even electrical fires.
- Component Damage: Electric stove coils are made of metal and are coated to withstand high temperatures. Immersing them in water can cause rusting and damage to the coating, affecting their performance and lifespan.
- Electrical Components: Apart from the visible coils, there are electrical components beneath the surface of the stove. Water can seep into these components, causing malfunctions, electrical issues, or even permanent damage.
If your electric stove coils need cleaning, it’s safer to use methods that do not involve immersing them in water. Instead, use damp cloths, mild cleaning solutions, or specific coil cleaning products that are designed for use on electrical components. Always make sure the stove is turned off and completely cool before attempting any cleaning, and avoid using excessive moisture to prevent electrical accidents and damage.
Also Read – Are Natural Gas And Propane Interchangeable?
Maintaining Your Electric Coil Stove Top
Maintaining your electric coil stove top is essential to ensure it continues to function efficiently and looks clean and inviting in your kitchen. Regular maintenance not only prolongs the lifespan of your stove but also enhances your cooking experience. Here are some key tips for maintaining your electric coil stove top:
Regular Maintenance Tips
- Wipe Spills Immediately: Accidents happen, but it’s crucial to wipe spills and splatters immediately. Prompt cleaning prevents stains and residues from hardening, making them easier to clean later.
- Weekly Surface Cleaning: Perform a light surface cleaning at least once a week. Use a damp cloth to wipe down the stovetop, removing any surface dust, grease, or food particles. Regular cleaning prevents buildup and keeps your stove looking new.
- Replace Drip Bowls As Needed: Drip bowls can wear out over time. If you notice them becoming rusty or damaged, replace them promptly. New, clean drip bowls not only improve the stove’s appearance but also enhance its functionality.
Avoiding Common Mistakes
- Avoid Abrasive Cleaners: Steer clear of abrasive cleaners or scouring pads. They can scratch the surface of your stove, making it more challenging to clean in the future. Stick to gentle, non-abrasive cleaning methods.
- Don’t Immerse Coils In Water: While cleaning the coils is essential, avoid immersing them in water. Water can seep into the electrical components, causing damage or even electrical hazards. Stick to damp cleaning methods for the coils.
- Regularly Inspect And Tighten Connections: Periodically, check the connections of the coil burners. If you notice any looseness or signs of wear, tighten or replace them as necessary. Loose connections can affect the stove’s performance.
- Use Cookware Of Appropriate Size: Match your cookware size to the coil burners. Using smaller pots on larger burners wastes energy and can lead to uneven cooking. Conversely, using larger pots on smaller burners can lead to inefficiency and longer cooking times.
Also Read – Why Electric Stoves Take Forever To Boil Water?
Final Thoughts: How To Clean An Electric Coil Stove Top?
Cleaning your electric coil stove top doesn’t have to be a daunting task when you approach it systematically and with the right techniques. By following the step-by-step guide outlined in this article, you can maintain your stove in top-notch condition, ensuring not only a sparkling clean kitchen but also efficient and safe cooking experiences.
Remember, regular maintenance is the key to a pristine stove. Wiping spills promptly, performing weekly surface cleanings, and being mindful of the cookware you use can significantly prolong your stove’s lifespan.
Additionally, always prioritize safety. Ensure the stove is turned off and cool before cleaning, avoid using abrasive materials, and never immerse electric components in water to prevent electrical hazards.
By employing the techniques mentioned here, you’re not only enhancing the aesthetic appeal of your kitchen but also ensuring the longevity and functionality of your electric coil stove top. So, roll up your sleeves, gather your cleaning supplies, and let your stove shine, providing you with a clean, safe, and enjoyable cooking environment.
Happy Cleaning!
Also Read – How Long Can You Leave An Electric Stove On Without Risking A Fire?
Frequently Asked Questions (FAQs)
-
How Often Should I Clean My Electric Coil Stove Top?
It’s advisable to perform a basic cleaning after each use and deep cleaning at least once a month to maintain optimal functionality.
-
Can I Use Metal Brushes To Clean The Coils?
No, using metal brushes can damage the coils. Stick to soft bristle brushes or sponges for cleaning.
-
Is It Safe To Use Commercial Stove Cleaners?
While some commercial cleaners are safe, it’s best to opt for natural solutions like baking soda and vinegar to avoid chemical residues.
-
Can I Put Drip Bowls In The Dishwasher?
Yes, most drip bowls are dishwasher-safe. Check the manufacturer’s instructions to confirm.
-
Why Is It Important To Let The Coils Air Dry Completely Before Reassembling?
Allowing the coils to air dry ensures there is no moisture trapped, preventing electrical issues when you turn on the stove.
🔧 Stove Expert | 🔥 Gas Guru | 🏠 DIY Enthusiast | 🎨 Painter Extraordinaire
John Davis is your go-to source for all things stoves, from expert repairs to maintenance tips. With a deep understanding of gas systems, including natural and propane, John ensures your kitchen stays cooking safely. His passion for DIY home and kitchen projects shines through his stunning paint transformations. Trust John to bring warmth and functionality to your home, one stove at a time.

