Cleaning electric stove burners and drip pans is an essential task to maintain the efficiency and longevity of your kitchen appliances. Neglecting this chore can lead to inefficient cooking and even potential hazards.
In this article, we will guide you through a step-by-step process on how to effectively clean electric stove burners and drip pans, ensuring a safe and hygienic cooking environment.
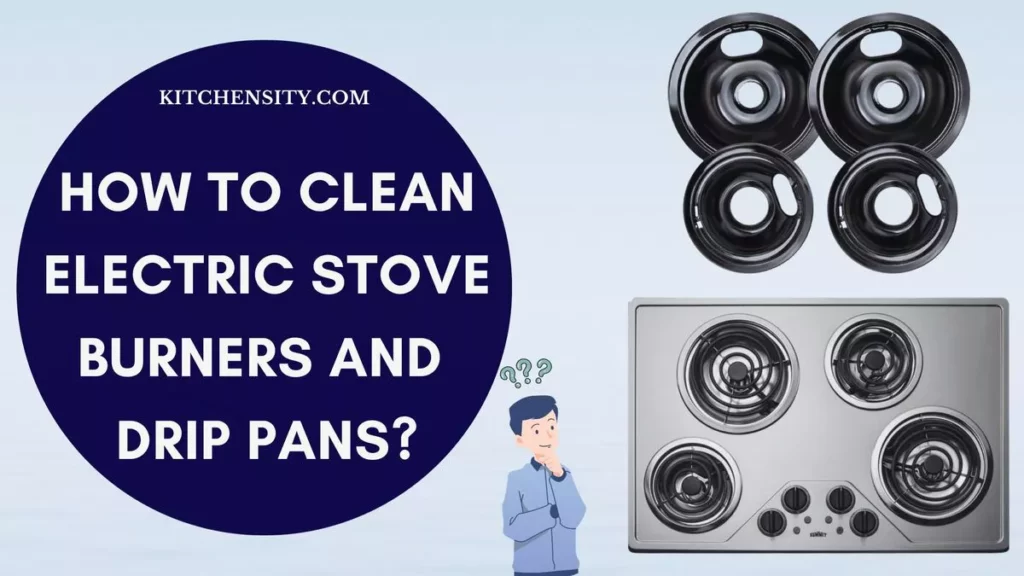
Table of Contents
- 1 Understanding The Importance Of Clean Burners and Drip Pans
- 2 Materials Needed
- 3 How To Clean Electric Stove Burners And Drip Pans? A Step-By-Step Guide
- 4 How To Clean Stove Drip Pans With Vinegar?
- 5 How Do You Clean Sticky Stove Burners?
- 6 Final Thoughts: How To Clean Electric Stove Burners And Drip Pans?
- 7 Frequently Asked Questions (FAQs)
- 7.1 How To Remove Drip Pans On An Electric Stove?
- 7.2 How Often Should I Clean My Electric Stove Burners And Drip Pans?
- 7.3 Can I Use Abrasive Cleaners On My Electric Stove Burners?
- 7.4 Can I Put My Electric Stove Burners And Drip Pans In The Dishwasher?
- 7.5 What Should I Do If My Burners Are Not Heating Evenly After Cleaning?
- 7.6 Is It Necessary To Clean The Burners Even If They Don’t Look Dirty?
Understanding The Importance Of Clean Burners and Drip Pans
Clean electric stove burners and drip pans are the unsung heroes of your kitchen. These seemingly insignificant components play a crucial role in your cooking experience and the overall safety of your home. Let’s delve into why keeping them pristine is essential:
- Enhanced Efficiency: When burners and drip pans are clean, they conduct heat efficiently. This means your pots and pans heat up faster and cook your food evenly. Dirty burners can cause uneven heating, leading to poorly cooked meals and frustration in the kitchen.
- Fire Prevention: Grease and food particles that accumulate on burners and drip pans can become highly flammable. Regular cleaning significantly reduces the risk of a kitchen fire. In a worst-case scenario, built-up grime can catch fire when you’re cooking, posing a danger to you and your home.
- Odor Control: Spilled food and grease can create unpleasant odors when they burn on a hot burner. This can permeate your kitchen and even your entire house. By keeping your burners and drip pans clean, you prevent these odors from developing, ensuring your home always smells fresh.
- Appliance Longevity: A clean stove is a happy stove. When burners and drip pans are caked with grime, they have to work harder to produce heat. This added strain can lead to premature wear and tear, reducing the lifespan of your electric stove. Regular cleaning preserves the longevity of your appliances, saving you money in the long run.
- Health And Hygiene: The kitchen is where you prepare food for your loved ones. If your burners and drip pans are dirty, there’s a risk of contamination. Bacteria and pests are attracted to food residue, potentially compromising the health of your family. Regular cleaning ensures a hygienic cooking environment.
- Aesthetics And Pride: A clean kitchen is a source of pride for any homeowner. It’s also more inviting for guests. Clean burners and drip pans contribute significantly to the overall cleanliness of your kitchen, enhancing its visual appeal and creating a positive impression on everyone who enters your home.
In essence, clean burners and drip pans are not just about aesthetics or ease of cleaning; they are fundamental to your safety, the efficiency of your cooking, and the longevity of your appliances.
Also Read – How To Clean An Electric Coil Stove Top?
Materials Needed
Gathering the right materials is the first step toward efficiently cleaning your electric stove burners and drip pans. Here’s what you’ll need:
- Warm Soapy Water: Start with a basin of warm water mixed with mild dish soap. This acts as the initial soaking solution to loosen grime and grease from the burners and drip pans.
- Baking Soda: Baking soda is an excellent natural abrasive cleaner. It helps to scrub away stubborn stains without scratching the surfaces of your burners and drip pans.
- Vinegar: White vinegar is a versatile cleaning agent. Its acidity makes it effective in dissolving tough residues, leaving your burners and drip pans spotless.
- Sponge Or Scrub Brush: A soft sponge or a scrub brush with non-abrasive bristles is ideal for cleaning most parts of the burners and drip pans. They provide the necessary friction without damaging the surfaces.
- Toothbrush: A toothbrush is perfect for getting into the crevices and corners of the burners and drip pans where grime tends to accumulate. Its small size allows for precise cleaning.
- Cloth: A clean, dry cloth is essential for wiping down the burners and drip pans after cleaning. It ensures that no cleaning residue is left behind, leaving the surfaces dry and ready for use.
Also Read – Can You Replace Burners On An Electric Stove?
How To Clean Electric Stove Burners And Drip Pans? A Step-By-Step Guide
To clean electric stove burners and drip pans, remove and soak them in warm soapy water. Scrub with a baking soda paste for stubborn stains and use a toothbrush for detailed cleaning. Rinse thoroughly, dry completely, and reassemble for a clean and efficient cooking experience.
Here’s a detailed guide on how to clean them step by step:
Step 1: Safety First
Before you start, ensure your safety by disconnecting the stove from the power source. For electric coil burners, gently unplug them from the socket or remove them according to your stove’s user manual. Safety should always be the top priority.
Step 2: Remove Burners And Drip Pans

To initiate the cleaning process, carefully remove the burners and drip pans from your electric stove. This step is pivotal as it allows for thorough cleaning without the hindrance of stove components. Here’s how to do it safely and efficiently:
- Electric Coil Burners: If your stove has electric coil burners, gently grasp the burner near its base and lift it upwards. Usually, these burners are designed to be easily removable. If you encounter resistance, refer to your stove’s user manual for specific instructions on removal. Do this for all burners, ensuring a clear workspace.
- Smooth Top Burners: For smooth top electric stoves, the burners are built into the surface. Refer to your stove’s manual to understand the correct way to remove them, as it might involve lifting the glass top or releasing a latch. Exercise caution and follow the manufacturer’s guidelines precisely to avoid damage.
- Drip Pans: Once the burners are removed, locate the drip pans beneath them. Drip pans are usually round or square metal components that collect food particles and spills. Carefully slide them out from their designated slots. If they are stuck due to accumulated grime, gently wiggle them while pulling to avoid bending or breaking them.
- Place On A Flat Surface: After removal, place the burners and drip pans on a flat surface covered with newspaper or an old towel. This catchment will absorb any drips and make the cleaning process less messy.
Also Read – How To Clean Gas Stove Grates?
Step 3: Soaking In Warm Soapy Water
Once you have removed the burners and drip pans, the next crucial step in cleaning your electric stove components involves soaking them in a warm soapy water solution. This step helps to break down stubborn grime and grease, making the cleaning process more manageable. Here’s how to do it effectively:
- Prepare A Basin Or Sink: Fill a basin or your kitchen sink with warm water. The water should be comfortably hot but not scalding. The warmth of the water aids in loosening the dirt and grease accumulated on the burners and drip pans.
- Add Mild Dish Soap: Add a few drops of mild dish soap to the warm water. The soap acts as a degreaser and helps in breaking down the oily residues on the surfaces of the burners and drip pans. Stir the water gently to create a soapy solution.
- Submerge The Components: Carefully place the removed burners and drip pans into the warm soapy water solution. Ensure that they are fully submerged. If there are stubborn stains, you can apply a small amount of dish soap directly onto those areas before soaking.
- Allow To Soak: Let the components soak for at least 15 to 20 minutes. During this time, the warm soapy water will work its magic, softening the grime and making it easier to scrub away. For particularly stubborn stains, you can extend the soaking time to loosen the residue further.
- Check Periodically: While the burners and drip pans are soaking, you can periodically check their progress. Gently agitate the water with your hands to see if the grime is starting to dissolve. For tough spots, you might notice them softening and becoming easier to remove.
Soaking the burners and drip pans in warm soapy water is a fundamental step in the cleaning process. It ensures that the components are thoroughly saturated, allowing the soap to penetrate and break down the layers of grease and food residue. This initial soak significantly eases the scrubbing process, making it more efficient and ensuring that your electric stove components are cleaned effectively.
Also Read – How To Clean Gas Stove Grates In The Dishwasher?
Step 4: Scrubbing With Baking Soda
After soaking the burners and drip pans in warm soapy water, the next step involves using baking soda as a natural abrasive cleaner to tackle stubborn stains and grime. Baking soda is gentle yet effective, making it an excellent choice for scrubbing without causing damage to the surfaces. Here’s how to proceed:
- Create A Baking Soda Paste: In a small bowl, mix baking soda with a small amount of water to create a thick, spreadable paste. The paste-like consistency ensures that the baking soda adheres well to the surfaces, allowing for effective scrubbing.
- Apply The Baking Soda Paste: Using your fingers or a soft brush, apply the baking soda paste generously onto the stained areas of the burners and drip pans. Focus on spots with heavy buildup, ensuring they are well-covered with the paste. Baking soda’s natural abrasiveness helps to dislodge grime without scratching the surfaces.
- Let It Sit: After applying the baking soda paste, let it sit for about 10 to 15 minutes. Allowing the paste to sit gives it time to react with the stains and soften the residues, making them easier to scrub away.
- Scrub Gently: Using a soft sponge or scrub brush, gently scrub the burners and drip pans. Use circular motions or back-and-forth strokes to target the stubborn stains. Be firm enough to remove the grime but gentle enough to avoid scratching the surfaces. For intricate areas, an old toothbrush can be particularly effective.
- Rinse Thoroughly: After scrubbing, rinse the burners and drip pans under running water to remove the baking soda residue and dislodged grime. Ensure that all the baking soda paste is washed away, leaving the components clean and residue-free.
- Inspect For Remaining Stains: After rinsing, inspect the burners and drip pans for any remaining stains. If there are still stubborn spots, you can repeat the baking soda scrubbing process until the surfaces are entirely clean.
Scrubbing with baking soda is a natural and eco-friendly way to remove tough stains and grime from your electric stove components. It ensures that your burners and drip pans are not only clean but also free from harmful chemical residues, providing you with a safe and effective cleaning solution.
Also Read – How To Clean Gas Stove Grates With Ammonia?
Step 5: Vinegar Soak For Stubborn Stains
When stubborn stains persist on your electric stove burners and drip pans, a vinegar soak can work wonders. Vinegar, with its natural acidity, is a powerful cleaning agent that helps dissolve tough residues. Here’s how to use a vinegar soak to effectively tackle stubborn stains:
- Prepare A Vinegar Solution: In a basin or large bowl, create a solution of equal parts water and white vinegar. This combination provides the right balance of acidity to break down stubborn grime. Ensure there is enough solution to fully submerge the burners and drip pans.
- Submerge The Components: Carefully place the burners and drip pans into the vinegar solution, ensuring they are completely submerged. The vinegar’s acidity will work to dissolve the stubborn stains over time. If the components are too large for a basin, you can also use large resealable plastic bags. Pour the vinegar solution into the bags and place the components inside, sealing the bags securely.
- Soak Overnight Or For Several Hours: Allow the burners and drip pans to soak in the vinegar solution for several hours, or preferably overnight. The extended soaking time allows the vinegar to penetrate and break down the stains effectively. Check periodically to see the progress.
- Scrub Gently, If Needed: After soaking, use a soft sponge or scrub brush to gently scrub the burners and drip pans. The vinegar soak would have loosened the grime, making it easier to remove. For stubborn spots, a gentle scrubbing action will help dislodge the remaining residue.
- Rinse Thoroughly: After scrubbing, rinse the components thoroughly under running water to remove the vinegar residue and any remaining grime. Ensure that all the vinegar solution is washed away, leaving the surfaces clean and odor-free.
- Dry Completely: Use a clean, dry cloth to pat the burners and drip pans dry. Ensure there is no moisture left, as dampness can lead to rust. You can also air-dry them in a well-ventilated area before placing them back onto the stove.
A vinegar soak is a natural and effective method to remove stubborn stains from your electric stove burners and drip pans. Its acidic properties make it an excellent cleaner while being safe and eco-friendly. By following these steps, you can restore your stove components to their pristine condition, ensuring efficient and safe cooking in your kitchen.
Also Read – How To Clean An Infrared Gas Stove?
Step 6: Detail Cleaning With A Toothbrush
Detail cleaning with a toothbrush is a meticulous approach that ensures every nook and cranny of your electric stove burners and drip pans is thoroughly cleaned. Using a toothbrush allows you to reach into tight spaces and intricate areas where grime tends to accumulate. Here’s how to perform this step effectively:
- Dampen The Toothbrush: Before you begin, dampen an old toothbrush with warm water. Having a slightly damp toothbrush helps in creating a paste if you decide to use baking soda or aids in loosening dried grime.
- Apply Baking Soda Paste (Optional): For particularly stubborn spots or intricate areas, you can apply a small amount of baking soda paste. Mix baking soda with a few drops of water to create a thick paste. Apply the paste to the areas you want to clean with the toothbrush. Baking soda acts as a gentle abrasive and enhances the cleaning power of the toothbrush.
- Scrub Intricate Areas: Use the toothbrush to scrub intricate areas of the burners and drip pans. Focus on crevices, corners, and around the burner coils. The small bristles of the toothbrush allow for precise cleaning, ensuring that even the tiniest residues are removed.
- Apply Gentle Pressure: While scrubbing, apply gentle pressure to avoid damaging the surfaces. Let the bristles do the work as you guide the toothbrush into the tight spaces. The goal is to dislodge grime without scratching or harming the components.
- Rinse Periodically: Periodically rinse the toothbrush under running water to remove accumulated grime. This ensures that you’re not spreading the dirt around and allows the toothbrush to continue cleaning effectively.
- Inspect And Repeat If Necessary: After detailing with the toothbrush, inspect the burners and drip pans for cleanliness. If there are still spots or residues, repeat the detailing process until you’re satisfied with the results. Patience and thoroughness are key to achieving a spotless finish.
- Rinse Thoroughly: Once you’re done detailing and satisfied with the cleanliness, rinse the burners and drip pans under running water to remove any remaining baking soda or grime. Ensure that all cleaning agents are washed away.
- Dry Completely: Use a clean, dry cloth or paper towel to pat the burners and drip pans dry. Ensure there is no moisture left, especially in crevices, to prevent rusting. Alternatively, you can air-dry them in a well-ventilated area before placing them back onto the stove.
Also Read – Can You Replace Burners On An Electric Stove?
Step 7: Rinse And Dry
After cleaning your electric stove burners and drip pans thoroughly, the final steps involve rinsing them to remove any remaining cleaning agents and drying them completely. Proper rinsing and drying ensure that your components are residue-free and ready for use. Here’s how to do it effectively:
- Rinse Under Running Water: Hold each burner and drip pan under running water, preferably in a sink. Use your hands or a gentle stream from a faucet to rinse off any remaining cleaning solution, grime, or baking soda residue. Ensure that all cleaning agents are washed away.
- Inspect For Residue: While rinsing, inspect the components closely for any signs of residue. Pay attention to corners, crevices, and edges, as these areas often trap residue. If you spot any remaining grime, use a sponge or your fingers to remove it under the running water.
- Dry Thoroughly: After rinsing, use a clean, dry cloth, paper towel, or microfiber cloth to pat the burners and drip pans completely dry. Ensure there is no moisture left, especially in crevices, as dampness can lead to rust over time. If you have multiple components, dry each one thoroughly before moving on to the next.
- Air Dry (Optional): If you have the time and space, you can allow the burners and drip pans to air dry in a well-ventilated area. Place them on a clean, dry surface and let them air dry completely. This method ensures that every part of the components is dry before you place them back onto the stove.
- Inspect For Readiness: Before reassembling, inspect the burners and drip pans one last time. Ensure they are completely dry and free from any residue. Check for signs of rust as well, especially if your components are made of metal. If everything looks clean and dry, they are ready to be placed back on the stove.
By thoroughly rinsing and drying your electric stove burners and drip pans, you not only remove cleaning agents but also prevent the growth of mold and rust. Proper drying ensures that your components remain in good condition and ready for use, allowing you to cook safely and efficiently in your kitchen.
Also Read – Are Electric Stove Burners Interchangeable?
Step 8: Reassemble And Test
After completing the meticulous cleaning process, it’s time to reassemble your electric stove burners and drip pans. Proper reassembly ensures that they function optimally and are safe to use. Here’s how to do it:
- Place The Drip Pans: Start by placing the cleaned and dried drip pans back into their designated slots beneath the burners. Ensure they fit securely and are flat to catch any spills during cooking.
- Attach The Burners: Carefully attach the electric coil burners back to their respective sockets. For smooth top stoves, follow the manufacturer’s instructions to secure the burners back onto the surface. Ensure they are correctly positioned and properly connected to the stove.
- Double-Check Connections: Confirm that each burner is securely attached and properly plugged in. Any loose connections can lead to inefficient heating or malfunctions. Double-check that the burners are stable and firmly in place.
- Reconnect Power: Plug in your stove or switch on the power supply, depending on your stove type. Ensure that the burners are getting power and heating up evenly. Test each burner individually to make sure they are functioning as expected.
- Observe Heating Patterns: Turn on each burner and observe its heating pattern. Check for even heating across the coils or the smooth top surface. Uneven heating might indicate an issue with the burner or the stove’s internal wiring. If you notice any irregularities, it’s best to consult a professional technician for further inspection and repairs.
- Run A Short Cooking Test: As a final step, place a small pot or pan on each burner and let it heat up. This short cooking test ensures that the burners are working correctly and can handle typical cooking tasks.
- Monitor For Smells Or Smoke: While testing, be alert for any unusual smells or smoke. If you notice any odors or smoke, immediately turn off the burner and investigate the issue. Unusual smells or smoke can indicate a problem with the electrical components and should be addressed promptly.
By reassembling and testing your electric stove burners and drip pans, you confirm that they are not only clean but also fully functional. Regular maintenance and cleaning enhance their efficiency and extend their lifespan, ensuring safe and efficient cooking in your kitchen.
Following these steps regularly, ideally, once a month, will not only keep your electric stove burners and drip pans clean but also maintain their efficiency and extend their lifespan, ensuring a safe and enjoyable cooking experience.
Also Read – Are Natural Gas And Propane Interchangeable?
How To Clean Stove Drip Pans With Vinegar?
Stove drip pans, prone to grease and grime buildup, can be effectively cleaned using vinegar, a natural and eco-friendly cleaning agent. Vinegar’s acidity helps dissolve stubborn stains and sanitizes the drip pans. Here’s a step-by-step guide on how to clean stove drip pans with vinegar:
Materials Needed
- White vinegar
- Baking soda
- Dish soap
- Scrub brush or toothbrush
- Warm water
- Sponge
- Clean, dry cloth or paper towels
Steps
- Remove Drip Pans: Start by carefully removing the drip pans from your stove. If they are stuck due to grime, gently wiggle them while pulling to avoid bending or breaking. Place them on a flat surface covered with newspaper or an old towel.
- Create A Vinegar Solution: In a basin or sink, mix equal parts of white vinegar and warm water. If the drip pans are heavily soiled, you can use undiluted vinegar for a stronger cleaning solution.
- Soak In Vinegar Solution: Submerge the drip pans in the vinegar solution. Let them soak for at least 15 to 30 minutes. The vinegar will work to loosen the grease and grime, making it easier to clean.
- Scrub With Baking Soda Paste: In a small bowl, make a paste using baking soda and a little water. Apply this paste to the drip pans, focusing on areas with stubborn stains. Let it sit for a few minutes. The baking soda’s abrasive nature helps to scrub away grime without scratching the surfaces.
- Scrub With A Brush Or Toothbrush: Use a scrub brush or an old toothbrush to scrub the drip pans. Concentrate on the areas with baked-on stains. The combination of vinegar and baking soda will create a foaming action, which helps in lifting away the grime.
- Rinse Thoroughly: Rinse the drip pans under running water to remove the vinegar, baking soda, and loosened grime. Use a sponge to wipe away any remaining residue. Check the drip pans to ensure they are completely clean. If needed, repeat the process for stubborn spots.
- Dry Completely: Use a clean, dry cloth or paper towel to pat the drip pans dry. Ensure there is no moisture left, especially in crevices, to prevent rusting. Air-drying them in a well-ventilated area is also an option.
- Reassemble And Test: Once the drip pans are completely dry, reassemble them back into your stove. Turn on the burners to ensure they are heating evenly, indicating that they are properly placed and functioning well.
Cleaning stove drip pans with vinegar is an efficient and natural method that leaves your drip pans clean and free from harmful chemicals, ensuring a safe and hygienic cooking environment.
Also Read – Why Electric Stoves Take Forever To Boil Water?
How Do You Clean Sticky Stove Burners?
Sticky stove burners can be a nuisance, but with the right approach, you can effectively clean them and restore their functionality. Here’s a step-by-step guide on how to clean sticky stove burners:
Materials Needed
- Warm soapy water
- Baking soda
- White vinegar
- Dish soap
- Scrub brush or toothbrush
- Sponge
- Clean, dry cloth or paper towels
Steps
- Remove Burners: Start by carefully removing the sticky burners from your stove. If they are electric coil burners, unplug them from the socket. For smooth top stoves, follow the manufacturer’s instructions to lift them out. Lay them on a flat surface covered with newspaper or an old towel.
- Soak In Warm Soapy Water: Fill a basin or sink with warm soapy water. Submerge the sticky burners in the water and let them soak for at least 15-20 minutes. The warm water will help loosen the sticky residue.
- Create A Baking Soda Paste: In a small bowl, mix baking soda with a little water to create a paste. Baking soda acts as a gentle abrasive cleaner and helps in scrubbing away sticky grime without damaging the surfaces.
- Scrub With Baking Soda Paste: Apply the baking soda paste generously on the sticky areas of the burners. Use a scrub brush or an old toothbrush to scrub the burners thoroughly. Concentrate on the sticky spots, applying a bit more pressure while scrubbing.
- Vinegar Solution For Stubborn Residue: For persistent sticky residue, apply white vinegar directly onto the affected areas. The acidity of the vinegar helps dissolve the sticky grime. Let it sit for a few minutes before scrubbing with the brush or toothbrush again.
- Rinse Thoroughly: Rinse the burners under running water to remove the baking soda, vinegar, and loosened grime. Use a sponge to wipe away any remaining residue. Check the burners to ensure they are completely clean.
- Dry Completely: Use a clean, dry cloth or paper towels to pat the burners dry. Ensure there is no moisture left, especially in crevices, to prevent rusting. If you have multiple burners, dry each one thoroughly before moving on to the next.
- Reassemble And Test: Once the burners are completely dry, reassemble them back into your stove. Plug in the electric coil burners or switch on the power supply for smooth top stoves. Test each burner individually to ensure they are heating evenly and functioning well.
By following these steps, you can effectively clean sticky stove burners and ensure they are free from residue, allowing for efficient and safe cooking in your kitchen.
Also Read – How Long Can You Leave An Electric Stove On Without Risking A Fire?
Final Thoughts: How To Clean Electric Stove Burners And Drip Pans?
Keeping your stove burners and drip pans clean is like giving your kitchen a fresh start every time you cook. By following the steps outlined in this guide, you’re ensuring that your cooking space remains safe and efficient.
Remember, it all starts with taking off the burners and drip pans and soaking them in warm, soapy water. Baking soda and vinegar, the household heroes, work wonders in scrubbing away stubborn stains. A little patience and a toothbrush for detail cleaning go a long way, making sure no spot is left untouched.
Once your components are sparkly clean, reassemble them carefully and test them to make sure they’re working perfectly. It’s not just about cleanliness; it’s about creating a cooking environment where you can enjoy making your favorite meals without any worries.
So, with these simple steps, you can keep your kitchen shining, making every cooking experience a delightful one. Happy cooking and happy cleaning!
Also Read – How Hot Do Electric Stove Burners Get?
Frequently Asked Questions (FAQs)
-
How To Remove Drip Pans On An Electric Stove?
To remove drip pans on an electric stove, lift the burners gently and slide out the pans. If they are stuck, wiggle them while pulling to avoid damage. Clean the pans thoroughly and place them back securely for optimal stove performance.
-
How Often Should I Clean My Electric Stove Burners And Drip Pans?
It’s recommended to clean them at least once a month, or more frequently if you notice significant buildup.
-
Can I Use Abrasive Cleaners On My Electric Stove Burners?
It’s best to avoid abrasive cleaners as they can damage the surface of the burners. Stick to mild soapy water, baking soda, or vinegar.
-
Can I Put My Electric Stove Burners And Drip Pans In The Dishwasher?
It’s not advisable as the high water pressure and heat in dishwashers can damage the burners and drip pans. Hand washing is the safest method.
-
What Should I Do If My Burners Are Not Heating Evenly After Cleaning?
Uneven heating might indicate a problem with the burner or the stove’s internal wiring. It’s best to consult a professional technician for repairs.
-
Is It Necessary To Clean The Burners Even If They Don’t Look Dirty?
Yes, it’s essential to clean them regularly, even if they appear clean. Residue can be invisible, affecting the stove’s efficiency.
🔧 Stove Expert | 🔥 Gas Guru | 🏠 DIY Enthusiast | 🎨 Painter Extraordinaire
John Davis is your go-to source for all things stoves, from expert repairs to maintenance tips. With a deep understanding of gas systems, including natural and propane, John ensures your kitchen stays cooking safely. His passion for DIY home and kitchen projects shines through his stunning paint transformations. Trust John to bring warmth and functionality to your home, one stove at a time.

