Tart pans are essential tools in the world of baking, allowing you to create delicious and visually appealing tarts.
However, there may be instances when you find yourself without a tart pan at hand.
In such situations, it’s helpful to know about alternative options that can serve as substitutes for tart pans.
Let’s explore various substitutes and how to utilize them effectively in your baking adventures.
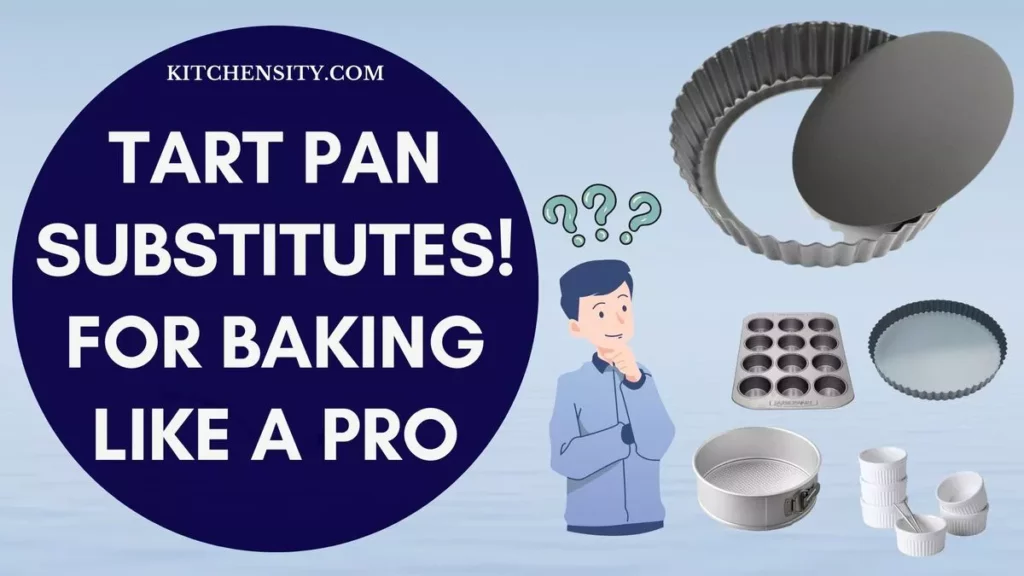
Table of Contents
- 1 Tart Pan Substitutes
- 2 What Are Tart Pans?
- 3 5 Substitutes Of Tart Pans With Instructions
- 4 Choosing The Right Substitutes Of A Tart Pan
- 5 Tips for Using Tart Pan Substitutes
- 6 Recipes For Tart Pan Substitutes
- 7 How To Make Mini Tarts Without A Tart Pan?
- 8 How To Make A Tart In A Springform Pan?
- 9 Conclusion
- 10 YOU MAY ALSO LIKE
- 11 FAQs (Frequently Asked Questions)
- 11.1 Can I Use Cake Pan Instead Of Tart Pan?
- 11.2 Can I Use A Pie Pan Instead Of A Tart Pan?
- 11.3 Can You Use A Cake Tin Instead Of A Tart Tin?
- 11.4 Can I Use A Springform Pan Instead Of A Tart Pan?
- 11.5 Will Cake Batter Leak In A Springform Pan?
- 11.6 Can I Use A Tart Pan Substitute For Any Tart Recipe?
- 11.7 Will The Tart Pan Substitute Affect The Taste Of The Tart?
- 11.8 Can I Use A Substitute Pan For Both Sweet And Savory Tarts?
- 11.9 Do I Need To Make Any Adjustments When Using A Tart Pan Substitute?
- 11.10 Where Can I Find Tart Pan Substitutes?
Tart Pan Substitutes
Tart pan substitutes include using a springform pan, ramekins or custard cups, muffin pans, and pie plates or quiche pans. These alternatives allow you to create delicious tarts with different shapes and sizes, offering flexibility in your baking options. However, keep in mind that the results may vary slightly in appearance and baking time compared to using a traditional tart pan.
For a more detailed explanation, please refer to the article below.
Also Read – how many mini loaf pans equal a regular loaf pan?
What Are Tart Pans?
Tart pans are specialized baking pans designed specifically for making tarts. They come in different sizes, shapes, and materials, offering bakers the flexibility to create a wide range of tart variations.
The shape and fluted edges of tart pans provide a beautiful presentation and help hold the tart’s filling securely during baking.
Also Read – How Many Quarts In An 8×8 Pan?
Common Tart Pan Types
Before diving into tart pan substitutes, it’s important to understand the common types of tart pans available.
- Traditional metal tart pans are widely used and known for their excellent heat conductivity.
- Non-stick tart pans make it easier to release the tart after baking.
- Ceramic tart pans offer a unique and elegant presentation, while silicone tart pans provide flexibility and easy removal of the tart.
What Is The Point Of A Tart Pan?
A tart pan serves several important purposes in the process of making tarts. Here are the key points of using a tart pan:
- Structure And Shape: The primary purpose of a tart pan is to provide structure and maintain the desired shape of the tart. The pan has fluted edges that give the tart an elegant and visually appealing appearance. The fluted edges also help in creating defined, decorative borders for the crust.
- Easy Removal: Tart pans typically have a removable bottom or a loose base. This feature allows for easy removal of the tart once it is baked and cooled. By simply releasing the bottom or pushing up the base, the tart can be lifted out of the pan without disturbing its shape or delicate crust.
- Even Baking: Tart pans are designed with materials that promote even heat distribution, resulting in uniform baking. The heat is evenly distributed across the bottom and sides of the pan, ensuring that the tart bakes evenly and achieves a golden crust.
- Crust Support: The shape and depth of a tart pan provide excellent support for the tart crust. The sides of the pan prevent the crust from collapsing or slumping during baking, allowing it to hold its shape and create a well to hold the filling.
- Presentation And Serving: Using a tart pan enhances the presentation of the tart when serving. The fluted edges and neat shape of the tart give it an elegant and professional appearance, making it visually appealing to guests or when photographing it for culinary purposes.
While it is possible to substitute a tart pan with other baking pans or creative methods, the specific design and features of a tart pan contribute significantly to the overall success and aesthetics of a tart.
Its purpose extends beyond mere functionality to enhance the baking experience and create visually stunning and delicious tarts.
Also Read – How Many Quarts In A 9×13 Pan?
5 Substitutes Of Tart Pans With Instructions
When you don’t have a tart pan on hand, don’t fret. There are several substitutes you can use to achieve similar results. Let’s explore some viable options:
1. Ramekins Or Custard Cups
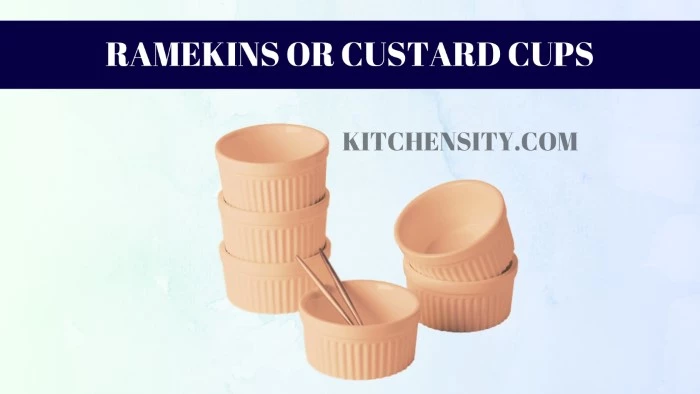
Ramekins or custard cups are small, individual-sized dishes that can double as tart pans. They are typically made of ceramic or glass and have a shallow depth, making them suitable for mini tarts.
While they lack the fluted edges of traditional tart pans, they can still create visually appealing and delicious treats.
When using ramekins or custard cups as substitutes for tart pans, follow these instructions for a successful outcome:
- Grease the ramekins or custard cups with butter or cooking spray to prevent the tart crust from sticking. This ensures easy removal of the baked tart.
- Prepare your tart dough according to the recipe instructions. Roll out the dough and cut it into circles slightly larger than the diameter of the ramekins or custard cups. Gently press the dough into the greased ramekins, ensuring it covers the base and sides evenly.
- To prevent the tart crust from puffing up during baking, use a fork to prick the dough all over its surface. This allows steam to escape and helps the crust maintain its shape.
- Add your desired tart filling to the prepared crust in the ramekins or custard cups. This can include fruit fillings, custards, creams, or any other tart filling of your choice.
- Place the filled ramekins or custard cups on a baking sheet and transfer them to a preheated oven. Follow the baking time and temperature specified in your tart recipe, but keep in mind that smaller ramekins or custard cups may require less baking time compared to a larger tart pan. Monitor the tarts closely to avoid overbaking.
- Once baked, remove the ramekins or custard cups from the oven and let the tarts cool for a few minutes. The tarts can be served directly in the ramekins or custard cups, or you can gently remove them from the containers and transfer them to serving plates for an elegant presentation.
Also Read – How Many Quarts Are In A 9×9 Pan?
2. Muffin Tins
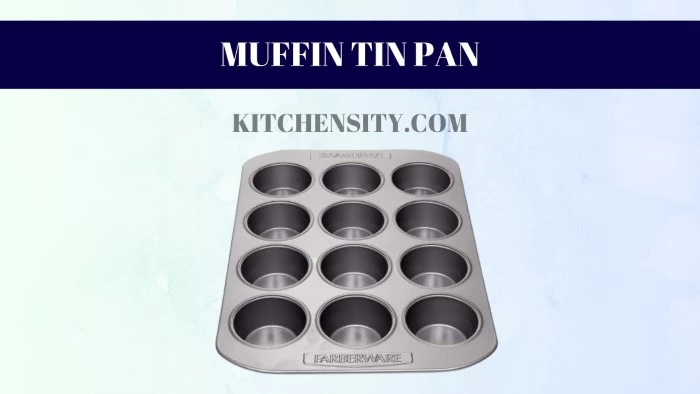
Muffin tins can also serve as substitutes for tart pans, especially when making individual-sized tarts or tartlets. Their round shape and shallow cups can closely mimic the look of a tart.
Ensure that the muffin tins are greased or lined with baking cups to prevent sticking.
Here are the instructions to use a muffin pan as a substitute for a tart pan:
- Start by greasing the individual cups of the muffin pan with butter or cooking spray. This will prevent the tart crust from sticking to the pan and make it easier to remove the tarts after baking.
- Prepare your tart dough following the recipe instructions. Roll out the dough and cut it into circles or squares slightly larger than the diameter of the muffin cups.
- Gently press each circle or square of the tart dough into the greased muffin cups, ensuring it covers the base and sides evenly. Use your fingers or a small piece of dough to press the dough into the bottom corners of the cups.
- To prevent the tart crust from puffing up during baking, use a fork to prick the dough in the bottom of each muffin cup. This will allow steam to escape and help the crust maintain its shape.
- Add your desired tart filling to each prepared crust in the muffin cups. This can include fruit fillings, custards, creams, or any other tart filling you prefer.
- Place the muffin pan in a preheated oven and bake the tarts according to the temperature and time specified in your tart recipe. Keep in mind that the smaller size of the muffin cups may require less baking time compared to a larger tart pan. Monitor the tarts closely to avoid overbaking.
- Once baked, remove the muffin pan from the oven and let the tarts cool in the pan for a few minutes. Then, use a small offset spatula or a butter knife to gently loosen the edges of each tart from the muffin cups.
- Carefully lift the tarts out of the cups and transfer them to a cooling rack or serving plate.
Also Read – Is Pyrex Oven Safe?
3. Pie Plates Or Quiche Pans
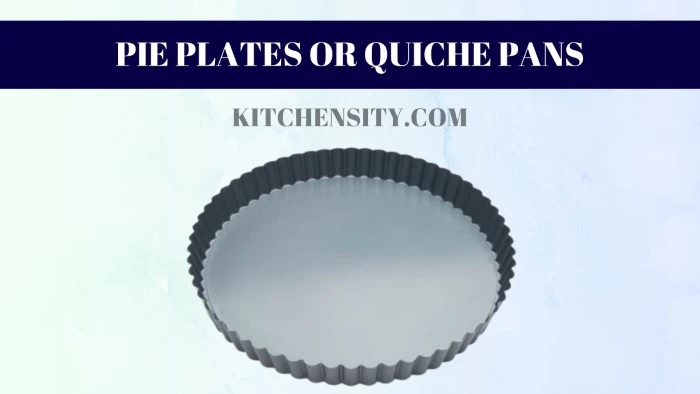
If you’re making a larger tart or a quiche, pie plates or quiche pans can be suitable substitutes. They have a larger surface area, allowing you to create a deep-dish tart.
While lacking the fluted edges, their shape and depth make them convenient alternatives.
Here are the instructions to use a pie plate or quiche pan as a substitute for a tart pan:
- Start by greasing the pie plate or quiche pan with butter or cooking spray. This will prevent the tart crust from sticking to the pan and make it easier to remove the tart after baking.
- Prepare your tart dough following the recipe instructions. Roll out the dough and transfer it to the greased pie plate or quiche pan. Gently press the dough into the bottom and sides of the pan, ensuring it covers the surface evenly. Trim any excess dough from the edges if needed.
- If desired, you can use your fingers or a fork to create a decorative fluted edge on the crust. Simply press the dough between your thumb and forefinger or use the tines of a fork to create small ridges along the edge of the crust.
- To prevent the tart crust from puffing up during baking, use a fork to prick the dough all over its surface. This will allow steam to escape and help the crust maintain its shape.
- Add your desired tart filling to the prepared crust in the pie plate or quiche pan. This can include fruit fillings, custards, creams, or any other tart filling you prefer.
- Place the pie plate or quiche pan in a preheated oven and bake the tart according to the temperature and time specified in your tart recipe. Keep in mind that the larger size of the pie plate or quiche pan may require a slightly longer baking time compared to a smaller tart pan. Monitor the tart closely to ensure it bakes evenly and reaches the desired level of doneness.
- Once baked, remove the pie plate or quiche pan from the oven and let the tart cool in the pan for a few minutes. You can serve the tart directly from the pie plate or quiche pan, or if desired, carefully transfer it to a serving plate for a more elegant presentation.
Also Read – Saucepan Vs Frying Pan
4. Cake Pans
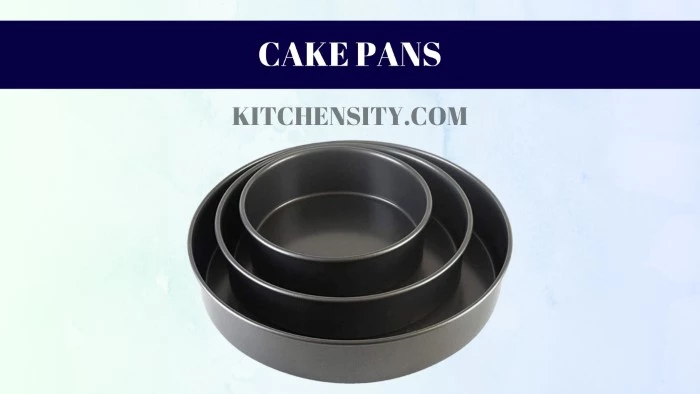
In a pinch, a cake pan can be used as a tart pan substitute, particularly for larger tarts or tart-like desserts. The wide and shallow shape of a cake pan can accommodate various fillings.
Just ensure that you adjust the baking time accordingly, as the larger size may affect the heat distribution.
Here are the instructions to use a cake pan as a substitute for a tart pan:
- Start by greasing the cake pan with butter or cooking spray. This will prevent the tart crust from sticking to the pan and make it easier to remove the tart after baking.
- Prepare your tart dough following the recipe instructions. Roll out the dough and transfer it to the greased cake pan. Gently press the dough into the bottom and sides of the pan, ensuring it covers the surface evenly. Trim any excess dough from the edges if needed.
- To prevent the tart crust from puffing up during baking, use a fork to prick the dough all over its surface. This will allow steam to escape and help the crust maintain its shape.
- Add your desired tart filling to the prepared crust in the cake pan. This can include fruit fillings, custards, creams, or any other tart filling you prefer.
- Place the cake pan in a preheated oven and bake the tart according to the temperature and time specified in your tart recipe. Keep in mind that the larger size of the cake pan may require a slightly longer baking time compared to a smaller tart pan. Monitor the tart closely to ensure it bakes evenly and reaches the desired level of doneness.
- Once baked, remove the cake pan from the oven and let the tart cool in the pan for a few minutes. You can serve the tart directly from the cake pan, or if desired, carefully transfer it to a serving plate for a more elegant presentation.
Also Read – Skillet Vs Frying Pan Vs Sauté Pan
5. Springform Pan
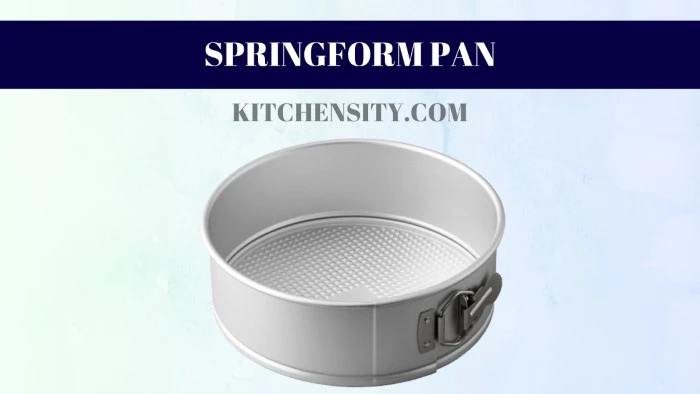
Another versatile substitute for a tart pan is a springform pan. Typically used for making cheesecakes, a springform pan consists of two parts: a circular base and a detachable ring that secures the base.
The ring can be easily released, allowing for easy removal of baked goods without the risk of damaging their structure.
To use a springform pan as a substitute for a tart pan, follow these instructions:
- Preheat the oven to the specified temperature in your tart recipe.
- Prepare your tart dough and press it into the bottom of the greased springform pan, ensuring an even layer that covers the base.
- If desired, you can also press the dough partially up the sides of the pan to create a crust.
- Prick the dough with a fork to prevent it from puffing up during baking.
- Proceed with your tart recipe’s filling and baking instructions as usual.
- Once the tart is baked and cooled, release the springform pan’s ring by gently unlatching it.
- Carefully lift the ring away from the tart, leaving the base in place.
- Transfer the tart to a serving plate or cake stand for presentation.
The springform pan’s adjustable ring and removable base make it an excellent choice for tarts with delicate or crumbly crusts.
Its leak-proof design is particularly beneficial when working with fillings that may have a higher moisture content.
Also Read – How To Tell If A Pan Is Oven Safe?
Choosing The Right Substitutes Of A Tart Pan
When opting for a tart pan substitute, there are a few considerations to keep in mind to ensure successful results.
- Size And Shape Considerations: Consider the size and shape requirements of your recipe. If the recipe specifies a specific tart pan size, choose a substitute with similar dimensions. Adapting the size will help ensure the correct proportions and baking time.
- Heat Distribution And Baking Time Adjustments: Different substitute pans have varying heat distribution properties. Keep in mind that metal pans conduct heat more efficiently than ceramic or glass pans. Adjust the baking time accordingly to avoid undercooking or overcooking your tart.
Tips for Using Tart Pan Substitutes
To make the most out of your tart pan substitute, here are some helpful tips:
- Preparing The Substitute Pan: Ensure the substitute pan is well-greased or lined with parchment paper to prevent the tart from sticking. Greasing the pan’s surface will aid in an easy release after baking.
- Adjusting The Baking Time And Temperature: Due to variations in heat distribution, monitor the tart closely while baking. You may need to adjust the baking time and temperature slightly to achieve the desired results. Keep a close eye to prevent over-browning or undercooking.
- Removing The Tart From The Substitute Pan: Once the tart is baked, allow it to cool for a few minutes before attempting to remove it from the substitute pan. Gently run a knife along the edges to loosen the tart, then carefully transfer it to a serving plate or cooling rack.
Also Read – Difference Between Hard Anodized Vs Non-Stick Cookware
Recipes For Tart Pan Substitutes
Here are a few delightful recipes that utilize tart pan substitutes:
1. Individual Fruit Tarts In Ramekins
Ingredients:
- Prepared tart dough
- Assorted fresh fruits
- Fruit glaze or jam
Instructions:
- Preheat the oven to the specified temperature in your tart recipe.
- Roll out the tart dough and line the greased ramekins, ensuring the dough covers the base and sides evenly.
- Prick the dough with a fork to prevent it from puffing up during baking.
- Fill the tart shells with your desired assortment of fresh fruits.
- Bake the tarts in the preheated oven according to your tart recipe’s baking time and temperature.
- Once baked, remove the ramekins from the oven and allow the tarts to cool slightly.
- Brush the fruit glaze or jam over the fruits for a glossy finish.
- Serve the individual fruit tarts as a delightful dessert or snack.
Also Read – How To Get Sticky Residue Off Non-Stick Pans?
2. Mini Quiches In Muffin Tins
Ingredients:
- Prepared pie or quiche dough
- Assorted vegetables or cooked meat
- Eggs
- Milk or cream
- Shredded cheese
- Salt and pepper
Instructions:
- Preheat the oven to the specified temperature in your quiche recipe.
- Roll out the pie or quiche dough and cut it into circles slightly larger than the muffin tin cups.
- Press the dough circles into the greased muffin tin cups, ensuring they cover the base and sides.
- In a separate bowl, whisk together the eggs, milk or cream, salt, and pepper.
- Add your choice of assorted vegetables or cooked meat to the egg mixture and mix well.
- Pour the egg mixture into the prepared muffin tin cups, filling each one about three-quarters full.
- Sprinkle shredded cheese on top of each mini quiche for added flavor and a delightful cheesy finish.
- Sprinkle shredded cheese on top of each mini quiche for added flavor.
- Bake the mini quiches in the preheated oven according to your quiche recipe’s baking time and temperature.
- Once baked, remove the muffin tin from the oven and let the mini quiches cool for a few minutes.
- Use a butter knife to gently loosen the edges of the quiches and remove them from the muffin tin.
- Serve the mini quiches as appetizers or enjoy them as a light meal.
Also Read – What Pans Can You Use Cooking Spray On?
3. Deep-Dish Fruit Tarts In Pie Plates
Ingredients:
- Prepared tart dough
- Assorted fresh fruits
- Fruit glaze or jam
Instructions:
- Preheat the oven to the specified temperature in your tart recipe.
- Roll out the tart dough and transfer it to a greased pie plate, ensuring the dough covers the base and sides evenly.
- Prick the dough with a fork to prevent it from puffing up during baking.
- Arrange your choice of fresh fruits in a decorative pattern on top of the dough.
- Bake the tart in the preheated oven according to your tart recipe’s baking time and temperature.
- Once baked, remove the pie plate from the oven and let the tart cool for a few minutes.
- Brush the fruit glaze or jam over the fruits for a glossy finish.
- Slice and serve the deep-dish fruit tart as a delightful dessert.
4. Cheesecake Tarts In Cake Pans
Ingredients:
- Prepared graham cracker crust or tart dough
- Cream cheese
- Sugar
- Eggs
- Vanilla extract
- Toppings (fruit compote, chocolate ganache, etc.)
Instructions:
- Preheat the oven to the specified temperature in your cheesecake tart recipe.
- Press the graham cracker crust or tart dough into the greased cake pan, ensuring an even layer on the base and sides.
- In a mixing bowl, beat together the cream cheese, sugar, eggs, and vanilla extract until smooth and creamy.
- Pour the cream cheese mixture into the prepared cake pan.
- Bake the cheesecake tart in the preheated oven according to your recipe’s baking time and temperature.
- Once baked, remove the cake pan from the oven and let the cheesecake tart cool completely.
- Top the tart with your desired toppings, such as fruit compote or chocolate ganache.
- Slice and serve the cheesecake tart as a delectable dessert option.
Also Read – How To Remove The Non-Stick Coating From Cookware?
5. Lemon Blueberry Tart In A Springform Pan
Ingredients:
- Prepared tart dough
- Fresh blueberries
- Lemon curd
- Whipped cream or powdered sugar (optional)
Instructions:
- Preheat the oven to the specified temperature in your tart recipe.
- Roll out the tart dough and press it into the bottom of the greased springform pan, ensuring an even layer that covers the base.
- Prick the dough with a fork to prevent it from puffing up during baking.
- Bake the tart crust in the preheated oven according to your tart recipe’s baking time and temperature.
- Once the crust is baked and cooled, spread a layer of lemon curd evenly over the crust.
- Arrange fresh blueberries on top of the lemon curd, pressing them slightly into the filling.
- Optional: Top the tart with a dollop of whipped cream or a light dusting of powdered sugar for added sweetness.
- Release the springform pan’s ring, carefully lift it away, and transfer the tart to a serving plate.
- Slice and serve the lemon blueberry tart as a refreshing and visually appealing dessert option.
How To Make Mini Tarts Without A Tart Pan?
If you don’t have a tart pan, don’t worry! You can still make delicious mini tarts using alternative methods. Here’s how to make mini tarts without a tart pan:
- Tart Crust Preparation: Start by preparing your tart crust dough according to your favorite recipe. Roll out the dough on a lightly floured surface to a thickness of about 1/8 inch (3mm).
- Cutting The Tart Crust: Use a round cookie cutter or a drinking glass with a diameter slightly larger than the desired size of your mini tarts to cut out circles from the rolled-out dough. Alternatively, you can use a knife to cut squares or rectangles for a different shape.
- Shaping The Tart Crust: Take each circle or shape and gently press it into the bottom and sides of a greased or lined muffin tin. Ensure that the dough covers the surface evenly and forms a well for the tart filling. Repeat this process with the remaining dough circles or shapes until the muffin tin is filled.
- Pricking The Dough: Use a fork to prick the bottom of each tart crust. This step helps prevent the crust from puffing up during baking and ensures it bakes evenly.
- Tart Filling: Add your desired tart filling to each prepared crust in the muffin tin. You can choose from various options such as fruit fillings, custards, creams, or any other tart filling that you prefer.
- Baking: Place the muffin tin with the mini tarts in a preheated oven and bake them according to the recommended temperature and time in your tart recipe. Keep a close eye on them to avoid overbaking.
- Cooling And Removal: Once the mini tarts are baked, remove them from the oven and let them cool in the muffin tin for a few minutes. Afterward, use a small offset spatula or a butter knife to carefully lift each tart out of the muffin tin and transfer them to a wire rack to cool completely.
Making mini tarts without a tart pan is a creative solution that allows you to enjoy these delightful treats.
The alternative method of using a muffin tin gives you the perfect individual portions of mini tarts.
Experiment with different fillings and crust variations to create a variety of flavors. Enjoy your homemade mini tarts!
Also Read – Does Enamel Cast Iron Chip?
How To Make A Tart In A Springform Pan?
Making a tart in a springform pan is a convenient alternative when you don’t have a traditional tart pan.
Follow these steps to make a tart in a springform pan:
- Preparing The Springform Pan: Start by greasing the bottom and sides of the springform pan with butter or cooking spray. This will prevent the tart crust from sticking to the pan and make it easier to remove the tart after baking.
- Tart Crust Preparation: Prepare your tart crust dough according to your preferred recipe. Roll out the dough to fit the size of the springform pan, ensuring it covers the bottom and sides evenly.
- Pressing The Tart Crust: Gently press the rolled-out dough into the bottom and about 1 inch (2.5 cm) up the sides of the greased springform pan. Use your fingers or the back of a spoon to press the dough firmly against the pan, ensuring an even thickness.
- Pricking The Dough: To prevent the tart crust from puffing up during baking, use a fork to prick the dough in the bottom of the pan. This will allow steam to escape and help the crust maintain its shape.
- Tart Filling: Add your desired tart filling to the prepared crust in the springform pan. This can include fruit fillings, custards, creams, or any other tart filling you prefer.
- Baking: Place the springform pan in a preheated oven and bake the tart according to the recommended temperature and time specified in your tart recipe. Keep in mind that the baking time may vary slightly compared to using a traditional tart pan, so monitor the tart closely to ensure it bakes evenly and reaches the desired level of doneness.
- Cooling And Removal: Once the tart is baked, remove it from the oven and allow it to cool in the springform pan for a few minutes. Release the sides of the springform pan by unlatching or removing the outer ring. Carefully slide a thin spatula or knife under the tart to separate it from the pan’s base. Transfer the tart to a serving plate or allow it to cool completely on a wire rack before serving.
Making a tart in a springform pan offers the advantage of easy removal and a more versatile shape.
The adjustable sides of the springform pan make it easier to release and serve the tart. Enjoy your homemade tart creation!
Also Read – How To Fix Scratched Non-Stick Pans?
Conclusion
In the world of baking, tart pans play a significant role in creating stunning and delicious tarts.
However, when you find yourself without a tart pan, there are several substitutes available that can still produce delightful results.
Ramekins or custard cups, muffin tins, pie plates or quiche pans, cake pans, and springform pans can all be used as effective alternatives.
By adapting the size, adjusting the baking time and temperature, and following some essential tips, you can successfully use these substitutes to create a wide variety of tarts.
Remember to be creative and embrace the available resources to continue enjoying the pleasure of baking.
YOU MAY ALSO LIKE
- Can You Put Enamel Cast Iron In The Dishwasher?
- Can You Use Vinegar On Enameled Cast Iron?
- Can You Use Steel Wool On Enameled Cast Iron?
- Can You Put Enameled Cast Iron In The Oven?
- Can You Use Enameled Cast Iron On A Glass Cooktop?
- Does Vinegar Ruin Non-Stick Pans?
- Why Do Metal Handles Of Pans Get Hot?
FAQs (Frequently Asked Questions)
-
Can I Use Cake Pan Instead Of Tart Pan?
While a cake pan can be used instead of a tart pan, the shape and depth may differ.
-
Can I Use A Pie Pan Instead Of A Tart Pan?
A pie pan can be used as a substitute for a tart pan, but the fluted edges will be missing.
-
Can You Use A Cake Tin Instead Of A Tart Tin?
A cake tin can be used as a substitute for a tart tin, but the shape and depth may differ.
-
Can I Use A Springform Pan Instead Of A Tart Pan?
Yes, a springform pan can be used instead of a tart pan for baking tarts.
-
Will Cake Batter Leak In A Springform Pan?
Cake batter may leak in a springform pan if it is too thin or the pan is not properly sealed.
-
Can I Use A Tart Pan Substitute For Any Tart Recipe?
Yes, you can adapt most tart recipes to work with the available substitute pans. Just ensure you consider the size and adjust the baking time and temperature accordingly.
-
Will The Tart Pan Substitute Affect The Taste Of The Tart?
The tart pan substitute should not significantly affect the taste of the tart. The primary difference lies in the presentation and shape of the tart.
-
Can I Use A Substitute Pan For Both Sweet And Savory Tarts?
Absolutely! Tart pan substitutes work well for both sweet and savory tarts. Just choose the fillings and flavors that suit your preferences.
-
Do I Need To Make Any Adjustments When Using A Tart Pan Substitute?
The main adjustments would involve baking time and temperature. Monitor the tart closely while baking and make necessary adjustments to ensure it cooks evenly.
-
Where Can I Find Tart Pan Substitutes?
Tart pan substitutes like ramekins, muffin tins, pie plates, and cake pans can be found in most kitchen supply stores or online retailers.
Katrina Smith is a seasoned expert with over 25 years of experience in all things related to cooking and the kitchen. As an avid cook and kitchen enthusiast, she is passionate about sharing her knowledge and expertise on cookware, kitchen appliances, kitchen tips, and kitchen staples.
Through her articles and reviews, Katrina aims to inspire and help others improve their cooking skills, experiment with different ingredients, and invest in quality cookware and appliances.

![How To Season And Clean Cast Iron Cookware? [4 Effective Ways] 8 How To Season And Clean Cast Iron Cookware](https://www.kitchensity.com/wp-content/uploads/2020/06/How-To-Season-And-Clean-Cast-Iron-Cookware.jpg)

![Stainless Steel Vs Nonstick Vs Ceramic Cookware Set [An Ultimate Guide 2023] 10 Stainless Steel vs Nonstick vs Ceramic Cookware Set](https://www.kitchensity.com/wp-content/uploads/2019/09/Stainless-Steel-vs-Ceramic-vs-Nonstick-Cookware-Sets-e1621083482728.jpg)
![What Pans Can You Use Cooking Spray On? [Ultimate Guide] 12 Types of pans with which cooking spray can be used](https://www.kitchensity.com/wp-content/uploads/2023/02/What-Pans-Can-You-Use-Cooking-Spray-On.jpg)
