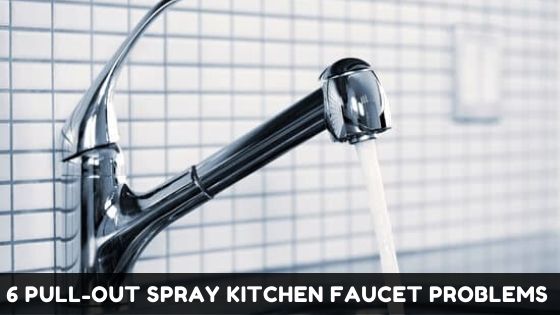
Pull-out spray kitchen faucets have become a popular choice for homeowners seeking convenience and flexibility in their kitchens.
These versatile fixtures offer the ability to extend the faucet’s reach with a retractable spray head, allowing for easier rinsing, cleaning, and filling of pots and pans.
However, like any other household fixture, pull-out spray kitchen faucets can encounter problems over time. From leaky hoses to low water pressure, these issues can cause frustration and inconvenience.
In this article, we will explore common pull-out spray kitchen faucet problems and provide practical solutions to help you address these issues effectively.
By understanding the potential problems and their fixes, you can ensure the continued smooth operation of your kitchen faucet, making your culinary tasks a breeze.

Table of Contents
- 1 What Are The Pull-Out Spray Kitchen Faucet Problems?
- 2 How Pull-Out Spray Kitchen Faucets Work And Their Components
- 3 6 Pull-Out Spray Kitchen Faucet Problems That Are Easy to Fix
- 4 How Do You Fix A Kitchen Faucet That Won’t Swivel?
- 5 How Do You Unclog A Kitchen Faucet Sprayer?
- 6 Preventive Measures For Pull-Out Spray Kitchen Faucets
- 7 Final Verdict
- 8 You May Also Like
- 9 FAQs
- 9.1 Why Is My Kitchen Faucet Leaking From Pull-Out Sprayer?
- 9.2 Pull Out Kitchen Faucet Leaking Under Sink
- 9.3 Why Is My Pull-Out Spray Kitchen Faucet Leaking?
- 9.4 How Can I Fix A Pull-Out Spray Kitchen Faucet That Won’t Retract?
- 9.5 What Should I Do If My Pull-Out Spray Kitchen Faucet Has Low Water Pressure?
- 9.6 How Do I Address A Loose Hose In My Pull-Out Spray Kitchen Faucet?
- 9.7 My Pull-Out Spray Kitchen Faucet Has A Clogged Diverter Valve. What Should I Do?
What Are The Pull-Out Spray Kitchen Faucet Problems?
Pull-out spray kitchen faucet problems can include leaks, low water pressure, defective retractable hoses, loose fittings, clogged diverter valves, and leaky spray heads. These issues can often be resolved by replacing or cleaning specific components, such as the hose, aerator, or diverter valve.
It’s important to identify the source of the problem and follow appropriate troubleshooting steps or seek professional assistance if needed.
Refer below for detailed instructions to fix the problem.
Also Read – How To Clean A Delta Pull-Down Kitchen Faucet Aerator?
How Pull-Out Spray Kitchen Faucets Work And Their Components
Pull-out spray kitchen faucets are a popular choice for many homeowners due to their versatility and convenience.
These faucets are designed with a retractable spray head that can be pulled out from the faucet spout, allowing for greater flexibility and ease of use in the kitchen.
- The main components of a pull-out spray kitchen faucet include the faucet body, the spout, the spray head, the hose, and the retractable mechanism.
- The faucet body is the main structure that holds all the components together and connects to the water supply lines.
- The spout is the part of the faucet from which water flows. It can be a fixed spout or a pull-out spout, depending on the type of faucet.
- The spray head is attached to the end of the hose and usually has different spray modes, such as a steady stream or a wide spray pattern.
- The hose is responsible for delivering water from the water supply to the spray head. It is flexible and allows for easy movement of the spray head around the sink area.
- The retractable mechanism enables the hose and spray head to be pulled out from the spout and then retracted back into place when not in use.
Understanding these components and how they work together is important for troubleshooting any potential issues that may arise with pull-out spray kitchen faucets.
By having a basic understanding of the inner workings, you can identify the specific parts that may be causing problems and find appropriate solutions.
- For example, if the hose becomes defective or gets stuck, it can affect the smooth retraction of the spray head.
- Knowing this, you can check the hose and its connection points to determine if it needs to be replaced or if there is any debris obstructing its movement.
Also Read – The Mighty Basin Wrench: Your Key to Effortless Plumbing Repairs
6 Pull-Out Spray Kitchen Faucet Problems That Are Easy to Fix
Like any other furniture or fixture, these things are expected to exhibit some wear and tear issues after a while. It doesn’t necessarily mean that you were careless or you made a bad decision of going for a certain type or brand.
Sometimes it just happens. It can be because of hard water, certain features, etc. If for instance, you find yourself in this dilemma, here are a few tips you can check out to address some of your pull-out faucet issues:
1. Defective Retractable Hose
A common problem with pull-out spray kitchen faucets is a defective retractable hose. Frequent retraction can lead to issues where the hose doesn’t retract properly, requiring manual adjustment.
The retraction mechanism typically involves an affixed weight attached to the hose, utilizing gravity to retract it.
To address this problem, first, check if the weight has fallen off. If it has, reattach it securely. If the hose is sticking to the side, it may be necessary to replace the hose entirely.
If your pull-out faucet’s hose is defective and not retracting properly, follow these steps:
- Check The Weight: Look under the sink and see if the weight that is attached to the hose has fallen off. If it has, reattach it securely.
- Inspect The Hose: If the weight is still in place, the hose may be sticking to the side. Carefully guide the hose back to its correct position, ensuring it is not tangled or obstructed.
- Replace The Hose: If the hose is damaged or continues to malfunction, you may need to replace it. Start by turning off the water supply to the faucet. Unscrew the connections at both ends of the hose using pliers or an adjustable wrench. Install the new hose by connecting it securely at both ends, ensuring proper alignment.
Also Read – Best Basin Wrench Alternatives: A Comprehensive Guide
2. Low Water Pressure
Low water pressure is a common issue in faucets, including pull-out spray models, often caused by mineral deposits in the aerator. Hard water components can accumulate in the aerator over time, restricting water flow.
To resolve this problem, start by brushing or scrubbing the aerator with a toothbrush to remove any mineral buildup.
If that doesn’t work, you can try soaking the aerator in vinegar for about 30 minutes to dissolve the deposits. After soaking, rinse the aerator thoroughly before reattaching it to the faucet.
If you’re experiencing low water pressure from your pull-out spray kitchen faucet, follow these troubleshooting steps:
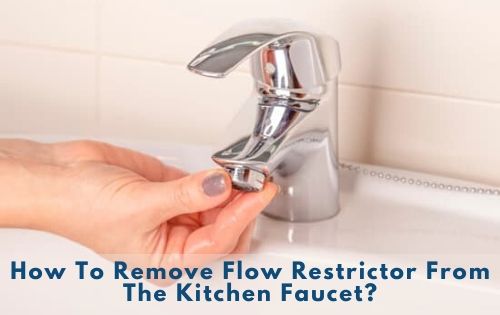
- Remove The Aerator: Unscrew the aerator, which is located at the tip of the faucet spout, using your hand or a pair of pliers if necessary.
- Clean The Aerator: Rinse the aerator with water to remove any loose debris. If mineral deposits are present, soak the aerator in a solution of equal parts water and vinegar for about 30 minutes. Scrub the aerator with a brush or toothbrush to remove any stubborn deposits.
- Reinstall The Aerator: After cleaning, rinse the aerator thoroughly and screw it back onto the faucet spout, ensuring a tight fit. Test the water flow to check if the pressure has improved.
Also Read – How To Remove Kitchen Faucet Without Basin Wrench?
3. Lose Hose
The movable parts of a pull-out spray kitchen faucet are more prone to wear and tear, which can lead to unstable and loose fittings.
Some high-quality pull-out spray faucets have technology specifically designed to address this issue, ensuring more stable and secure hose fittings. However, faucets with such features may come at a higher price point.
If your pull-out spray kitchen faucet has loose fittings, follow these steps:
- Identify The Loose Fittings: Carefully inspect the connections between the hose, spray head, and faucet body. Look for any signs of looseness or instability.
- Tighten The Fittings: Use an adjustable wrench or pliers to tighten the fittings. Be careful not to overtighten, as it may cause damage.
- Consider Replacement: If the fittings continue to be loose or unstable, despite tightening, it may be necessary to replace them. Consult the manufacturer’s instructions or seek professional assistance for proper replacement procedures.
Also Read – Low Water Pressure In The Kitchen Sink: Fix It In 4 Simple Ways
4. Leaky Hose
Leaks can occur at either end of the faucet, and a leaky hose should not be ignored as it can cause damage to your kitchen and result in increased utility bills.
To address a leaky hose, you don’t necessarily have to replace the entire faucet. Instead, turn off the water valves supplying the faucet.
Check if the weight attached to the hose is still in place. If it is, remove it. Next, disconnect the hose from the water supply.
Slide off the plastic weight, then pull the hose through the faucet spout. Finally, replace the old hose with a new one, ensuring a secure connection.
If you have a leak in the hose of your pull-out spray kitchen faucet, follow these steps to replace it:
- Turn Off The Water Supply: Locate the water shut-off valves under the sink and turn them clockwise to shut off the water flow to the faucet.
- Disconnect The Hose: Using pliers or an adjustable wrench, loosen the connections at both ends of the hose. Carefully remove the hose from the faucet body and water supply connection.
- Install The New Hose: Attach the new hose to the faucet body and water supply connection, ensuring a secure fit. Tighten the connections with pliers or an adjustable wrench.
- Turn On The Water Supply: Once the new hose is securely installed, turn on the water supply valves under the sink to restore the water flow. Check for any leaks and make sure the hose functions properly.
Also Read – How To Fix A Faucet Handle That Turns Too Far?
5. Leaky Spray Head
If the spray head of your pull-out spray kitchen faucet is leaking, you can simply replace it to solve the problem. Start by turning off the water valve to the faucet.
Next, unscrew the existing spray head and remove the C-clip. Attach the new spray head by reattaching the clip, washer, and head onto the connection. Ensure that the connection is tight and secure.
If you have a leaky spray head on your pull-out spray kitchen faucet, follow these steps to replace it:
- Turn Off The Water Supply: Locate the water shut-off valves under the sink and turn them clockwise to shut off the water flow to the faucet.
- Unscrew The Spray Head: Use your hand or pliers to unscrew the spray head from the hose connection. Be cautious not to damage the threads.
- Remove The C-Clip: Some spray heads have a C-clip that secures the head in place. If your spray head has one, gently remove the C-clip using a small screwdriver or a pair of pliers.
- Replace The Spray Head: Take the new spray head and attach it to the hose connection. If there was a C-clip, reattach it to secure the spray head in place. Ensure a tight connection, but avoid overtightening.
- Turn On The Water Supply: Once the new spray head is securely installed, turn on the water supply valves under the sink to restore the water flow. Check for any leaks and test the spray function to ensure it works properly.
Also Read – How To Clean Plastic Kitchen Sink?
6. Clogged Diverter Valve
Over time, it is common for the diverter valve in pull-out spray faucets to become dirty, leading to reduced water pressure and potential issues.
To determine if your diverter valve is clogged, remove the spray head and check if the water pressure running from the hose is low.
This is an indication of a clogged valve. Additionally, if you experience a pulsating sprayer or water coming out of the main spout while spraying, it is likely due to a clogged diverter valve.
Unfortunately, the only effective solution for a clogged diverter valve is to replace it. Consult the manufacturer’s instructions or seek professional assistance to ensure proper replacement.
If you suspect a clogged diverter valve in your pull-out spray kitchen faucet, follow these steps to address the issue:
- Turn Off The Water Supply: Locate the water shut-off valves under the sink and turn them clockwise to shut off the water flow to the faucet.
- Remove The Spray Head: Unscrew the spray head from the hose connection and set it aside.
- Check Water Pressure: Turn on the faucet and observe the water pressure. If the pressure is low or water is coming out of the main spout while spraying, it indicates a potential clog in the diverter valve.
- Replace The Diverter Valve: To replace the diverter valve, consult the manufacturer’s instructions as the process can vary depending on the faucet model. Typically, it involves dismantling the faucet body to access the diverter valve. Remove the old diverter valve and install the new one according to the manufacturer’s guidelines.
- Reassemble The Faucet: Once the new diverter valve is in place, reassemble the faucet by following the reverse order of the disassembly steps. Make sure all connections are secure and tightened.
- Turn On The Water Supply: After reassembling the faucet, turn on the water supply valves under the sink to restore the water flow. Test the faucet to ensure proper functioning and check for any leaks.
You May Also Like – How to Unclog a Sink Clogged With Coffee Grounds?
How Do You Fix A Kitchen Faucet That Won’t Swivel?
If you’re facing a kitchen faucet that won’t swivel, there are a few steps you can take to fix the issue:
- Start by checking if there are any obstructions or debris around the base of the faucet. Remove any items that might be blocking the swivel motion.
- If the faucet still won’t swivel, check the mounting nut underneath the sink. Ensure that it is securely tightened. Use a wrench or pliers to tighten it if needed.
- Lubricate the swivel joint of the faucet with a silicone-based lubricant. Apply the lubricant to the joint and move the faucet handle back and forth to distribute it evenly.
- If the above steps don’t resolve the problem, there may be an issue with the internal components of the faucet. In such cases, it is recommended to consult the manufacturer’s instructions or contact a professional plumber for further assistance.
Remember to exercise caution and turn off the water supply before attempting any repairs.
Also Read – How To Lubricate A Swivel Faucet?
How Do You Unclog A Kitchen Faucet Sprayer?
To unclog a kitchen faucet sprayer, you can follow these steps:
- Start by removing the sprayer head from the hose. This is typically done by twisting it counterclockwise or by detaching a retaining nut.
- Once the sprayer head is detached, check for any visible debris or mineral buildup on the screen or aerator. Use a small brush, such as a toothbrush, to scrub away the clog gently.
- Alternatively, you can soak the sprayer head in a mixture of vinegar and water to dissolve the deposits. Rinse it thoroughly afterward.
- If the clog persists, the next step is to clean the sprayer hose. Disconnect the hose from the water supply under the sink. Hold the disconnected end of the hose over a bucket or container and turn on the water supply for a few seconds. This will help flush out any debris or buildup that might be causing the clog.
- Reconnect the hose to the water supply and reattach the sprayer head. Ensure that all connections are tight and secure.
- Test the kitchen faucet sprayer by turning on the water. Check if the water flow is smooth and free of any obstructions. If the clog persists, you may need to repeat the cleaning process or consider replacing the sprayer head if it’s damaged or worn out.
Remember to turn off the water supply before removing any parts and handle small components carefully to avoid misplacement or damage.
If you encounter difficulties or the clog remains unresolved, it is recommended to consult the manufacturer’s instructions or seek professional assistance.
Also Read – How To Fix A Stiff Kitchen Faucet Handle?
Preventive Measures For Pull-Out Spray Kitchen Faucets
- Regularly Clean The Aerator:
- The aerator is prone to mineral buildup, which can affect water pressure.
- To prevent this, remove the aerator periodically and clean it.
- Rinse it with water to remove loose debris, and if there are mineral deposits, soak it in a mixture of equal parts water and vinegar for about 30 minutes.
- Scrub the aerator with a brush or toothbrush to remove stubborn deposits. Cleaning the aerator regularly will help maintain optimal water flow.
- Use A Water Softener:
- If you have hard water, consider installing a water softener system for your home.
- Hard water contains minerals that can accumulate inside the faucet, causing blockages and affecting its performance over time.
- A water softener will help reduce mineral buildup and prolong the life of your pull-out spray kitchen faucet.
- Avoid Excessive Force:
- Pull-out spray kitchen faucets are designed for convenience, but it’s important to use them gently.
- Avoid exerting excessive force when retracting or extending the hose, as this can strain the internal components and lead to issues with retraction or leaks.
- Be mindful of how you handle the faucet to prevent unnecessary wear and tear.
- Check And Tighten Fittings Periodically:
- Regularly inspect the connections and fittings of your pull-out spray kitchen faucet.
- Over time, vibrations and usage can cause fittings to become loose.
- Use an adjustable wrench or pliers to tighten any loose connections.
- By checking and tightening the fittings periodically, you can prevent leaks and ensure stable operation.
- Clean The Spray Head Regularly:
- The spray head can accumulate mineral deposits and debris over time, affecting the spray pattern and water flow.
- To maintain optimal performance, remove the spray head and clean it periodically.
- Soak it in a vinegar-water solution, scrub it gently, and rinse it thoroughly before reinstalling.
- Regular cleaning will help keep the spray head functioning properly.
- Address Issues Promptly: If you notice any problems with your pull-out spray kitchen faucet, such as leaks, reduced water pressure, or difficulty retracting the hose, address them promptly. Ignoring or delaying repairs can lead to further damage and more extensive repairs down the line. By taking immediate action, you can prevent minor issues from escalating into major ones.
Also Read – How To Fix A Leaky Kitchen Faucet?
Final Verdict
In conclusion, pull-out spray kitchen faucets are convenient and practical additions to any kitchen, but like any fixture, they can experience problems over time.
In this article, we have discussed common issues with pull-out spray faucets and provided solutions to address them.
It is important to remember that when faced with malfunctioning faucets, prompt action is key. By identifying the source of the problem and taking appropriate steps to fix it, you can save money and effort.
Remember to troubleshoot and check for simple solutions first, such as loose connections or damaged seals, before assuming more complex issues.
Additionally, we have discussed preventive measures that can help maintain the performance of your pull-out spray kitchen faucet.
Regular cleaning, using water softeners, and being mindful of how you handle the faucet can go a long way in preventing problems and prolonging the lifespan of your faucet.
However, it is worth noting that not all issues can be resolved through DIY methods. If you encounter persistent or complex problems with your pull-out spray kitchen faucet, it is advisable to seek professional assistance.
A qualified plumber or faucet technician can provide expert advice and ensure that the problem is addressed effectively.
We encourage you, our readers, to share your experiences and tips in the comments section below.
By exchanging knowledge and insights, we can create a helpful community that supports one another in maintaining the functionality of our kitchen faucets.
You May Also Like
- How To Fix A Spinning Faucet Handle: A Comprehensive Guide
- How To Tighten A Loose Moen Single Handle Kitchen Faucet?
- Best Insulation Under The Kitchen Sink
- How to Insulate Under Kitchen Sink?
- What Is The Effect Of Oven Cleaner On Kitchen Countertops?
FAQs
Why Is My Kitchen Faucet Leaking From Pull-Out Sprayer?
If your kitchen faucet is leaking from the pull-out sprayer, it may indicate a problem with the hose or spray head. Check for loose connections or damaged seals, and if necessary, replace the hose or spray head to fix the issue.
Pull Out Kitchen Faucet Leaking Under Sink
If your pull-out kitchen faucet is leaking under the sink, it is likely due to a problem with the supply lines or connections. Inspect the connections and tighten them if necessary. If the leak persists, you may need to replace the supply lines or seek professional assistance to resolve the issue.
Why Is My Pull-Out Spray Kitchen Faucet Leaking?
Leaks in pull-out spray kitchen faucets can be caused by various factors such as worn-out seals, loose connections, or damaged hoses. Checking these components and replacing them if necessary can help resolve the issue.
How Can I Fix A Pull-Out Spray Kitchen Faucet That Won’t Retract?
If your pull-out spray kitchen faucet is not retracting properly, it could be due to a defective hose or a fallen-off weight. First, check if the weight is still attached. If not, reattach it. If the hose is damaged or sticking, you may need to replace it.
What Should I Do If My Pull-Out Spray Kitchen Faucet Has Low Water Pressure?
Low water pressure in a pull-out spray kitchen faucet is often caused by mineral buildup in the aerator. Try cleaning the aerator by brushing it or soaking it in vinegar to remove the deposits. If the problem persists, consider replacing the aerator.
How Do I Address A Loose Hose In My Pull-Out Spray Kitchen Faucet?
Movable parts in a pull-out spray kitchen faucet can experience wear and tear, leading to loose fittings. Tightening the parts can help in some cases. However, if the issue persists, consider investing in a high-quality pull-out faucet that addresses this problem.
My Pull-Out Spray Kitchen Faucet Has A Clogged Diverter Valve. What Should I Do?
If the diverter valve in your pull-out spray kitchen faucet is clogged, it can affect water pressure and cause other issues. If cleaning the spray head and checking for low water pressure doesn’t resolve the problem, replacing the diverter valve may be necessary.
Katrina Smith is a seasoned expert with over 25 years of experience in all things related to cooking and the kitchen. As an avid cook and kitchen enthusiast, she is passionate about sharing her knowledge and expertise on cookware, kitchen appliances, kitchen tips, and kitchen staples.
Through her articles and reviews, Katrina aims to inspire and help others improve their cooking skills, experiment with different ingredients, and invest in quality cookware and appliances.

![How To Unclog A Sink Clogged With Coffee Grounds? [3 Effective Ways] 3 How-to-Unclog-a-Sink-Clogged-With-Coffee-Grounds](https://www.kitchensity.com/wp-content/uploads/2020/06/How-to-Unclog-a-Sink-Clogged-With-Coffee-Grounds.jpg)


![Best Insulation Under The Kitchen Sink [3 Top Insulations] 6 Best Insulation Under The Kitchen Sink](https://www.kitchensity.com/wp-content/uploads/2023/04/Best-Insulation-Under-The-Kitchen-Sink.jpg)


