Cleaning a hand mixer is an essential task to maintain hygiene, prolong the lifespan of the appliance, and ensure optimal performance with each use.
Whether you’ve whipped up a batch of delicious cake batter or mixed ingredients for a savory dish, the aftermath of a hand mixer’s operation often leaves it coated in sticky residues.
Cleaning a hand mixer may seem daunting at first, especially with its electrical components, but with the right approach, it can be a simple and safe process.
In this guide, we will provide you with a comprehensive step-by-step method to clean your hand mixer effectively, from the exterior to the beaters and accessories.
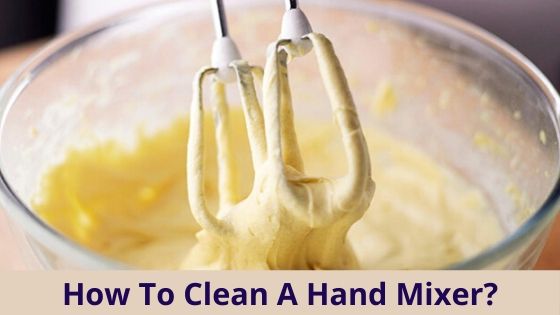
Table of Contents
- 1 How To Clean A Hand Mixer?
- 2 Step-By-Step Process To Clean A Hand Mixer
- 3 How To Perfectly Dry The Hand Mixer?
- 4 How To Clean Hand Mixer Accessories?
- 5 How To Clean Stubborn Dirt From The Hand Mixer?
- 6 Some Common Questions
- 6.1 What Is The First Step In Cleaning Electric Hand Mixer?
- 6.2 What Is The Proper Way To Clean The Beaters And Bowls After Use?
- 6.3 How To Clean The Inside Of A Hand Mixer?
- 6.4 How To Remove Beaters From Hand Mixer?
- 6.5 When To Clean The Hand Mixer And Its Accessories?
- 6.6 What To Do If The Dirt Gets Dried Out?
- 7 Safety Precautions
- 8 Final Verdict
- 9 FAQs
How To Clean A Hand Mixer?
To clean a hand mixer, begin by taking a soft towel, applying liquid detergent, and rinsing it. Squeeze out any excess water and use the damp cloth to clean the hand mixer thoroughly. Afterward, take a dry towel to wipe it down and allow it to air dry completely.
You May Also Like: Best Hand Mixer For Mashed Potatoes
Step-By-Step Process To Clean A Hand Mixer
To effectively clean your hand mixer, follow these steps:
- Turn Off And Unplug The Hand Mixer: Before starting the cleaning process, ensure that your hand mixer is turned off and unplugged from the power source. This step is crucial to ensure your safety while cleaning and to prevent any electrical mishaps.
- Type Of Liquid Detergent:
- It is recommended to use mild dish soap for cleaning your hand mixer.
- The gentle formula of dish soap helps break down grease and residue without causing any damage to the appliance.
- Mix a small amount of dish soap with warm water to create a cleaning solution.
- Cleaning Hard-To-Reach Areas:
- Hand mixers often have crevices and hard-to-reach areas where batter or other ingredients can get trapped.
- To clean these areas effectively, you can use a small brush or toothbrush. Gently scrub these areas using the cleaning solution to remove any residue.
- Be careful not to apply excessive force that could potentially damage the appliance.
- Damp Cloth Cleaning:
- Take a soft towel or cloth and dampen it with the cleaning solution. Ensure that the cloth is not dripping wet but is slightly moist.
- Wipe down the entire surface of the hand mixer, including the handles, buttons, and any exposed areas, to remove any dirt, stains, or food particles.
- Pay extra attention to areas that come into direct contact with the ingredients.
- Cleaning Crevices And Attachments:
- If there are removable attachments or beaters, detach them from the hand mixer according to the manufacturer’s instructions.
- Clean these attachments separately using the same cleaning solution and a cloth or sponge.
- Ensure that you clean all sides and crevices thoroughly. Rinse the attachments with clean water to remove any soap residue.
- Cleaning The Cord: While cleaning the hand mixer, don’t forget to wipe down the cord as well. Use a slightly damp cloth to gently clean the cord, ensuring that it is completely dry before storing or using the appliance again.
- Drying:
- After cleaning, take a dry towel or cloth and wipe down the hand mixer to remove any excess moisture.
- Leave the appliance to air dry completely before storing it or using it again.
- This step is crucial to prevent the accumulation of moisture, which can lead to mold growth or electrical damage.
You May Also Like: Best Hand Mixers for Whipping Cream, Kneading and Much More
How To Perfectly Dry The Hand Mixer?
After cleaning your hand mixer, it is crucial to allow it to dry completely before using it again. Proper drying not only ensures the safety of the appliance but also helps maintain its performance and prolong its lifespan.
Follow these steps to effectively dry your hand mixer:
- Allow The Hand Mixer To Dry Completely:
- Moisture and electrical devices do not mix well, and using a wet hand mixer can pose serious electrical hazards.
- To avoid any accidents or damage, it is essential to let the hand mixer dry thoroughly before plugging it in or using it again.
- Leave The Hand Mixer In A Well-Ventilated Area:
- Find a well-ventilated area in your kitchen where you can place the hand mixer to air dry.
- This allows the natural airflow to help evaporate any remaining moisture.
- Avoid confined or humid spaces, as they can prolong the drying process or even contribute to mold growth.
- Use A Fan Or Airflow To Speed Up Drying:
- If you want to expedite the drying process, you can use a fan or create airflow in the area where you placed the hand mixer.
- Position the fan to blow air toward the appliance, helping to evaporate the moisture more quickly.
- Ensure that the fan is not too close to the hand mixer to prevent any potential damage.
- Store The Hand Mixer In An Upright Position:
- Once the hand mixer is completely dry, it is important to store it properly to prevent moisture buildup.
- Storing the hand mixer in an upright position allows any residual moisture to drain or evaporate naturally.
- This helps maintain the internal components and prolongs the lifespan of the appliance.
By allowing your hand mixer to dry completely and following these additional tips, you ensure the safety of the appliance and help preserve its performance over time.
Also Read – Best Coffee Makers Under 200 Dollars
How To Clean Hand Mixer Accessories?
Now comes the accessories. You can easily clean the accessories without any tension with these basic steps.
Basic Steps To Clean The Accessories
- Take a bowl of hot water and pour some liquid dish soap into it.
- Attach the beaters or hooks to the hand mixer and start the motor.
- Start it at low speed and whip the solution of water and dish soap for a minute.
- This step will remove all the ingredients that are attached to the beaters.
- Now, take cold water, and again start the hand mixer and whip it for another minute. This step will clean the accessories.
- After doing the above process, now you can take a dry cloth and simply wipe the beaters.
This is a combo method as both the beaters and the bowl got cleaned in this process. So, if you have any dirty bowls you can try this.
This is a very effective method as it can clean anything (butter, cream, etc) that is attached to the accessories.
Note: If by mistake water gets inside the device don’t get panic. Take the device and keep it in the sunlight for some time. This will dry out all the water that gets inside the hand mixer.
But make sure, you do not start the appliance immediately to test whether it’s working or not. This can malfunction the device, so first let it dry and then start it.
Also Read – How To Make Oven Racks Slide Easier?
Step-By-Step Process To Clean The Hand Mixer Accessories
When it comes to cleaning the accessories of your hand mixer, such as beaters or attachments, it is important to follow proper cleaning practices to ensure their longevity and cleanliness. Here are some additional details to consider:
- Type Of Dish Soap For Cleaning Accessories:
- Similar to cleaning the hand mixer itself, it is recommended to use mild dish soap for cleaning the accessories.
- Look for a gentle formula that effectively cuts through grease and residue.
- Avoid using harsh chemicals or abrasive cleaners that may damage the accessories or leave behind unwanted residue.
- Consider Stainless Steel Beaters Or Attachments:
- If you have the option, choosing stainless steel beaters or attachments can simplify the cleaning process.
- Stainless steel is generally easier to clean, less prone to staining, and more resistant to odors compared to other materials.
- It also offers better hygiene as it is less likely to harbor bacteria or react with certain ingredients.
- Detach Accessories Before Cleaning:
- Before cleaning the beaters or attachments, it is important to detach them from the hand mixer according to the manufacturer’s instructions.
- This allows for thorough cleaning and prevents any damage to the hand mixer itself during the process.
- Rinse Thoroughly With Water:
- After detaching the accessories, rinse them thoroughly with clean water.
- This step helps remove any remaining soap residue and ensures that the accessories are free from any cleaning solution.
- Pay attention to hard-to-reach areas or crevices, ensuring that no residue is left behind.
- Dry The Accessories Completely:
- After rinsing, dry the beaters or attachments completely before storing them.
- Use a clean towel or allow them to air dry in a well-ventilated area.
- This prevents moisture buildup, which can lead to rust or other damage to the accessories.
By detaching the accessories, rinsing them thoroughly, and drying them properly, you can ensure that your hand mixer accessories remain clean, hygienic, and in optimal condition.
Also Read – How To Program A Black And Decker Coffee Maker?
How To Clean Stubborn Dirt From The Hand Mixer?
Sometimes, the hand mixer may accumulate stubborn or dried-on dirt that requires additional effort to remove. Here are some methods you can employ to effectively clean such residue without causing damage to the hand mixer:
- Soaking In Warm Soapy Water:
- If you encounter dried-on or stubborn dirt on the beaters or attachments, one method is to soak them in warm soapy water for an extended period.
- Fill a bowl or sink with warm water and add a mild dish soap.
- Place the beaters or attachments in the soapy water and let them soak for a while, preferably for 15 to 30 minutes.
- The warm water and soap help loosen the dirt, making it easier to remove.
- Gently Scrubbing With A Non-Abrasive Sponge:
- After soaking, use a non-abrasive sponge or cloth to gently scrub off the stubborn residue.
- Apply a small amount of dish soap on the sponge and work it into the affected areas.
- Be careful not to use excessive force or aggressive scrubbing, as this may damage the coating or surface of the hand mixer.
- Instead, use gentle circular motions to gradually remove the dirt.
- Avoid Sharp Objects Or Abrasive Materials:
- It’s important to exercise caution and avoid using sharp objects, such as knives or metal scouring pads, as they can scratch or damage the coating or surface of the hand mixer.
- Similarly, avoid using abrasive materials that can cause abrasions or remove the protective finish.
- Stick to non-abrasive sponges, soft cloths, or brushes specifically designed for cleaning kitchen appliances.
- Rinse Thoroughly And Dry:
- After cleaning the stubborn dirt, rinse the beaters or attachments thoroughly with clean water to remove any remaining soap residue.
- Ensure that all traces of dirt and cleaning solution are washed away.
- After rinsing, dry the beaters or attachments completely before storing them or reattaching them to the hand mixer.
- This helps prevent moisture buildup and potential damage.
Remember, patience and gentle cleaning techniques are key when dealing with stubborn dirt. Avoid harsh or aggressive methods that may harm the hand mixer.
If the dirt persists or if you are unsure about cleaning a specific area, consult the manufacturer’s instructions or contact their customer support for guidance.
You May Also Like: Best Lubricants For Oven Racks
Some Common Questions
What Is The First Step In Cleaning Electric Hand Mixer?
The first step in cleaning an electric hand mixer is to ensure the appliance is unplugged from the electrical outlet. This is a crucial safety precaution that must be followed before starting the cleaning process.
By unplugging the hand mixer, you eliminate the risk of electric shock or accidental activation of the appliance while cleaning.
Always prioritize safety and double-check that the hand mixer is disconnected from the power source before proceeding with any cleaning tasks.
What Is The Proper Way To Clean The Beaters And Bowls After Use?
Cleaning the beaters and bowls after use is essential to maintain hygiene and prevent the buildup of residue. Here’s the proper way to clean the beaters and bowls:
- Detach The Beaters From The Hand Mixer: Depending on your hand mixer model, press the beater release button or follow the manufacturer’s instructions to detach the beaters from the hand mixer.
- Remove Any Excess Batter Or Food: Before cleaning, remove any excess batter or food clinging to the beaters and bowls. Use a spatula or your fingers to scrape off as much residue as possible.
- Soak The Beaters And Bowls: Fill a bowl or sink with warm water and add a small amount of mild dish soap. Submerge the beaters and bowls in soapy water, ensuring they are fully covered.
- Wash The Beaters: Use a sponge or a soft brush to gently scrub the beaters, paying attention to the wire loops and any hard-to-reach areas. Make sure to remove any residue or stains.
- Rinse The Beaters: Thoroughly rinse the beaters under running water to remove any soap residue. Check that all the soap is washed away, as any leftover residue can affect the taste of future recipes.
- Clean The Bowls: While the beaters are soaking, use a sponge or cloth to clean the bowls. Apply dish soap and scrub the bowls to remove any remaining batter or food particles.
- Rinse The Bowls: Rinse the bowls under running water to remove any soap residue. Ensure they are completely clean before drying.
- Dry The Beaters And Bowls: After washing and rinsing, dry the beaters and bowls with a clean towel or allow them to air dry. Ensure they are completely dry before storing or using them again to prevent any moisture-related issues.
It’s important to note that some beaters and bowls may be dishwasher-safe. Check the manufacturer’s instructions to determine if they can be safely washed in a dishwasher. If dishwasher-safe, follow the dishwasher’s guidelines for proper cleaning.
Also Read – What To Look For When Buying An Air Fryer?
How To Clean The Inside Of A Hand Mixer?
Cleaning the inside of a hand mixer requires some additional steps to ensure thorough cleaning without damaging the internal components. Here’s a guide on how to clean the inside of a hand mixer:
- Unplug The Hand Mixer: Before starting the cleaning process, make sure the hand mixer is unplugged from the electrical outlet to ensure safety.
- Remove The Beaters Or Attachments: Detach the beaters or attachments from the hand mixer according to the manufacturer’s instructions. This will allow you better access to the inside of the hand mixer.
- Check For Any Food Or Debris: Inspect the inside of the hand mixer for any visible food particles or debris. Use a soft cloth or brush to gently remove any loose residue.
- Use A Small Brush Or Toothbrush:
- To clean hard-to-reach areas or crevices inside the hand mixer, use a small brush or toothbrush.
- Dip the brush in a mixture of warm water and mild dish soap, and gently scrub the interior surfaces.
- Be careful not to apply excessive force or damage any delicate components.
- Wipe With A Damp Cloth: Take a damp cloth or sponge and wipe the inside of the hand mixer thoroughly. Ensure that the cloth is only damp and not soaking wet to prevent water from entering the internal parts of the appliance.
- Dry The Inside Of The Hand Mixer: After cleaning, use a dry cloth or towel to wipe the inside of the hand mixer. It’s essential to ensure that no moisture remains inside the appliance to prevent damage. Let the hand mixer air dry completely before reassembling or using it again.
- Clean The Beaters Or Attachments Separately: Clean the beaters or attachments using the methods mentioned earlier in the article, such as soaking them in warm soapy water and rinsing thoroughly. Ensure they are completely dry before reattaching them to the hand mixer.
Also Read – How To Clean A Coffee Maker With Baking Soda, Vinegar, Dishsoap?
How To Remove Beaters From Hand Mixer?
Removing beaters from a hand mixer may vary slightly depending on the specific model and design. However, here are some general steps to remove beaters from a hand mixer:
- Ensure The Hand Mixer Is Unplugged: Before attempting to remove the beaters, make sure the hand mixer is unplugged from the electrical outlet for safety.
- Locate The Beater Release Button Or Lever: Examine the hand mixer to find the beater release button or lever. This is usually located near the handle or on the top or back of the hand mixer.
- Press The Beater Release Button Or Lever: Depending on the design, press the beater release button or slide the lever in the direction indicated (often marked with an arrow or a release icon). This action will disengage the beaters from the hand mixer.
- Pull The Beaters Out: Once the release mechanism is activated, gently pull the beaters straight out from the mixer body. They should easily slide out from their attachments.
- Clean Or Replace The Beaters:
- After removing the beaters, you can proceed to clean them following the recommended cleaning methods mentioned earlier in the article.
- If the beaters are damaged or worn out, this is also an opportunity to replace them with new ones, ensuring optimal performance.
- Reattach The Beaters (If Necessary):
- If you have finished cleaning or replacing the beaters and are ready to reattach them, align the beaters with the attachment points on the hand mixer.
- Push the beaters firmly into place until you hear or feel a click, indicating that they are securely attached.
When To Clean The Hand Mixer And Its Accessories?
Knowing when to clean your hand mixer and its accessories is important to maintain cleanliness and prevent the buildup of residue. Here are some guidelines on when to clean the hand mixer and its accessories:
- Immediately After Use:
- It is generally recommended to clean the hand mixer immediately after each use, especially if it becomes dirty or if any ingredients or batter stick to it.
- By cleaning it promptly, you prevent the residue from drying and becoming more difficult to remove later.
- Regularly For Routine Maintenance:
- Even if the hand mixer appears clean after use, it is still beneficial to clean it regularly as part of your routine maintenance.
- This helps to remove any invisible residue or oils that may have accumulated during the mixing process.
- Regular cleaning promotes hygiene and ensures that your hand mixer remains in optimal condition.
- When Accessories Are Visibly Dirty:
- The beaters or attachments used with the hand mixer should be cleaned when they are visibly dirty or have food particles stuck to them.
- Cleaning the accessories promptly prevents cross-contamination and ensures that they are ready for use in future recipes.
- For Specific Ingredients Or Allergens:
- If you have used the hand mixer to mix ingredients with strong odors, such as garlic or onions, or if you have prepared recipes with allergens like nuts or dairy, it is advisable to clean the hand mixer and its accessories thoroughly.
- This prevents any lingering odors or allergen traces from transferring to future recipes.
What To Do If The Dirt Gets Dried Out?
If the dirt on your hand mixer has dried out, there are a few steps you can take to effectively clean it. Here’s what you can do:
- Scrape Off Loose Dirt: Use a spatula or your fingernail to gently scrape off any loose or dried-on dirt from the surface of the hand mixer. Be careful not to apply excessive force that could damage the appliance.
- Soak In Warm Soapy Water:
- Fill a sink or a bowl with warm water and add a small amount of mild dish soap. Submerge the affected parts of the hand mixer, such as the beaters or any detachable accessories, in soapy water.
- Allow them to soak for a while to loosen the dried dirt.
- Scrub Gently: After soaking, use a soft brush or sponge to gently scrub the dried dirt. Apply gentle pressure and circular motions to remove the residue. Avoid using abrasive materials or harsh scrub brushes that could damage the surface of the hand mixer.
- Rinse Thoroughly: Once you have scrubbed away the dried dirt, rinse the hand mixer parts under running water to remove any remaining soap residue and dirt particles. Ensure that all the soap is rinsed away completely.
- Dry Completely:
- After cleaning, pat dry the hand mixer parts with a clean towel or allow them to air dry thoroughly.
- Make sure all the components are completely dry before reassembling or storing them.
- Moisture can cause damage or lead to the growth of mold or mildew.
If the dirt persists or if there are hard-to-reach areas with dried residue, you can try using a non-abrasive cleaning solution specifically designed for removing stubborn stains.
Follow the instructions on the cleaning product and use it following the manufacturer’s recommendations.
Safety Precautions
When it comes to cleaning your hand mixer, safety should always be a top priority. Follow these essential safety precautions to ensure a safe and hassle-free cleaning process:
- Unplug The Hand Mixer: Before you begin cleaning, always remember to unplug the hand mixer from the electrical outlet. This simple step prevents any risk of electric shock or accidental activation of the appliance while cleaning.
- Keep The Hand Mixer Away From Water Sources:
- It is crucial to keep your hand mixer away from water sources during the cleaning process.
- Water and electrical appliances do not mix well and can pose serious safety hazards.
- Avoid placing the hand mixer near sinks, faucets, or other sources of water to minimize the risk of water contact.
- Never Immerse The Hand Mixer Completely In Water:
- Submerging the hand mixer completely in water is a common mistake that should be avoided.
- Hand mixers are not designed to be fully immersed, and water entering the internal components can damage the motor and other electrical parts.
- Only detachable attachments, such as beaters, should be immersed in water if recommended by the manufacturer.
- Use A Damp Cloth Instead Of Spraying Water:
- Instead of spraying water directly onto the hand mixer, use a damp cloth for cleaning.
- Moisten a cloth with water and wring it out, ensuring it is damp but not dripping wet. Gently wipe the surfaces of the hand mixer to remove any residue or stains.
- This method prevents excess moisture from entering the appliance and reduces the risk of motor damage.
- Avoid Sharp Objects Or Abrasive Materials:
- Do not use sharp objects, such as knives or metal utensils, to clean the hand mixer. These can damage the coating or surface of the appliance, compromising its functionality and safety.
- Likewise, avoid using abrasive materials that can cause scratches or remove protective finishes.
- Stick to non-abrasive sponges, soft cloths, or brushes designed for kitchen appliance cleaning.
Final Verdict
So, cleaning a hand mixer is a necessary step to maintain cleanliness, prevent cross-contamination, and ensure optimal performance. By following the recommended steps and precautions outlined in this guide, you can effectively clean your hand mixer without risking damage to its motor or components.
Regular cleaning, immediate attention to dirt or residue, and proper storage will not only promote hygiene but also extend the lifespan of your hand mixer, making it a reliable and efficient kitchen tool for years to come.
With a little effort and care, you can keep your hand mixer in top condition and enjoy its reliable performance in your culinary adventures.
FAQs
-
Can I Submerge The Entire Hand Mixer In Water For Cleaning?
No, you should never submerge the entire hand mixer in water as it can damage the motor and other electrical components. Instead, use a damp cloth to clean the exterior and detachable parts.
-
Can I Clean The Beaters In The Dishwasher?
It depends on the manufacturer’s instructions. Some beaters are dishwasher-safe, while others may require hand washing. Refer to the user manual or product labeling for specific cleaning recommendations.
-
How Often Should I Clean My Hand Mixer?
It is recommended to clean your hand mixer after each use, especially if it becomes dirty or if ingredients stick to it. Regular cleaning helps maintain hygiene and prevents residue buildup.
-
What Should I Do If Water Accidentally Gets Inside The Hand Mixer?
If water accidentally gets inside the hand mixer, unplug it immediately and allow it to dry thoroughly before using it again. Do not attempt to turn it on or test its functionality until it is completely dry.
-
Can I Use Abrasive Cleaners Or Scouring Pads To Clean My Hand Mixer?
No, abrasive cleaners and scouring pads can damage the surface of the hand mixer. It is best to use non-abrasive cleaning solutions and soft brushes or sponges for gentle cleaning.
Katrina Smith is a seasoned expert with over 25 years of experience in all things related to cooking and the kitchen. As an avid cook and kitchen enthusiast, she is passionate about sharing her knowledge and expertise on cookware, kitchen appliances, kitchen tips, and kitchen staples.
Through her articles and reviews, Katrina aims to inspire and help others improve their cooking skills, experiment with different ingredients, and invest in quality cookware and appliances.



![Best Lubricants For Oven Racks [For Easy Cleaning] 5 Best Lubricants For Oven Racks](https://www.kitchensity.com/wp-content/uploads/2022/10/Best-Lubricants-For-Oven-Racks.jpg)


![5 Best Hand Mixer For Mashed Potatoes [Ultimate Guide] 8 Best Hand Mixer For Mashed Potatoes](https://www.kitchensity.com/wp-content/uploads/2020/07/Best-Hand-Mixer-For-Mashed-Potatoes.jpg)